I know it’s just a Hallmark holiday, one of those occasions created by big-box stores to cash in on our gullibility, but I love Valentine’s Day, regardless. I don’t think it’s ever a bad time to show someone that you love them, but an official holiday makes a great excuse to do so.
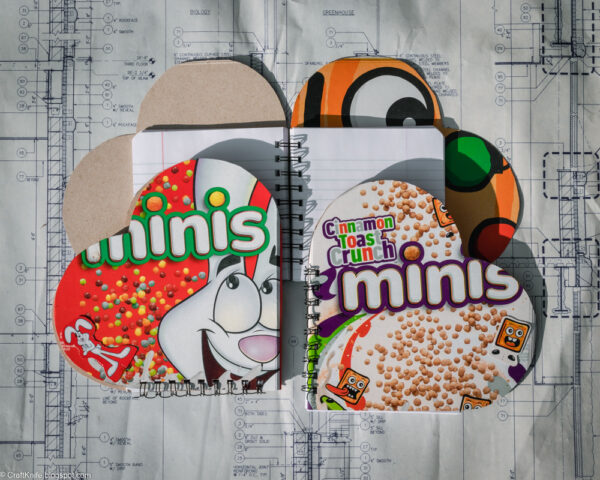
Handmade gifts are, of course, the best gifts, and Valentine’s Day is one more excuse for me to make something special for my loved ones. This Valentine’s Day, I’m giving my teenagers each this little gift created with their two favorite things in mind: sugar cereal and tiny notebooks!
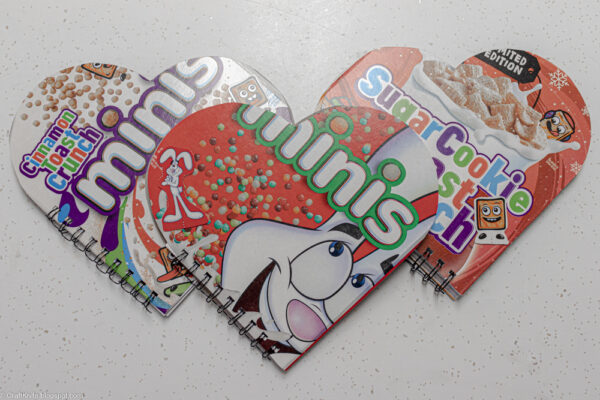
Here’s how to make your own tiny heart-shaped notebooks with cereal box covers and upcycled papers!
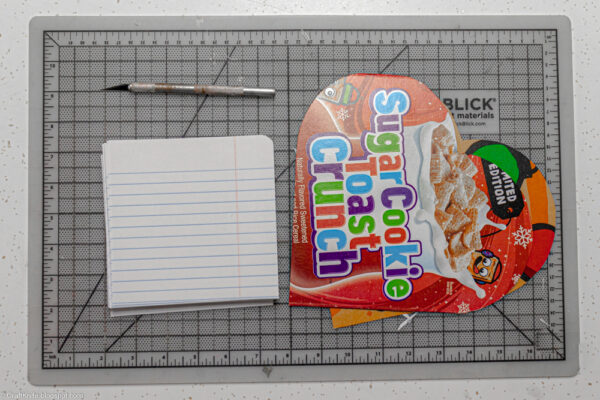
You will need:
- upcycled cardboard. Cardboard food packaging works well for these smaller notebooks, but feel free to experiment with other types of cardboard. Corrugated cardboard, upcycled composition book covers, and candy box lids would also work! Or go rogue and use wood veneer or paneling instead.
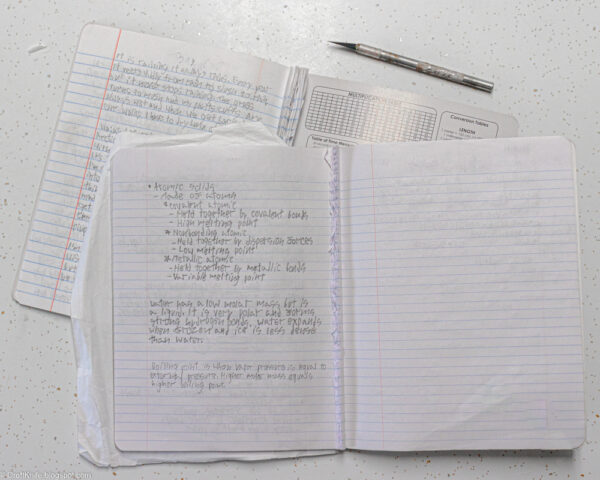
- upcycled papers. For years now, my kids and I have been in a stand-off regarding their old school notebooks. I don’t see why they can’t simply use a notebook until all its pages are filled, and they don’t see why they can’t have new notebooks every year. I buy them their new notebooks, but I save the old ones, and I upcycle the pages whenever possible. Here, I’m upcycling the blank pages from three of their old composition books. And not gonna lie–I’m feeling wickedly triumphant about passing those unloved pages back to those kids, who will never know of my deception. Mwa-ha-ha! Scrapbook paper, typing paper, or kraft paper would also work to fill these notebooks.
- bookbinding materials. You’ve got tons of options for binding these mini notebooks. You could stitch them, hole punch them and thread an old notebook spiral through them, or glue them. To bind these notebooks, I’m using my decade-old Zutter Bind-It-All and scrap binding wires cut from previous projects.
- measuring and cutting tools. I needed scissors, a ruler, a self-healing cutting mat, a craft knife, and a guillotine paper cutter. However, you could do this entire project with just a ruler and a pair of scissors.
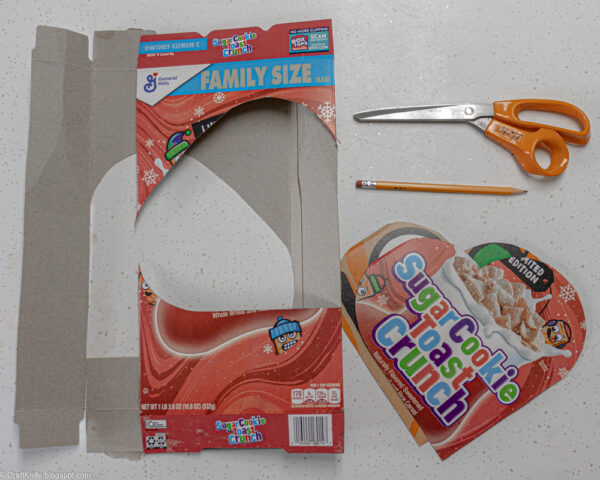
Step 1: Cut heart-shaped covers from the cardboard cereal boxes.

I don’t always buy sugar cereal, but my kids know that I am a sucker for limited edition novelty foods, and they can generally convince me to buy the latest name-brand gimmick. Then the kids get the sugary treat and *I* get the colorful packaging!
Use a heart template or freehand two matching hearts, then cut. You want your heart to have a 90-degree angle at the bottom corner, and straight sides all the way up to where the top curve begins. That’s a pretty basic heart, so you shouldn’t have much trouble finding a template online, but be careful about the lines and angles if you’re freehanding it.
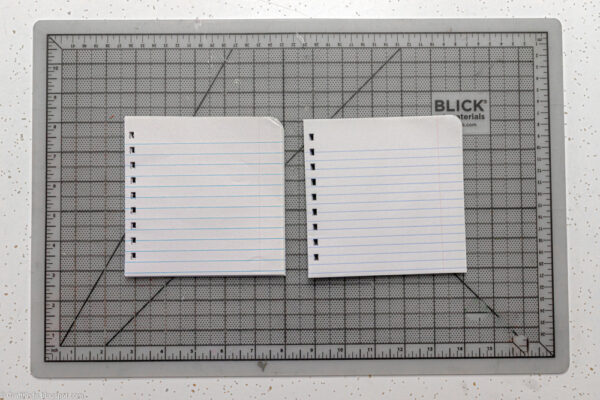
Step 2: Measure and cut the upcycled paper interior pages.
I used a craft knife to cut the blank pages from these composition books, because I’m a sentimental hoarder and I want to keep the book with its filled pages intact. I love my kids’ little doodles and notes! If you don’t want to preserve the book, though, just rip them on out. Upcycled composition book covers would actually work great as the book covers for this project, too!
Measure the cardboard heart notebook covers to see how to size the interior pages. A wide, transparent quilt ruler works really well for this. Your interior pages should be square, with each side equalling the distance from the center of the heart to the edge at the point parallel to that edge’s adjacent size. See below for the visual:
The self-healing cutting mat helps you lay out the heart template in a way that makes measuring these dimensions easier.
Once you know the measurement for the interior pages, use a guillotine paper cutter to cut the pages in batches. Reserve the scraps for a future project, or do what I did and dig them into your raised garden beds.
Step 3: Bind the pages into a notebook.
Here’s how it looks to bind the notebook using a decade-old Zutter Bind-It-All. First, I punch the holes for the coils into the interior pages and the cardboard covers. Then, I use wire cutters to cut the coil to size.
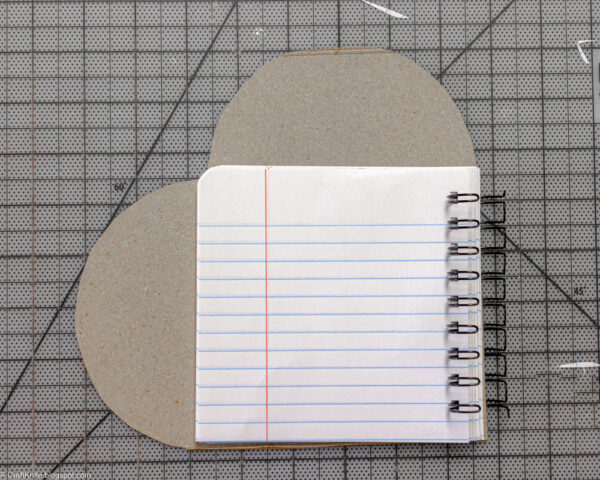
Thread the covers and pages onto the coil, then use the machine to press the coil closed.
My favorite thing about this heart-shaped notebook is how it looks when you open it.
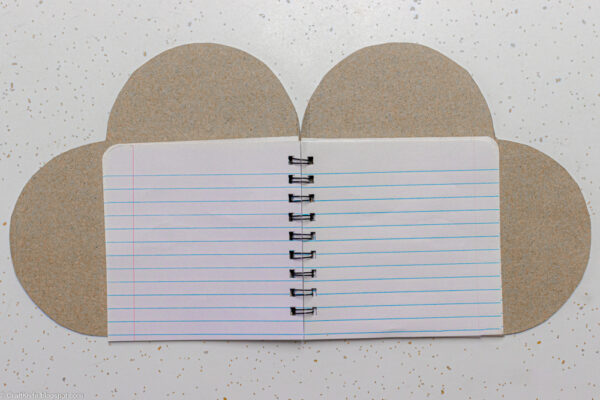
I love the way the pages line up so nicely with the heart template, and I love how the heart-shaped covers look so pleasingly symmetrical.
There are so many possibilities for embellishing these cute notebooks! I used double-sided tape to add some fussy-cut details from the cardboard boxes to the notebook covers, and you could do SO more more with scrapbooking or cardmaking supplies. A ribbon bookmark or pen holder would look cute. You could intersperse patterned papers with the notebook pages. You could even fill out this book yourself, putting photographs and love notes and meaningful ephemera on every page.
And Big Valentine didn’t have a thing to do with it!