

1. Calculate your ideal strap length. To do this, I had the kiddo put on the tank top, then I pulled up on the strap, pinching it in the middle, until the front and back of the tank top hit where I wanted them to, about the middle of the shoulder on this particular top; your particular measurement will depend on the cut of your own top. I measured the over-the-shoulder-distance from the front to the back of the top (7.25″), and added .5″ for a seam allowance.
2. Cut off the old straps. I cut just below the seams, to avoid sewing through extra bulk when I attach the new straps.
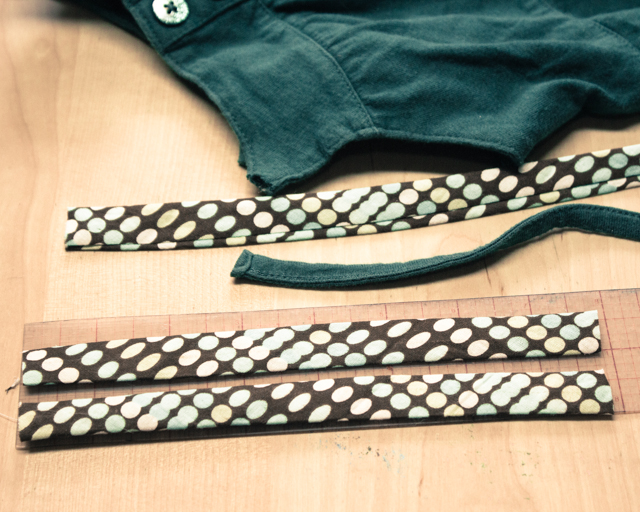
3. Choose the new straps. For the top’s new straps, I made bias tape out of a matching quilting cotton in my scraps bin. Other options include store-bought bias tape, sturdy ribbon, or even upcycled materials like belts or tote bag handles.
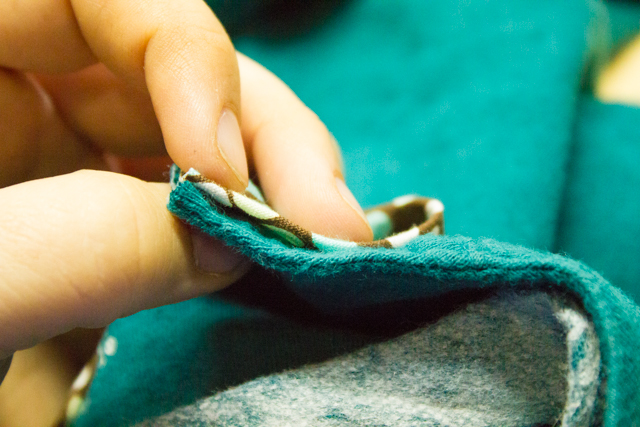
4. Sew on the new straps. Put the strap and the shirt right sides together, edges aligned, with the strap pointing down to the bottom hem of the shirt. Sew the strap to the shirt using a very sturdy stitch, then fold the strap back over itself so that it’s now pointing over the shoulder, and top stitch it down to the shirt front. Repeat for the other half of the strap, and then for the other strap.
The finished tank top should be just the right length, with no more droopy shoulder straps.
Is your tank top also too roomy in the torso? Here’s how to take it in!
Have a T-shirt but WANT a tank top? Here’s how to convert it!
Don’t like that particular T-shirt to tank top tutorial? Here’s another one!


Pingback: Tutorial: How to replace tank top straps · Sewing | CraftGossip.com