The best summer camp crafts utilize items found in nature and items easily bought or donated (or hey, just found in the back of your closet!). They make something cute or useful–no junk allowed!–and are adaptable for a variety of ages and skill levels.
These embroidery floss macrame pendants are a little more challenging than, say, my yarn tassel or Ojo de Dios summer camp crafts, but I think they’re suitable for older elementary kids on up. I love that you can use this simple macrame technique to make a pendant that will hold anything your heart desires, from a favorite rock to the prisms in these photos to a toy dinosaur. Size the floss down to make finer jewelry, or size up to cotton cording to make plant hangers.
Here’s how to make your next favorite craft!
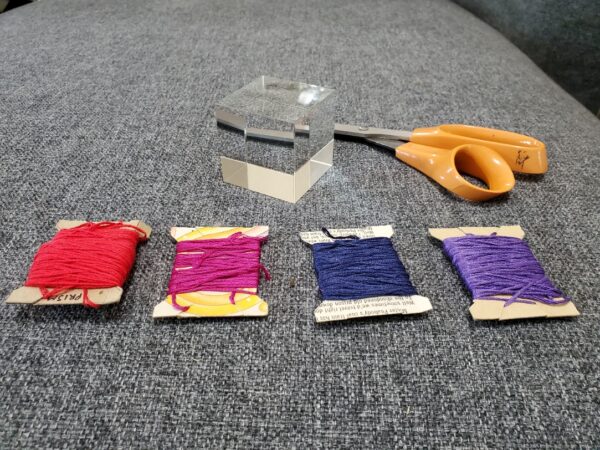
You will need:
- found object. Go with something fist-sized or smaller for a first try with embroidery floss. After that, get as creative as you like!
- embroidery floss. This is a great material for a summer camp craft because it’s so easy to obtain. Ask the community for any stash embroidery floss they might have kicking around, and don’t forget to dig through your own forgotten stash craft supplies!
- embellishments (optional). I don’t cover it in this tutorial, but anytime you’ve got embroidery floss, you can always throw a bead or two into the mix!
Step 1: Cut four strands of embroidery floss to size.
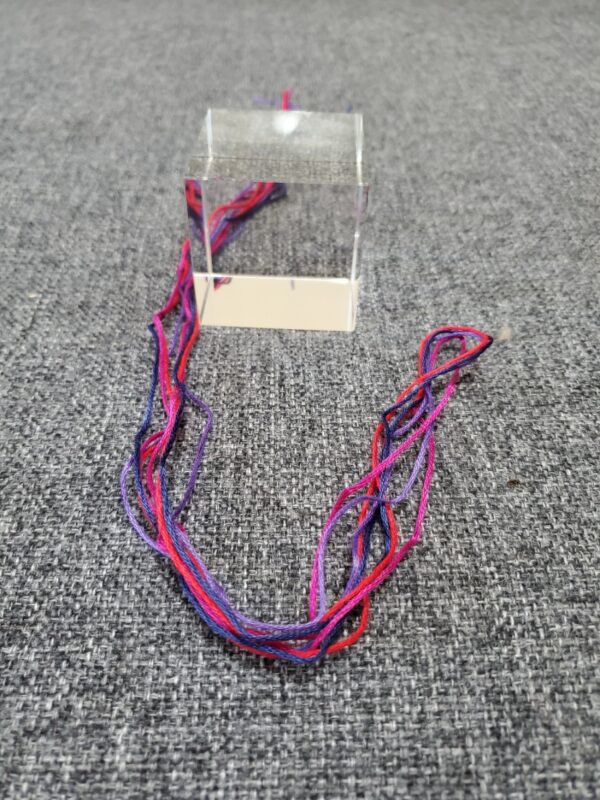
You’ll need four strands of embroidery floss to make this pendant. In most of these photos, I’m using four different colors so that you can see the knotwork better. I cut each strand about the length of my arm, and was left with plenty of extra floss to braid afterwards to make a hanger for each pendant.
Step 2: Tie the bottom loop.
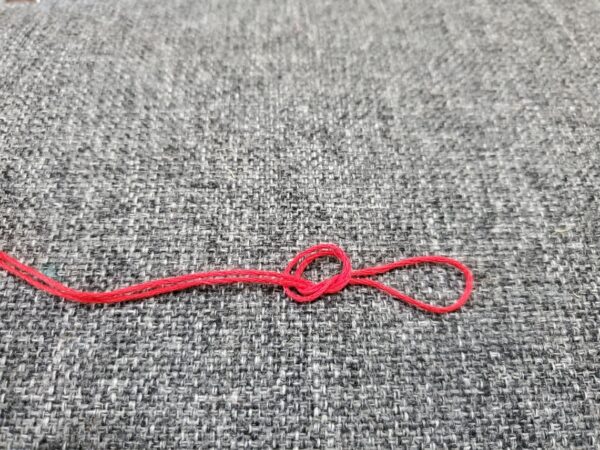
Choose one strand of floss to make the bottom loop of your macrame pendant. Fold the floss in half to double it.
Tie an overhand knot near the fold to create a loop. The bottom of your pendant will sit in this loop, so size it appropriately.
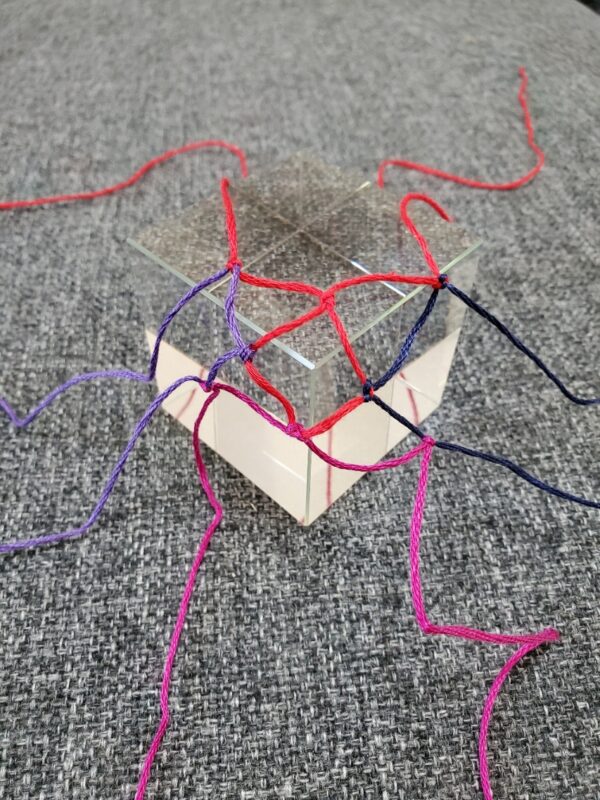
Step 3: Use girth hitch knots to attach the other three strands of floss.
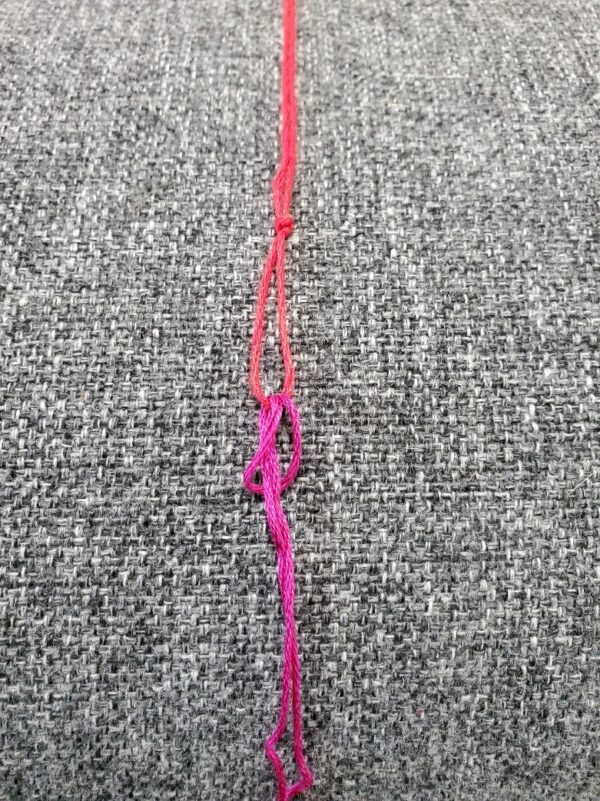
Fold a second strand of embroidery floss in half, then use the folded end to tie a girth hitch to the opposite side of the loop.
Tie the remaining two strands of floss evenly around the loop with girth hitches.
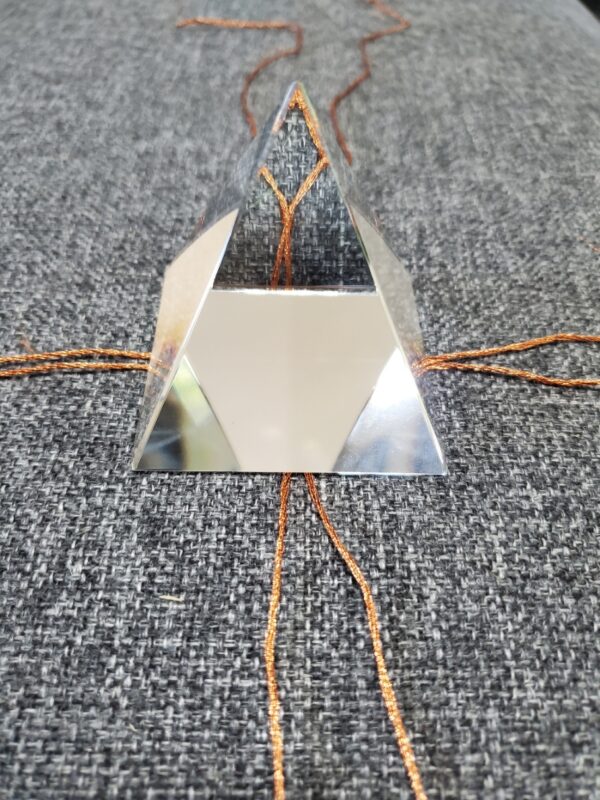
At this point, if you have a pendant that will sit neatly still and let you tie knots around it, as I do with the triangular prism above, you can add the pendant to your knotwork.
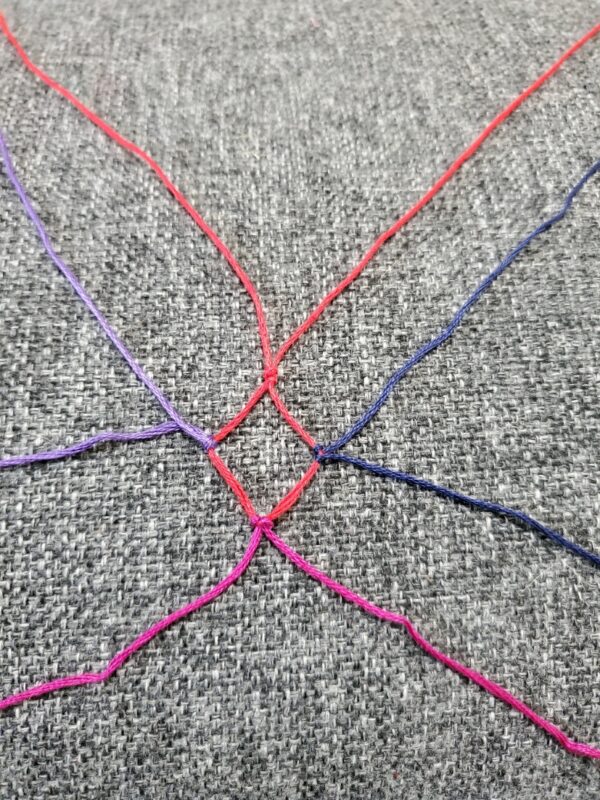
Step 4: Add to the knotwork using square knots.
Each girth hitch, plus the first overhand knot, results in two long tails of embroidery floss. Here’s where having four different colors of floss comes in handy, because now you want to use a square knot to tie one strand of floss to its adjacent buddy, and the other strand to its buddy on the other side.
Do this all the way around the loop, so that you have four more loops surrounding the center loop.
If you were able to place the pendant in the knotwork in the previous step, you can tie these square knots with the pendant still in place. This was a great way for me to lock down the corners of that triangular prism!
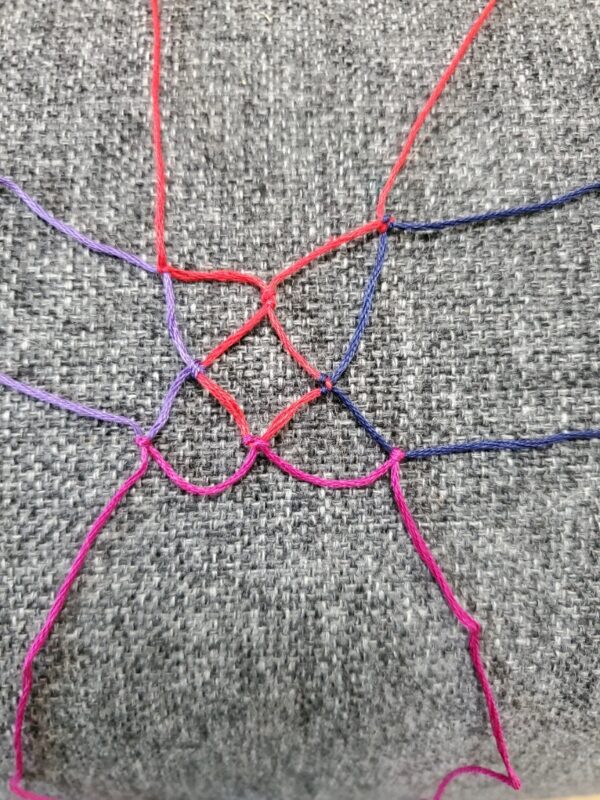
Add another round of loops by again tying each strand of embroidery floss to its adjacent buddy using a square knot. Continue in this fashion until you have a large enough net to hold your pendant.
Step 5: Place the pendant in the net.
Whenever you can, add the pendant to the net that you’re tying. This rectangular prism was super hard to add, so I ended up placing the net over the top of it–see that original red loop there at the corner in the above photo?
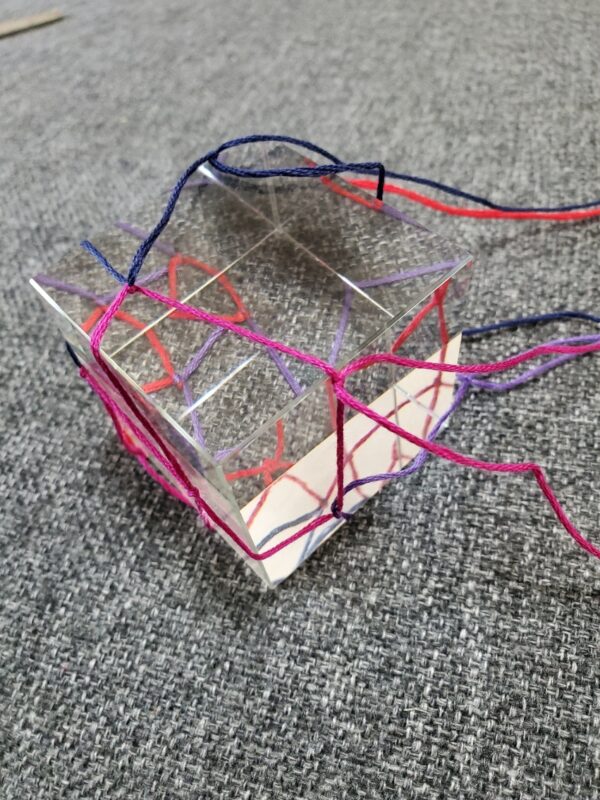
As soon as you can get the pendant installed, you can start tying your knots to rest against it, making the net custom-fitted to the pendant.
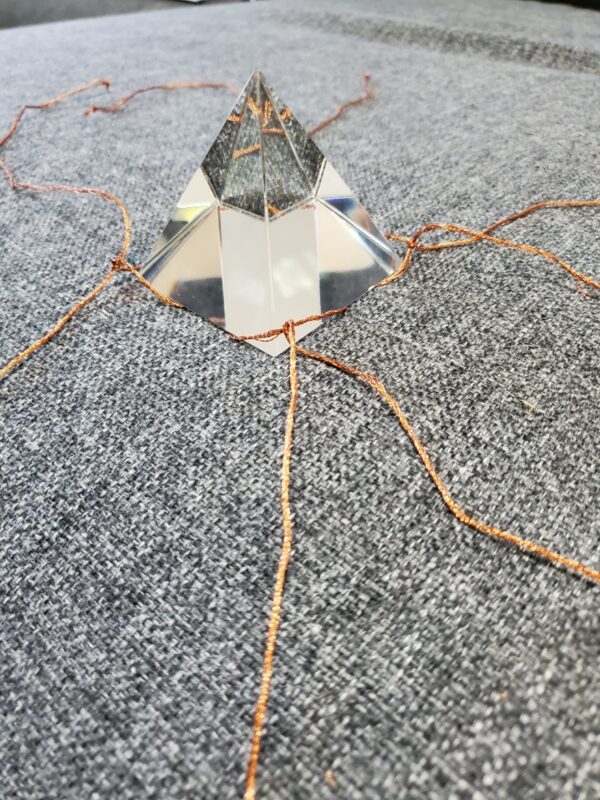
Step 6: Tie all the strands at the top of the pendant.

Tie square knots until all strands of floss meet at the top of the pendant. Tie all the strands together at the top with an overhand knot close to the pendant.
From here, you can finish off the floss tails however you like. I like to divvy up the eight strands into three sections, then braid them and tie a loop at the end for hanging. There are several more sophisticated macrame knots you could use, or you could add an o-ring and a chain. Beads and other embellishments are, of course, always a good option.
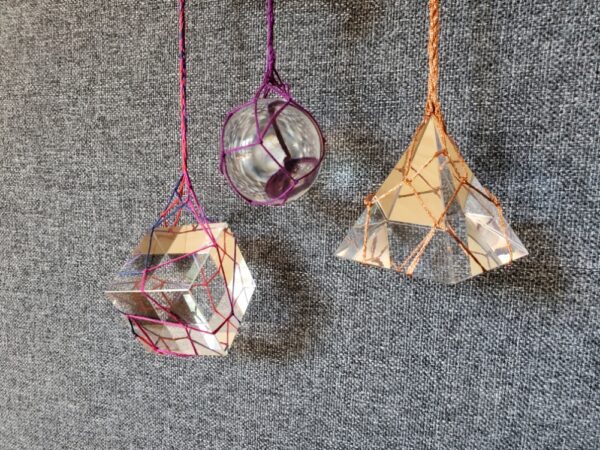
I like to hang these prism as suncatchers, but they can also be worn as necklaces or earrings, or used as the ends of pull chains.