
Skip the spendy sewing machine repair shop and replace your needle plate yourself. It’s easier than it looks!
My Singer Heavy-Duty 4411 sewing machine was sewing soooo poorly! I couldn’t get the tension correct and it was skipping stitches, breaking thread, and otherwise misbehaving itself quite badly.
Of course, I tried rethreading the top thread. Then I tried taking the bobbin out and putting it back in. I changed needles. I tested every possible thread tension. I was just about at my wit’s end, unhappily contemplating having to take it to the local repair shop where 1) the employees are high-key mean to me, 2) it takes MONTHS to get my sewing machine so much as assessed, much less repaired, and 3) it costs sooooo much money to fix anything that I might as well buy another cheap sewing machine instead, grr.
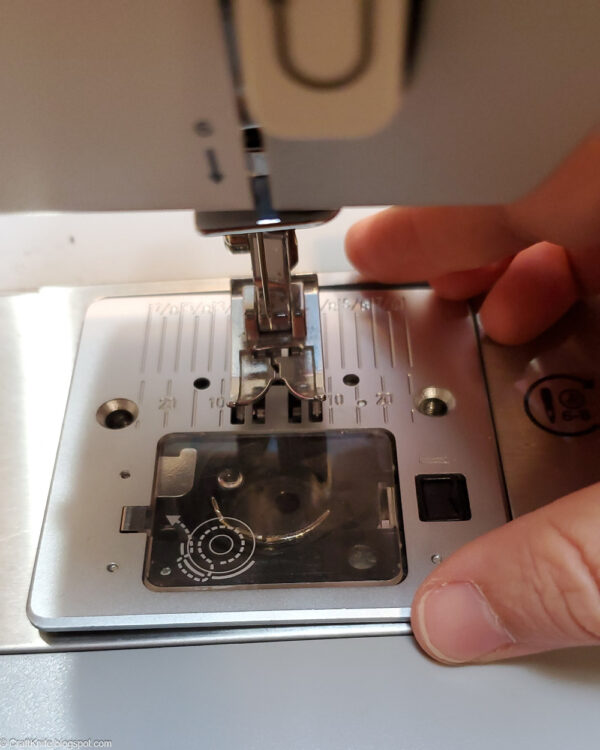
Eventually, though, it occurred to me to give my sewing machine my own little assessment first, and YIKES! Check out the image below and see if you can see what I found:
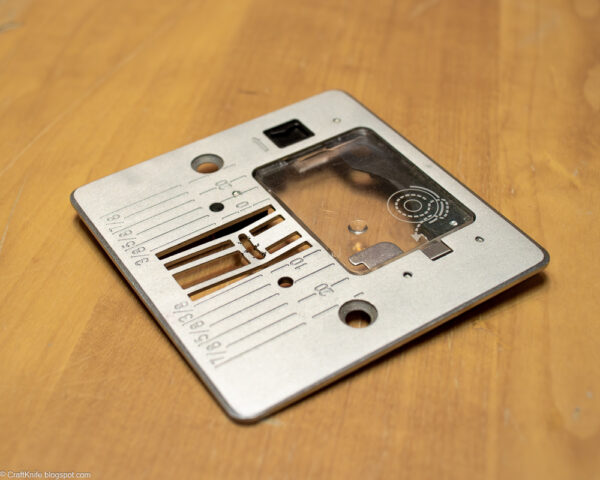
Not only are there a ton of nicks, which alone are enough to cause all of the issues I’d been experiencing, but, um… that needle plate is actually DENTED. How on earth did that happen?!?
Fortunately, replacing the needle plate is one of the easiest repairs you can do on a sewing machine. It’s barely harder than replacing the needle!
Supplies
To replace the needle plate on your sewing machine, here’s what you’ll need:
- replacement needle plate. Your local sewing machine shop should have this or be able to order it, or you can search it out yourself–just make sure it’s compatible with your machine’s make and model. Needle plates are often compatible with multiple models, as you can see in the listing for the needle plate I bought, which mentions that it’s compatible with four different models.
- small flathead and Phillips screwdrivers. For the flathead, I could use the flathead screwdriver tool that came with my sewing machine and is otherwise used to change the needle. For the Phillips, I had to dig out my eyeglasses repair kit and use one if its tiny screwdrivers. If you don’t have a similar kit on hand, you can find short Phillips screwdrivers at any hardware store.
Step 1: Remove the old needle plate.
Unscrew AND DO NOT LOSE the screws holding the needle plate to the machine, then remove the needle plate.
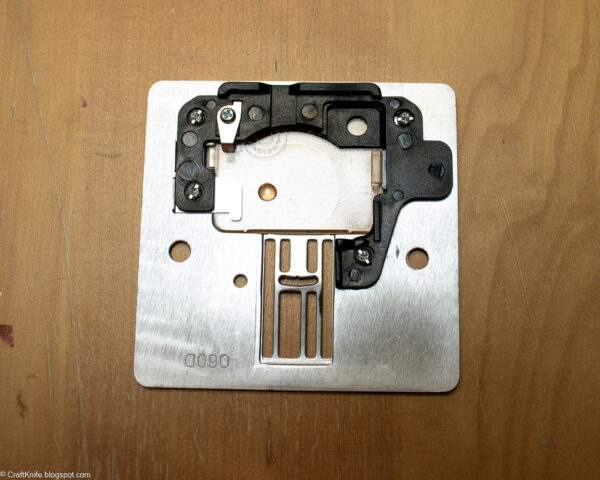
Visually inspect the old needle plate to assess the condition of all the little pieces that attach to it on the underside. You can buy two versions of a new needle plate, one with all the little pieces already attached and one without any of the little pieces. Buying the needle plate alone, without any of the little pieces attached, is half the price of buying it with everything attached and ready to go, but you only want to do that if all the pieces on your old needle plate are in good condition and able to be transferred.
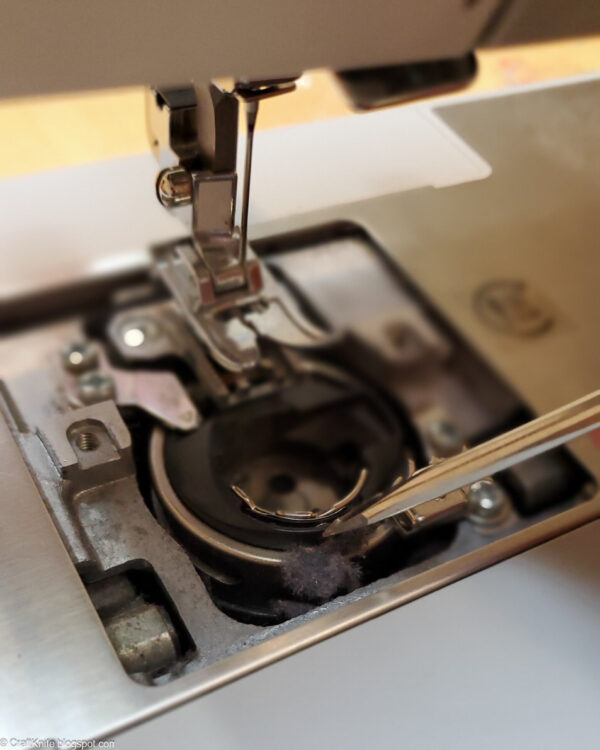
While you’ve got the needle plate off, take a few minutes to brush off or pick out all of the lint that’s accumulated underneath the sewing machine, because all that lint certainly doesn’t help your sewing machine function better!
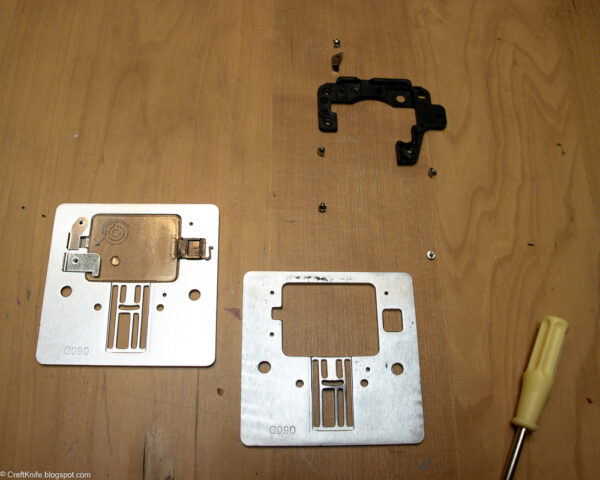
Step 2: Transfer the accessory pieces from the old needle plate to the new needle plate.
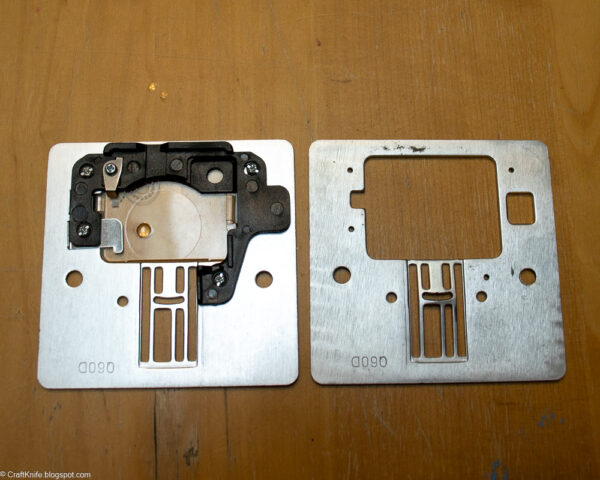
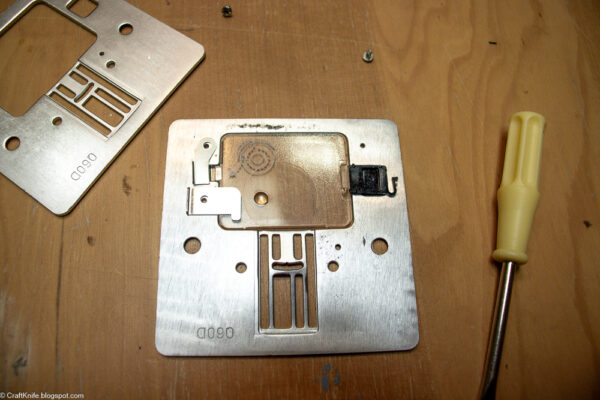
Before you get started, do yourself a favor and snap a photo of the back of the needle plate with all of the pieces still attached. I referred to this photo about a thousand times while I transferred the pieces to the new needle plate!
Unscrew the attachment pieces layer by layer, setting them and their screws safely aside. Then, screw them onto the new needle plate in reverse order, using the same screws and applying the same tension on the screws.
Don’t be afraid to refer to the photo that you took as often as you need to. The pieces aren’t symmetrical, and I kept getting confused about which way each piece should face. Thank goodness I had photographic evidence!
Step 3: Screw the new needle plate onto the sewing machine.
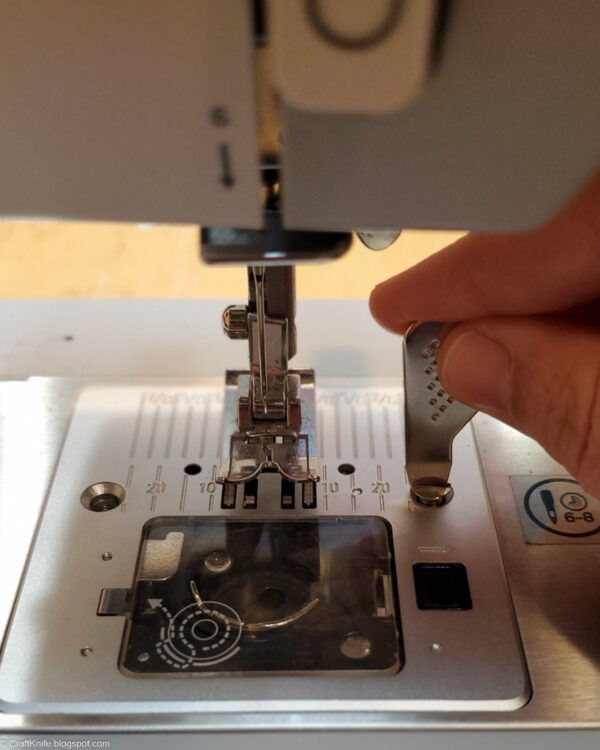
Set the new needle plate into position, then screw it into place using those original screws. Because they’re flathead, I got to use the little flathead screwdriver tool that came with my machine. It’s adorable!
I had my heart in my throat a little bit testing out my machine with its new needle plate, but huzzah, for now it sews perfectly! It is SUCH a nice feeling to see that line of perfectly even stitches, with no skips, no snags, and no breakage.
My new goal is never to break that throat plate again. I mean, my next project is only sewing my teenager a pair of suit pants using our old outdoor trampoline as the fabric, so I can’t imagine how that could possibly put anymore dings or dents in a needle plate, ahem.


