You’ve got to paint a few coats of sealant on your picnic table, anyway, if you want it to last outdoors–you might as well paint something interesting onto it first!
You can do this project on a picnic table of any age. If your picnic table is old and care-worn, replace any rotten wood and sand the other surfaces down to clean boards, first. If your picnic table is brand-new, you can paint right onto the unfinished wood.
Supplies & Tools
Either way, you’ll need the following supplies:
- Water-based outdoor primer.
- Water-based outdoor paint. Avoid oil-based paint, which generally has more VOCs than water-based paint, and requires paint thinner to clean up. You can use any water-based outdoor paint, and look for the smaller, approximately 200 mL “sample” containers to avoid waste. For this project, I bought 200 ml containers of Dutch Boy Maxbond Exterior in satin. There’s just enough paint to refinish my two picnic tables, one old and one new, and freshen up the work on the deck chairs that I refinished here on CAGW four years ago.
- Paintbrushes. I used large paintbrushes for the primer and the sealant, and a selection of small artist’s brushes to paint the colorful details onto my picnic table.
- Measuring and marking tools. These might include a pencil, meter sticks or rulers, and masking tape.
- Polyurethane sealant. Buy water-based polyurethane sealant to make this project more eco-friendly. I used to be reluctant to use polyurethane sealant altogether because of its environmental footprint, but watching my deck furniture rot and need to be replaced after just a couple of seasons of Midwestern weather taught me that it’s better to do what it takes to make things last. If you know of a better alternative, do me a favor and let me know in the Comments below!
Directions
1. Prime the picnic table.
You only need to prime the area that you’ll be working on, as you can otherwise seal the bare wood of the underside of the picnic table and benches. I used white primer, but I’d actually recommend avoiding white unless you really want that specific color in the background of your design, or you plan to completely cover the white with another color. Even after several coats of sealant, white quickly looks dirty, and that happens all the more quickly outside. If I had this project to do again, I’d have instead started with a slate grey or blue for the picnic table’s top.
2. Sketch out the design.
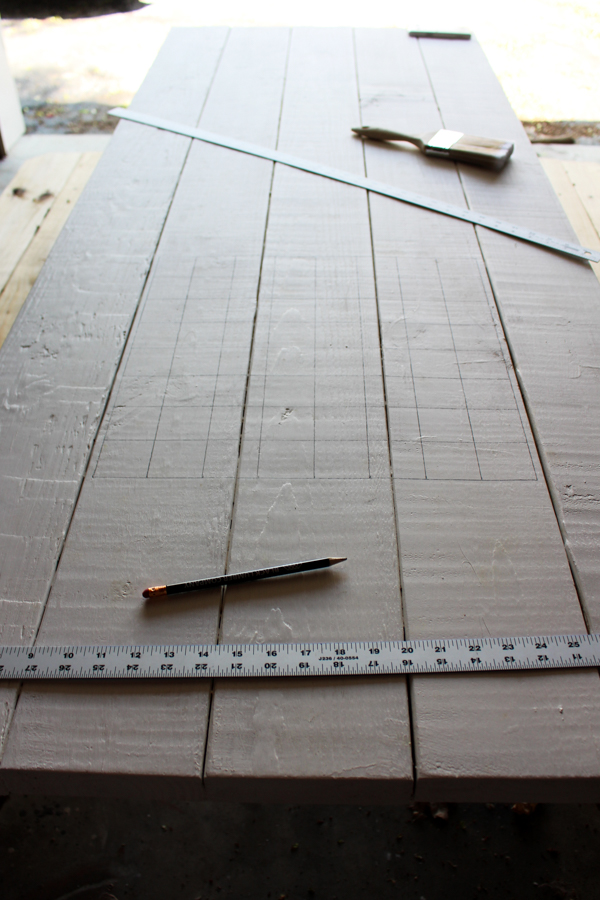
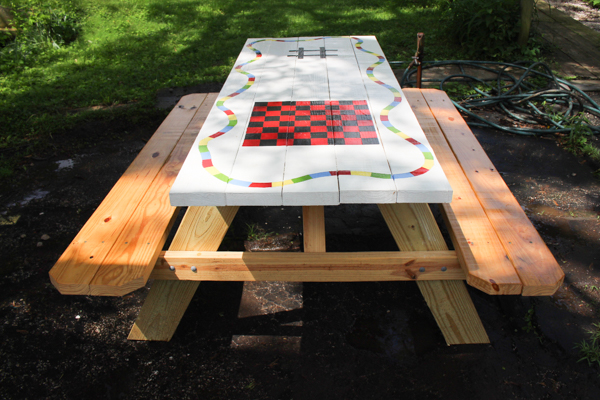
You can draw your design with a pencil directly onto the primed surface of the picnic table. I wanted this picnic table to have a chessboard, tic tac toe board, and colorful board game path painted onto it, so I first sketched them all in with pencil.
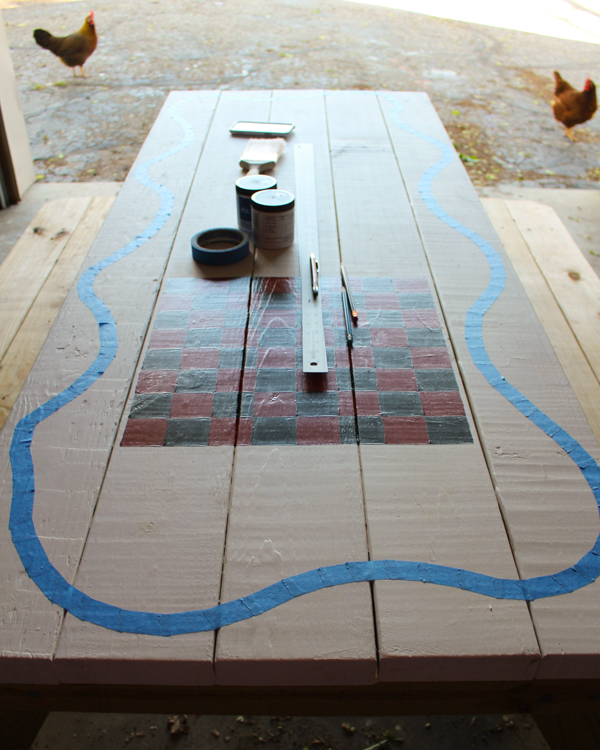
For the chessboard, I used two-meter sticks to measure out a 16×16″ square, centered between the two picnic benches, and then I divided the square into an 8×8″ array.
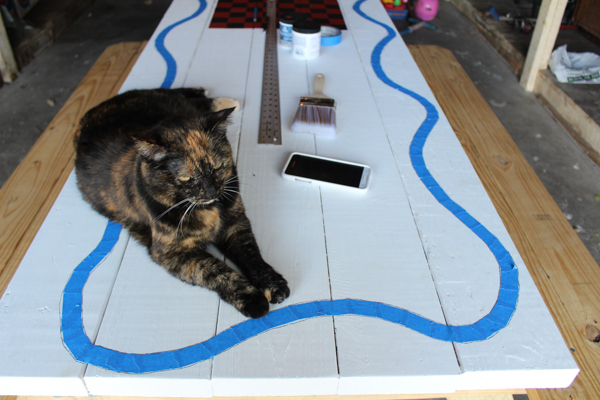
For the board game path, I used masking tape to lay a curving path around the perimeter of the picnic table. Masking tape can even be used to make smooth curves if you tear off and layer short pieces.
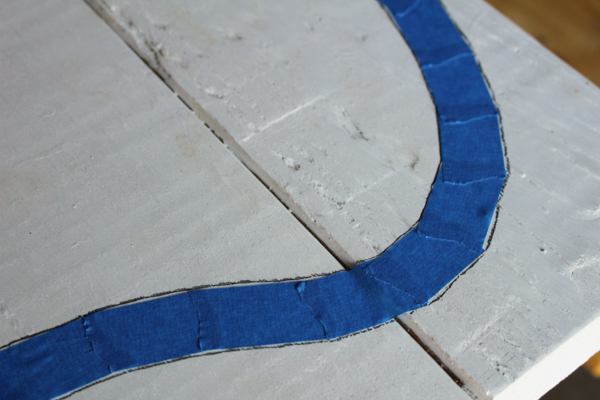
I traced the path in pencil, tore off all of the tape, and then divided the path into 2″ steps.
I also used masking tape to lay out the tic tac toe board, then traced around it in pencil and tore off the tape.
3. Paint the picnic table.
This part of the process takes the longest, because you must wait for a color to dry before you can begin painting an adjacent color, and each color might require 2-3 coats before it looks saturated.
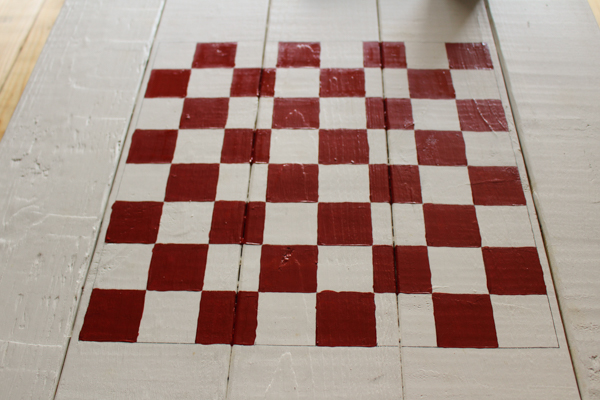
After the entire picnic table is painted, you can paint on the polyurethane sealant. This also takes a while, since there are several coats to add, and it can take up to a week for the last coat of sealant to fully cure for use.
But the time-intensive process is well worth it when you see the beautiful result!
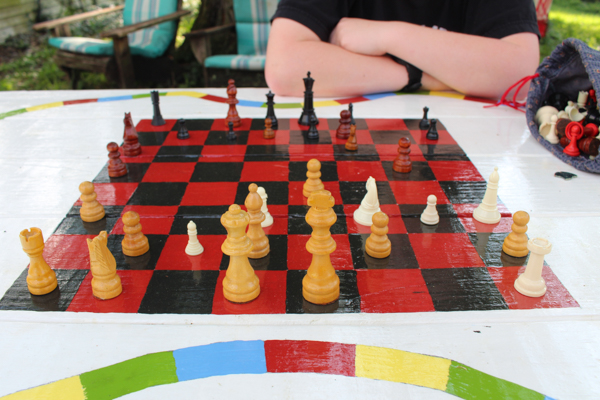
The well-sealed surface of our picnic table ensures that we can use it as-is for all of our other outdoor projects and fun, but there’s nothing like sitting down to a quick game of tic tac toe using twigs and leaves while we’re waiting for one last person to finish getting ready before we all hop in the car, or grabbing the bag of mismatched chess pieces for one game of chess that turns into eight games on a lovely spring evening.
That’s a lot of multi-purpose fun from just a few colors of paint!




What kind of paint did you use on the bright details of the table?
It’s house paint! A friend who’s a mural artist tipped me off about the little sample jars of house paint that many hardware stores sell. You can get them mixed in any color, and they’re already configured for indoor or outdoor or whatever you need.