
Turn an old piece of wood furniture new again with this cool image transfer to furniture technique.
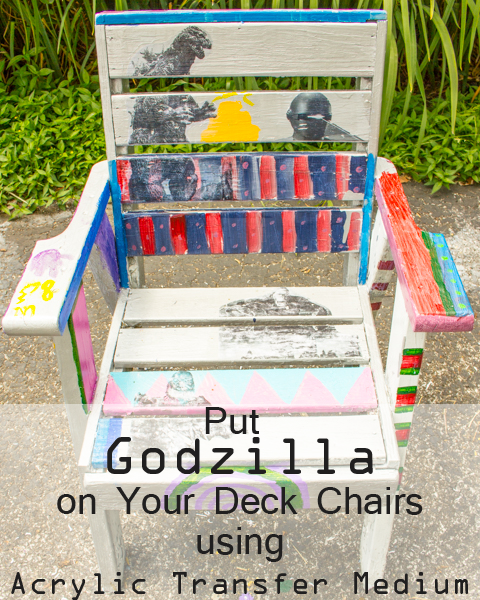
Even if you do not have the artistic skills of a professional painter (as I do NOT!), you can still put some pretty baller graphics on your pieces.
I, for instance, had the dream of a deck chair with a black and white movie monster theme. Can I draw Gort, King Kong, the Creature from the Black Lagoon, and, my personal favorite, Godzilla?
No, my friends, I cannot. I can draw a cartoon cat. That’s it. If you want a cartoon cat drawn on something, then come to me first. Anything else? I’m not your gal.
Instead, I use a magical material called acrylic gel medium to transfer any image that I want to anything else that I want. That thing should be somewhat porous, so think wood or canvas rather than glass or metal, but otherwise, the sky is the limit.
To transfer images of Godzilla and King Kong to your own deck chairs, you will need the following supplies:
acrylic gel medium. I use Liquitex Matte Gel Medium, which goes on opaque, so that I can see what I’m doing, and dries clear, although you’ll need to be mindful, because you WILL be able to see brush strokes in it. I like the fact that this particular gel medium dries clear, as you can then see the chair’s original paint color through the uninked parts of my image. It is possible, however, to buy acrylic gel medium that is white even when dry, and that tends to be a better choice for color images.
laser printed image on plain copy paper. Can you use an ink jet printer? No. Can you use a laser printer? Yes. Can you use a photocopy? Yes. Can you use photo paper? No.
clear varnish. I have a can of clear polyurethane varnish that I use for everything, and I have not tried anything else. If you want to try something else, experiment first.
paint brush, water, soft cloth. These are general supplies that you definitely have kicking around somewhere.
And here’s what you do!
1. Print and cut out your image. Remember, Friends–laser printed, NOT ink jet. Copy paper, NOT photo paper.
Cut around the image, knowing that anything that you leave on your cut-out will show on the furniture. For instance, since my images are all black-and-white movie stills, none of their backgrounds are plain white. I could have spent ages fussy cutting around just King-Kong or Gort to avoid having that background around them, but dang. It’s just a deck chair that I let my kids crazy paint first. No need to go all Martha Stewart on it.
NOTE: If you have anything in your image that MUST go the correct way–words, for example, or a person holding something in their dominant hand–then you MUST print that image in reverse.
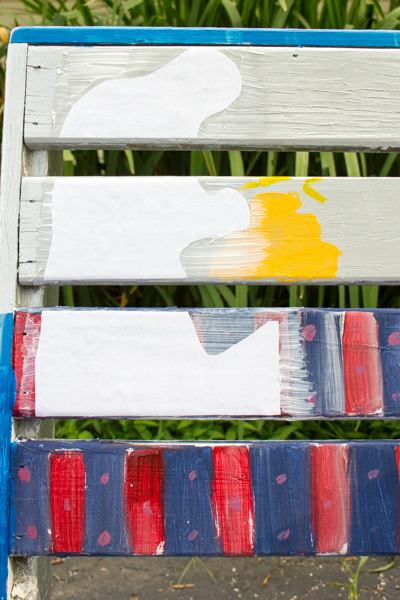
2. Apply acrylic gel medium to the surface of the piece. Paint the acrylic gel medium on a little on the thick side–keep in mind that when you apply the image, you’ll want it to sit on this acrylic gel medium and get saturated. Since this particular brand that I’m using goes on opaque, I make sure that the entire area that I’ve brushed it on is opaque–if there’s a translucent spot, then that spot doesn’t have enough medium.
3. Press the image face down onto the acrylic gel medium. Gently tap out bubbles with your finger, but don’t press down on the image so firmly that you squish the acrylic gel medium out from under it.
Take special care with the image’s edges, as these usually need to be tapped down as well. Gently, with your finger, also smooth over the entire image, just to make sure that it’s completely adhered. Don’t squish!
Use a damp cloth to wipe away the excess acrylic gel medium from around the paper.
My brand of acrylic gel medium doesn’t specify a drying/curing time, so I give it 24 hours to set before the next step.
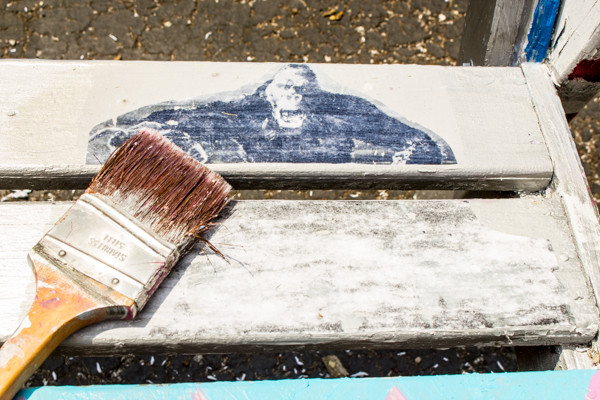
 4. Rub the paper backing off of the image using a damp cloth. Oh, my gosh, this step is tricky, so don’t make your first project of this kind something that you’re going to freak out about if you mess it up. I know what I’m doing, and I still messed up at least one spot on every single movie monster image. Just remember that your mess-ups give your piece character.
Take a damp cloth, or a wet finger, and gently rub away at the image’s paper backing. The wet paper will come off in little pills and rolls as you rub, and you’ll be able to see your image. Now here’s the tricky part:
- If you rub too hard, the ink WILL come off.
- If you rub too gently, paper will stay on the back and you won’t be able to see your image.
To complicate this, right now you can really only see your image when it’s damp. Even when you’ve done a good job rubbing off just the right amount of paper, when it dries, you’ll really only be able to see paper fuzz, and the fuzzy image below. If you haven’t rubbed off enough paper, you won’t be able to tell until you varnish it. That’s why I prefer to use my finger rather than a cloth. If you use your finger and pay attention, you can see the paper rubbing away, feel the slightest change in texture, and see the second that you start to rub away too much, so you can stop before it’s noticeable.
5. Let the image dry. This step doesn’t need to take more than a few minutes–just remember that you don’t want to varnish your image while it’s still damp.
Once the image is dry, take a clean, soft paintbrush and sweep away any last remaining paper pills or bits of fuzz.
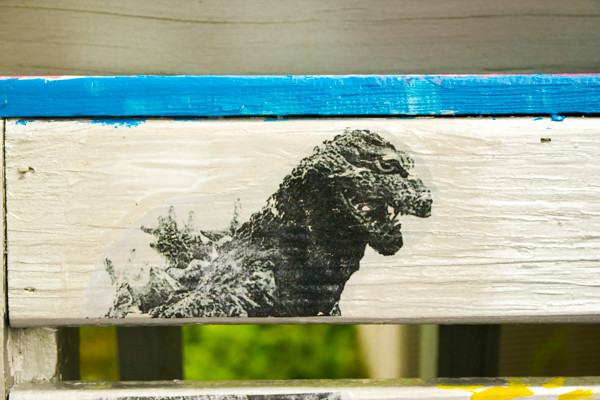
6. Varnish your piece. I varnish my entire piece in this step, but I give several extra coats to the transferred images.
Gently brush on a very thin layer of polyurethane varnish, and do it slowly. You’ll see the image absorb the varnish, and as it does, it will magically reappear, looking as nice as it did when it was wet. Make sure that there’s a layer of varnish completely saturated into the image before you let it dry, then brush on several more coats.
This method works for both outdoor and indoor furniture. Slightly modified, it makes photo art that looks just as clear as a photograph itself.
And you don’t have to be able to draw anything, not even a cartoon cat, to do it!


