

 Ditch plastic Easter eggs entirely! These papier mache Easter eggs are just as fun to hide and find, and they have just as much room for treats inside.
The bonus to papier mache Easter eggs over plastic eggs, however, is that they’re made from recycled materials, not petroleum by-products. They’re handmade, kid-painted, and can be used for years. What’s not to love?
Read on for the tutorial:
To make these papier mache Easter eggs, you will need:
- newspaper: Tear it into narrow strips.
- glue: Use Mod Podge, watered down school glue, or the homemade natural flour/water paste that I use in our DIY pinatas.
- egg form: If you have any old plastic Easter eggs, you can use those. However, we use our wooden Easter eggs, wrapped in plastic wrap to keep the papier mache from sticking.
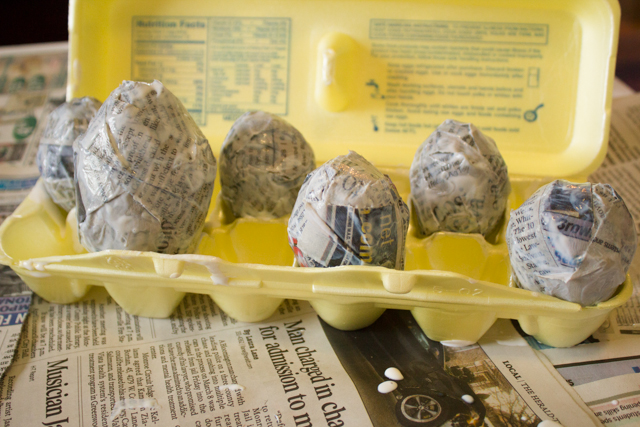
- drying rack: Use an old styrofoam (not cardboard!) egg carton if you have one. Otherwise, use a sheet of wax paper.
- paints: We use artist’s acrylic paints, but any types of acrylics or tempera will stick.
- box knife: If you want to be able to hide surprises inside, you’ll need to cut your egg open!
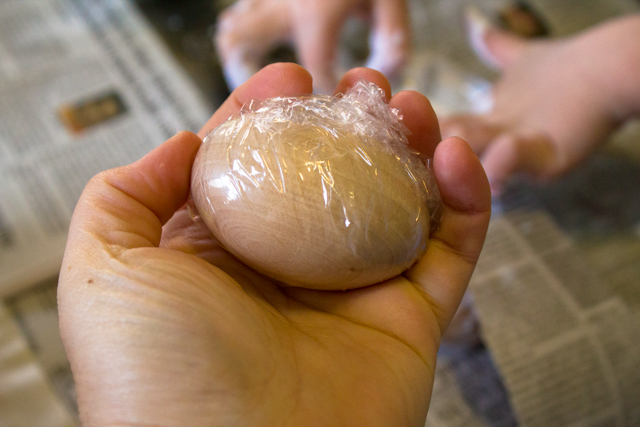
1. Prepare the egg form. If you’re using an old plastic Easter egg as an egg form, or anything made of glass or shiny plastic, you won’t need any additional preparations. However, if you’re using a wooden egg, as we are, or anything with a rough surface, then first wrap the egg form in clear plastic wrap. If you’d rather not use plastic wrap, which you’ll be able to peel out of the finished egg, look for something that you won’t mind later lining the interior of the papier mache egg–scrap fabric, perhaps?
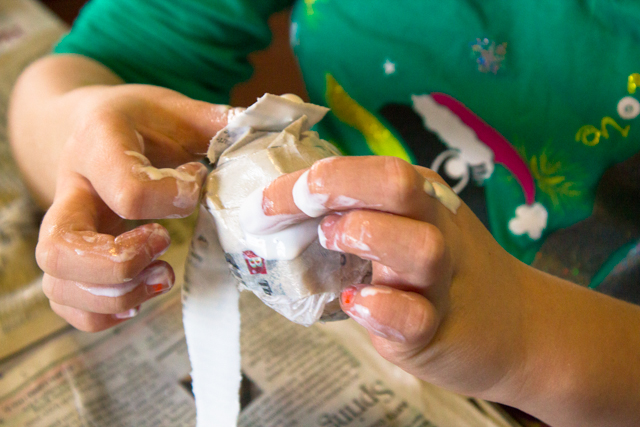 2. Add newspaper strips. Dip each strip in glue, then run your fingers down both sides of the strip to remove the excess. Wrap the newspaper strips around each egg form, overlapping the strips as needed, covering the egg form completely.
3. Let the glue dry, then repeat. My kiddos like to do the first layer of newspaper strips–they love a mess!–but their results aren’t always exactly egg-shaped. I like to wrap the eggs a second time myself; they need one more layer to be sturdy, and this gives me a chance to smooth out the bumps left by that first kid-made wrapping.
Next >> Finishing the Easter Egg
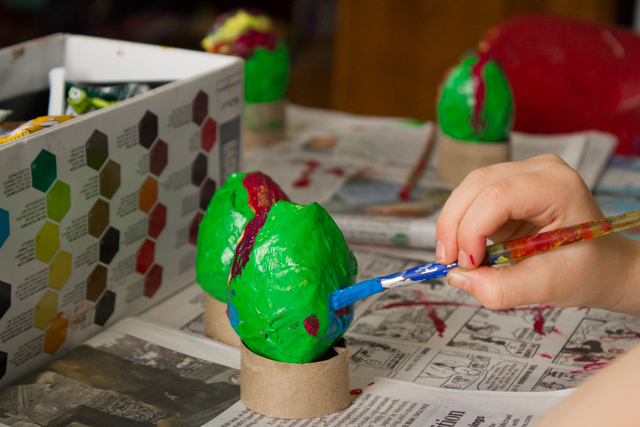
4. Let the glue dry, then paint. To make sure that the unattractive newspaper will be completely covered, no matter what we decide to paint, we first paint a base coat onto the papier mache Easter egg. We chose green for the base coat this year, just because we have a lot of it.
After the base coat is dry, I snip a toilet paper tube into shorter rings for the kids to use as egg stands, and then they paint away! If you’d rather not paint, you could decorate with stickers, decoupage, or add another layer of papier mache using decorative papers, such as tissue paper, foreign language newspapers, or vintage book pages.
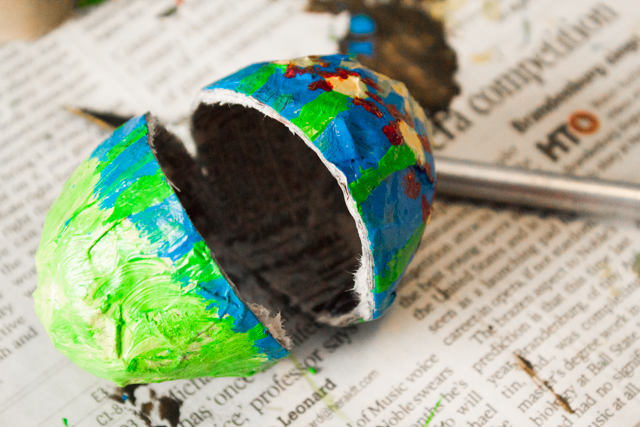
5. Slice it open! Let the paint dry completely, then take a sharp X-acto or box knife and slice through the middle of the egg, around approximately 90% of its circumference. Don’t cut all the way around it!
You’ll probably notice that there’s more wet glue on the inside of the egg; let the entire egg rest until it’s completely dry, inside and out.
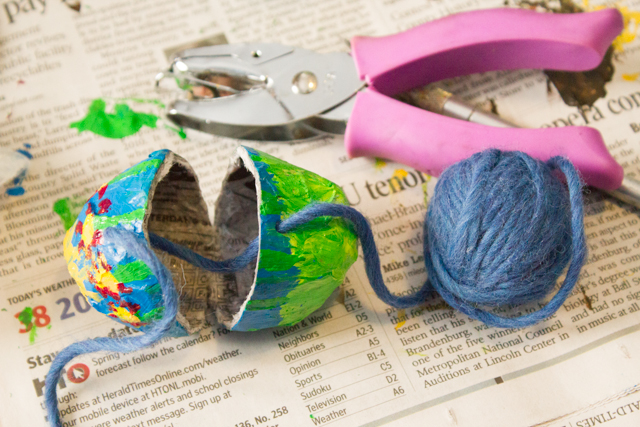
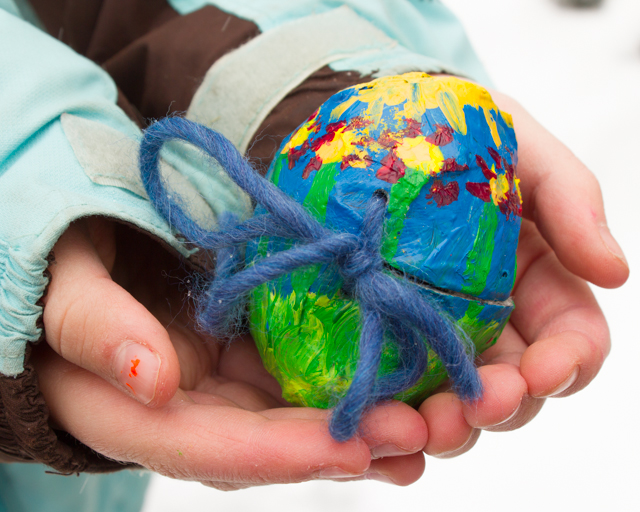
6. Add a yarn tie. The papier mache is supple enough that you’ll easily be able to open and close your Easter egg by that hinge that you left uncut, but you want to be able to hold the egg closed so that all of your jelly beans don’t fall out too soon. Using a narrow hole punch, punch a hole through the egg on either side of the cut, and thread yarn, ribbon, or embroidery floss through the holes. Tie it into a loose bow, and it will hold the egg closed.
We LOVE these papier mache Easter eggs of ours. We use them yearly, adding to our stash nearly every Easter. They’re great fun to have in Easter egg hunts, but if one accidentally gets crunched by a too-enthusiastic seeker, we don’t fret.
We just recycle it!


Pingback: Easter Egg Crafts | Care2 Healthy Living
Pingback: 20 Eco-Friendly Easter Egg Ideas | What About Pollution
Pingback: Vegan Easter Egg Dying Alternatives: Keep the Memories