
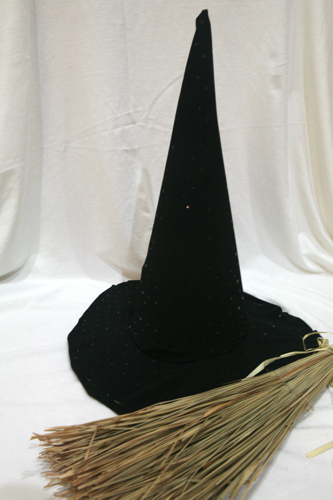
 A witch is one of the simplest and the easiest characters to be on Halloween. Put on a black outfit and a pointy hat, and you are ready to party. But buying one of those cheap plastic or polyester ones that last a short time is very wasteful.
So I thought I’d show you how to make a hat that’ll last year after year. I won’t lie; it wasn’t as easy as I thought because it involved….geometry. But don’t worry. I did all the hard work of figuring out how to measure so you dont’ have to.
To make a witch hat that is 17″ high and 22″ round at the opening, you’ll need:
- Three Wire Hangers
- Pliers
- Heavy Gauge Wire Cutter
- Goggles
- Two Yds. Black Jersey Fabric
- Two Sheets of 17 x 34 Fusible Web or any other paper that’s similar in thickness.
- Sewing Machine
- Needle and Black Thread
Caution: make sure to wear protective goggles to prevent an eye injury. You will be twisting and clamping wire and it can rotate unexpectedly towards your eye, so protect them. Also, wire hangers are pretty thick, so use pliers to twist the wires and not your bare hands so it will be easier to work with.
Instruction:
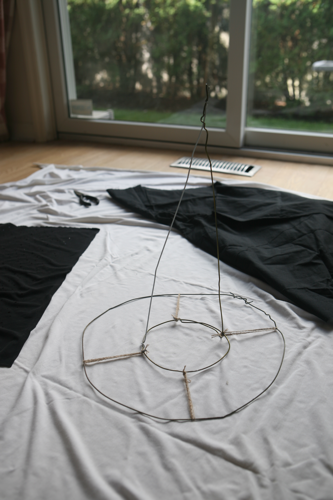
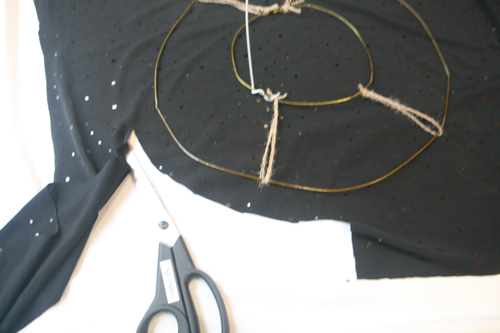
Using pliers, unwind your first hanger and shape the wire to form a circle to fit around your head. This will be the smaller circle. With the next hanger, attach two long wires from opposite sides of the circle pointing upward, and twist the ends together at the top. These two wires and the circle on the bottom, will create a cone shape. With the third hanger, make a larger circle, which will be the brim of the hat. If you want a larger brim, you may need to use regular wire and not a wire hanger as it may be too short.
Attach the larger circle to the smaller circle, using twine, as pictured. This will be temporary until the hat is finished. The purpose of the twine is to hold the shape while you work on the hat.
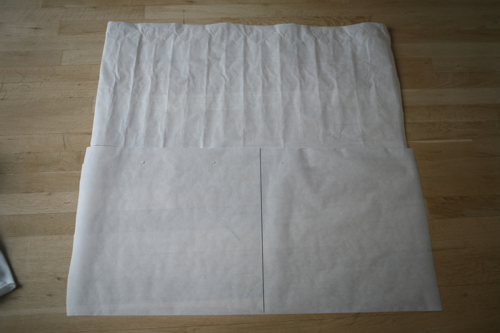
Next, take two pieces of 17 x 34 fusible web and tape them together on the 34″ sides to create a large piece of 34 x 34.
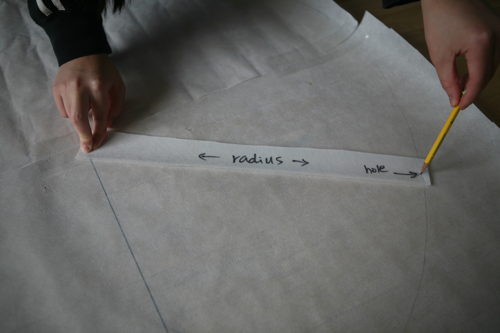
Draw a circle the same measurement of the outside brim of your hat. Use a strip of scrap paper cut to the length of the radius to help. Cut out this circle.

Make a slit along the length of one radius and roll it in a cone shape. Then, tape the end down the main body of the cone. Adjust the opening of the cone to fit your head.
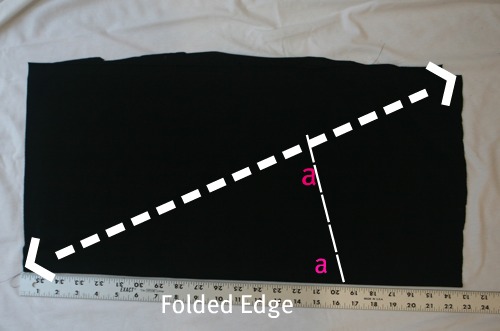
Cut a piece of fabric about 24 x 22 inches and fold it in half along the short side, ending with a folded piece of 12 x 19. Then, draw a straight line from the folded corner to the opposite side as pictured to make a triangle. Pin and sew along the thick dotted line. Then, measure the height of the hat down on both sides of the triangle and mark them with pins (“a”). Draw a straight line across the short side, connecting both pins. This line will be the opening of the cone where it will attach to the brim of the hat. Cut two inches below this line.
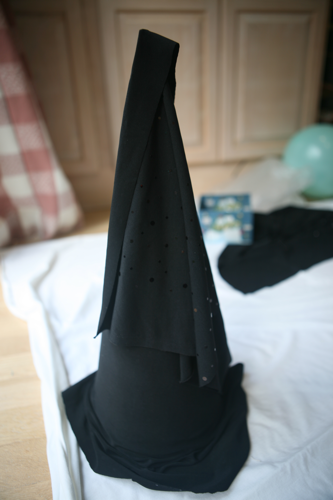
Drape the cone on the paper frame and see if it fits. If you need to adjust it, this is the time to trim. Put the cone over the wire frame and see how it fits. It doesn’t have to fit perfectly as the wire and the paper is just a frame.
Take the remaning piece of the fabric and draw a larger circle around the wire frame. You can finish the brim in two ways. One is to just sew the outer edge under the wire frame in which case, you need to cut two inches wider than the wire frame. Another method is to have two layers for the brim, in which case, you’ll nee to cut twice as wide as the larger circle on the wire frame.
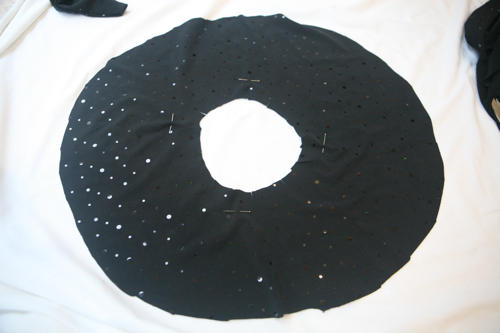
Now, cut a hole inside the circle, two inches larger than the inner wire circle. Then, line up the inside hole of the circle you just cut with the hole of the cone, right sides together, and sew the edges together. Then, clip little slits all around the sewn edges of both circles.
Put the fabric over the paper cone, and then put that over the wire frame. Tug the fabric over the brim and hand stitch the fabric under or use a zipper foot on your machine to sew all around the brim, pulling the fabric under. Cut the twine that are holding the two circles together. If you are going to use the double later method, you’ll need to pull the fabric taut over the brim and hand stitch near the hat’s opening.
And you are done!


I love it, thanks for sharing.
Pingback: Vintage Tips, Tutorials and Links Round-Up | Penny Dreadful Vintage
Pingback: Governor Brown Makes Shark Finning Illegal in CA - ecokaren