

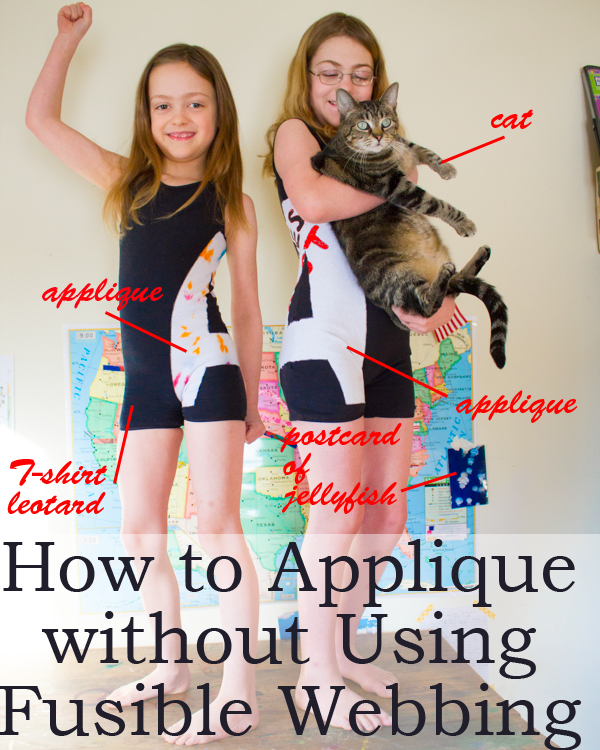
Sometimes you want a nice, sustainable sewing project. You’ve got some T-shirt fabric to upcycle, a cool applique that you want to make…
…and a bunch of gluey, plasticy fusible webbing that you feel like you’ve got to use.
Mind you, I don’t think that every single project has to be 100% eco-friendly in every single way, especially if you’re upcycling (as we speak, I’ve got a washing machine full of old T-shirts soaking in enough black dye to FREAK. YOU. OUT), so if fusible webbing is the way that you absolutely want to go, then more power to you, and congratulations on keeping that upcycled fabric out of the waste stream.
HOWEVER… don’t feel like you simply *have* to use fusible webbing in order to successfully sew that stretchy, thin, easy to warp, easy to roll jersey knit T-shirt fabric. It is really not that hard to sew jersey knit fabric, and even to applique it, without any kind of fusible webbing whatsoever.
It’s time-consuming.
It’s fussy.
But it’s NOT hard.
Sometimes, it’s even the best way to get the result that you want. The T-shirt leotards that I’m sewing in this particular project are cut to really follow the contours of the body, so the sewn seam that I wanted to applique across simply wouldn’t be able to lie flat. If I’d wanted to applique using fusible webbing, this would be a problem. However, this method that I’m using here works great with curved seams.
Here’s what you’ll need:
1. spray starch. If I’m making my own, here’s the homemade spray starch recipe that I use. If I’m buying it, I buy this brand in a re-usable spray bottle.
2. pins. Lots of pins. So many pins. ALL THE PINS!
3. ball point sewing needle. Use a fresh one, because it does make a difference. Seriously, most of the time whenever I think that my sewing machine is jacked, it turns out that all I need to do is change to a new needle. At some point I’m probably going to make a poster that says “Have you considered changing your needle?” and put it at eye-level over my work table.
And here’s how to applique without fusibles!
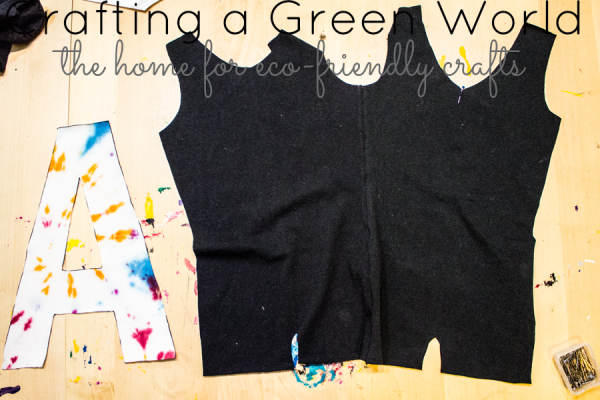
1. Prepare the playing field. Sew any seams that the applique will cross, and cut out your applique.
 The key piece of prep work that you’re going to have to do, however, is to starch that applique to high heaven. Seriously, you cannot have too much starch on this applique. Either starch it and iron it and starch it again, or spray it down with starch until it’s soaking, let it air dry, and then iron it.
Starch is the best method for dealing with jersey knit fabric, because, starched until it’s stiff, it no longer behaves like jersey knit fabric. Sure, it still needs that ball point sewing needle, but it won’t stretch or warp or curl, and therefore you don’t need fusible webbing to deal with it.
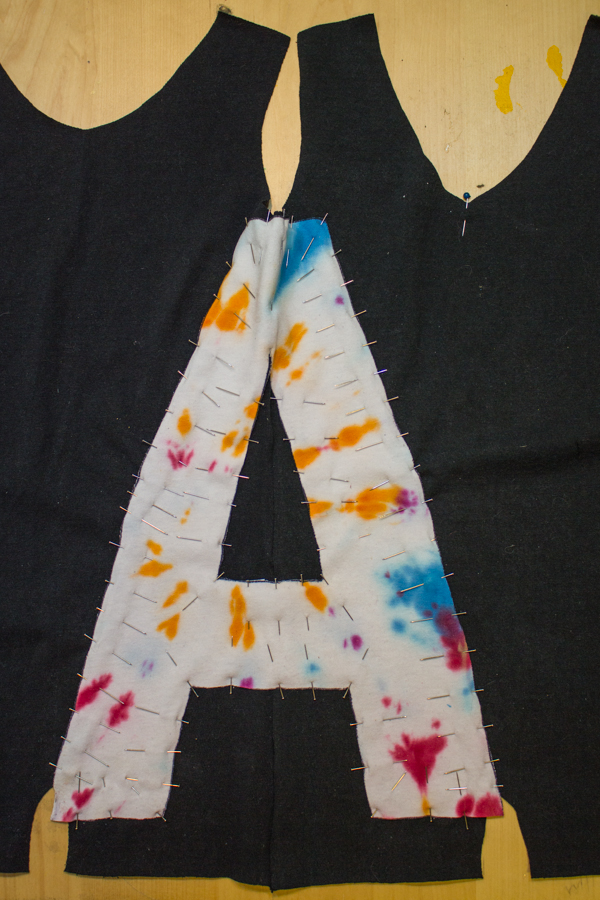 2. Pin with ALL THE PINS. If your T-shirt fabric that you’re sewing your applique to lays flat, you could starch it, as well, to save yourself some trouble, but with these leotards, that would defeat the purpose of getting a smooth fit over curvy seams. Instead, place your applique, and then pin it until you can’t pin it anymore. Pin, like, every 1/2″, or pin even more closely on those fiddly curves.
If you’re pinning over a seam that doesn’t lie flat, you’ll have to pin your applique in stages. Pin the part that lays flat first, then feel free to fold it over or wrinkle it up until another part lays flat, and pin that. One of my leotards had a much more prominent curve for the hip than my other leotard, so for that one, I actually had to fold it at that seam, then pin the applique to each half of the fold.
Yes, it’s time-consuming. Yes, it’s fussy. But it’s not hard, and it works.
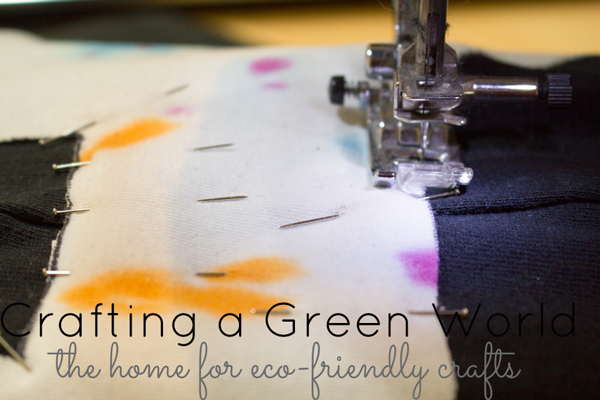
3. Sew slowly. You should now be able to sew this applique down using your regular zig-zag stitch on your sewing machine. Go slowly, both so that the still-delicate fabric doesn’t get warped as it passes between the presser foot and the feed dogs, and so that you can see every pin and remove it before you sew over it and break your needle.
Be mindful, as you sew, to let the fabric feed itself. Don’t pull or stretch it, and if the needle catches over a seam stop, raise the needle, raise the presser foot, and feed the fabric and the needle by hand for a couple of stitches to get you over the hump.
If, when you’re finished, the seams seem a little wavy, don’t freak out. Instead, do the next step.
4. Wash it. Wash your finished piece to get the starch out, and 9 times out of 10, if you’ve noticed any waviness in the seam of your finished applique, this will magically flatten it out. You can also iron out the waviness, but, before you freak out, actually put on the appliqued garment–any remaining waviness may well disappear with the natural stretch of the finished garment as it’s worn.
Because you’ve sewn your applique with a zig-zag stitch, it will retain the natural stretchiness of the fabric. This makes it also a good choice when sewing with other stretch fabrics, such as spandex, or for other garments that must move, such as ice skating and gymnastics costumes.
And believe me–I sew for ice skating and gymnastics AND aerial silks. I know my stretch!


Awesome! Thank you so much for sharing. I’m new to a lot of this & kind of what would to most be considered backward. I was raised in Maghery, a small town in Ireland on the banks of Lough Neagh. They are living in a time which existed here about 100 yrs ago (or more). My cousin Sean called me at about 4am our time or about 9am there all excited & says “éisteacht seo” (they don’t speak English), “listen to this”…….wooosh…..toilet flushing! They got indoor plumbing and were so thrilled they had to call and tell me about it! I was gonna kill him! I had a 3 week old infant and a 7 week old infant (long story but my brother & his wife were killed in the North Tower of the World Trade Center on 9/11 & we had each agreed to raise the others children if anything happened to either of us, who ever believes it will happen…..) I had FINALLY gotten two fussy infants to sleep and he is on the phone about the toiled without thinking about the time difference but this is par for the course there. Things are totally different than here in the US and different things are important. This is why I found your sharing ‘how to’ as well as your introduction of yourself and who you are and what you are about to be so refreshing. You reminded me of home! Sewing there is still done mostly by hand if it is something for a family member you want to be sturdy. I only wear cloaks, they are much warmer than any coat I’ve ever bought but you can’t get the kind my Aunt Maime used to make for me here. They have a sweep of approx 33 feet, 402” (full round) all sewn by hand, black Irish wool with a knitted Irish wool lining, kind of like a heavy sweater you can button in and out. Maime died 2 years ago at the age of 104 and I still haven’t found anyone who can make my cloaks for me. Probably have to wait till I go home again to visit.
Thank you for sharing as this is something I was having some trouble with. I don’t use a sewing machine but your starching idea and zig-zag stitch and pinning out the wazzoo did the trick and solved the problem I had been about ready to give up on .
I’m probably giving your readers cramp. Just wanted to say hi and THANK YOU!
I never would have thought of that on my own. With 7 kids I am always doing some kind of stitching or darning socks or the like. I get teased a lot but I wouldn’t trade my life for anything. I wish I had had the courage to stand up to the school system here and home school my kids. Just because my vision isn’t the greatest doesn’t mean I couldn’t have taught them. Todays schools are horrible. God Bless you for doing all you do for your kids. They will grow-up and thank you for it. Mine did. It’s not an easy world we have to prepare them for out there today.
God Bless
Aylagh