
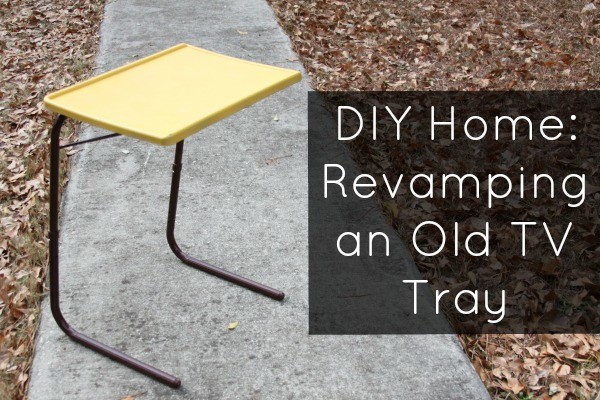

Don’t throw away that old TV tray! Revamp it into a functional DIY laptop stand with a little bit of crafty love.
I saved an old TV tray from the trash can, but I wanted to redo it to make it more of my style. It will actually have multiple purposes: a DIY laptop stand, a table that I can move around for photographing small items, and a table for crafting! Here’s how I revamped an old TV tray into a piece of furniture that will match my decor and is super functional!
DIY Laptop Stand from an Old TV Tray
Materials
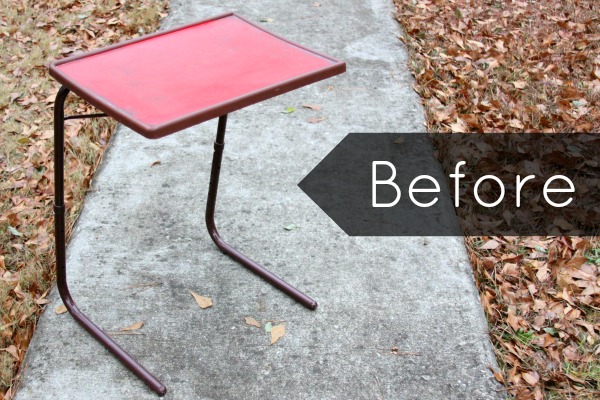
+ an old TV tray – Here’s what mine looked like before:
+ painter’s tape
+ sand paper
+ polyurethane (optional)
Directions
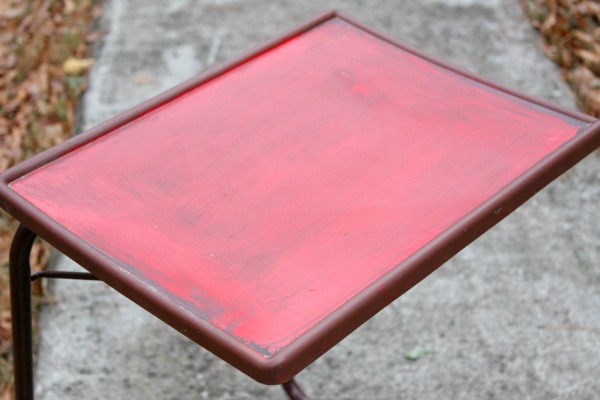
1. Gently sand the top of your TV tray with sand paper. This will help the spray paint stick to the tray and will smooth out any scratches that might be on the top. Mine was painted horribly before, so it needed a little more sanding than usual.
2. With your painter’s tape, tape off any of the areas that you don’t want to paint. I didn’t want to paint the legs of my tray, so I taped them off.
3. Spray paint it! As I always say, remember that multiple thin coats will give you the best results. One heavy coat can give you drips. I chose a bright mustard yellow color– it’s my favorite!
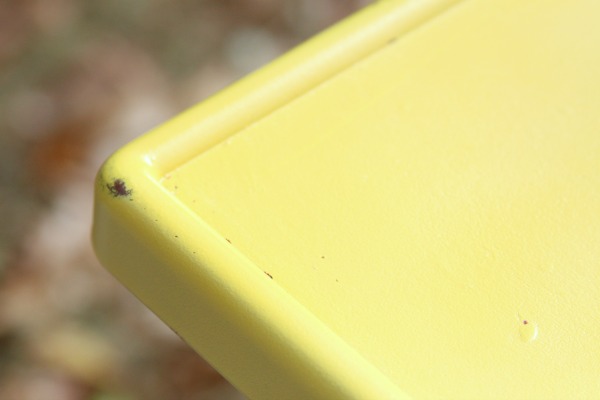
4. I love the shabby-chic look (like this shabby chic coffee table), so I decided to distress the edges of the tray a little bit. You can achieve this look easily with sand paper.
5. Once I was done distressing the edges, I sealed the top of the tray with a spray polyurethane. Polyurethane isn’t the greenest craft supply, but it protects and seals the paint from everyday wear and tear. It will also give the piece a nice finished look like a piece you would buy from a furniture store.
Isn’t it so much better now? I’ve already used it several times for projects. I’m so glad I saved it from the trash!
What items could you save from the trash? Instead of throwing away old furniture pieces, you can easily revamp them!
Here are more DIY home and furniture ideas to get you inspired:
+ 7 DIY Furniture Makeover Projects
+ 10 DIY Ways to Revamp Old Furniture
+ Upholstery for Beginners: A Reupholstered Foot Stool
+ How To: DIY Scrap Fabric Pulls


