Homemade Christmas tree ornaments are my favorite holiday decoration. Every year, my kids and I add more handmade ornaments to our collection and I cull a couple more store-bought ornaments. My ultimate goal is to have a Christmas tree so bedazzled that you can barely see its branches, with nary a store-bought ornament in sight.
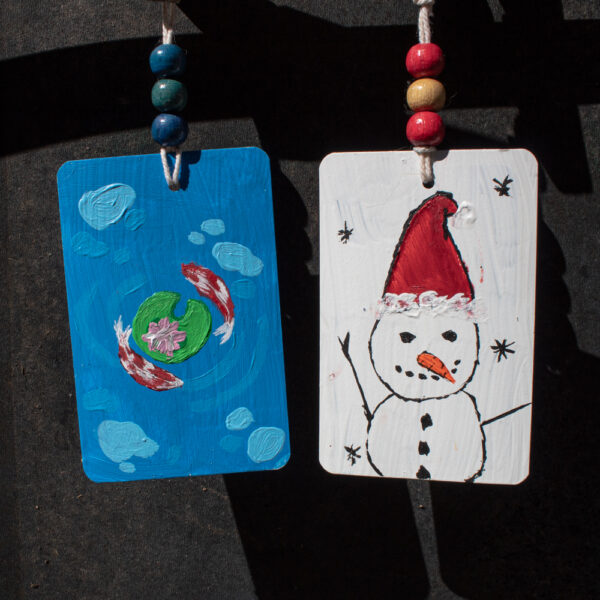
These altered playing card ornaments are perfect for filling in the last nooks remaining between cinnamon dough toddler handprints and tiny stuffed felt Princess Leia. They’re light and unbreakable (unless embellished with something delicate, of course). They’re also well suited to the crafting skills of everyone from the littlest littles to the grown-est grown-ups. Artistic people will be especially drawn to the level of detail that you can put onto these miniature canvases. If you prep the cards and gather the supplies ahead of time, you can even spring a “spontaneous” crafting session upon your family or have a ready-at-hand activity for a party or get-together.
Here’s what you need to make your own altered playing card ornaments:
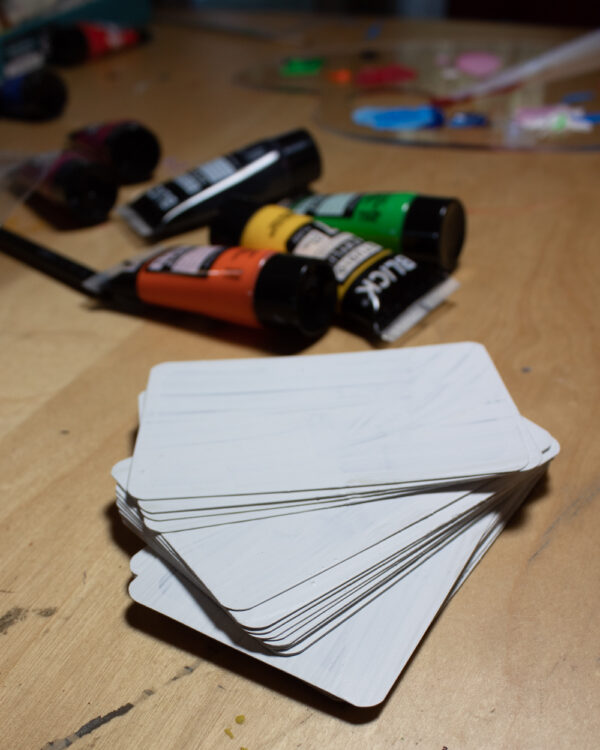
- playing cards to upcycle. An incomplete deck of playing cards is the perfect crafting supply! I do a really great job of ruining decks of cards all by myself, but if you, unlike me, take good care of your possessions, ask around for donations from your more careless friends. Yard sales are another good place to collect decks on the cheap.
- gesso. Even if I plan to collage my playing cards, I still like to gesso one side first. Gesso lets you draw and paint on the card, or even just change the background color. It adds tooth and texture and a workable surface for tons of art techniques. You can buy both white and black gesso.
- acrylic paints. I don’t like craft acrylics because I think their saturation and coverage is inferior to even entry-level artist’s acrylics. The look that I get from one coat of artist’s acrylics would take me several coats of craft acrylics to achieve. This basic set of Liquitex acrylics never does me wrong!
- hole punch. I like a 1/16″ hole punch for this project. A novelty shaped punch would also be cute!
- twine. I do think twine looks best with these ornaments. If you’ve got yarn, leather cording, or anything else that you like better on hand, go for it!
- embellishments (optional). Don’t think that you have to stick solely to painting your ornaments! Collage, embroidery, and other three-dimensional elements can take your ornament crafting game to a whole new level.
- sealant (optional). Depending on the materials you use and how your ornament will be displayed, consider a water-based clear sealant.
Step 1: Gesso the playing cards.
This step is so easy and satisfying! Brush a thick coat of gesso onto one side of each playing card, then let dry. If any playing cards curl as they’re drying, bend them back into shape afterwards.
If you’d like to paint both sides of your playing cards, gesso the opposite sides after these sides are fully dry.
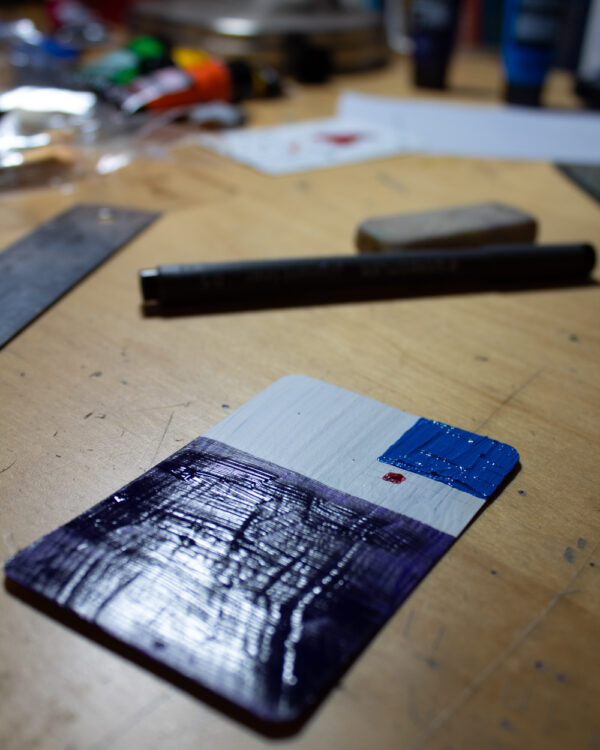
Step 2: Paint the playing cards.
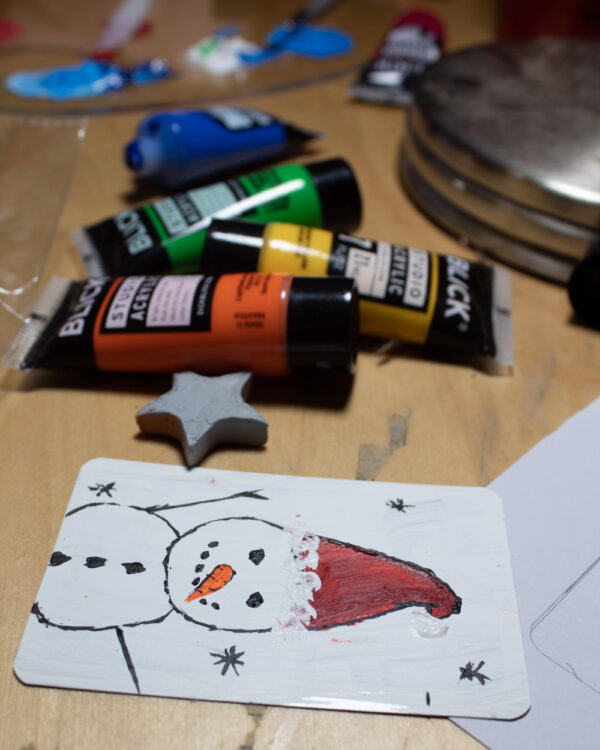
Here’s the fun part! Your playing cards are now miniature canvases that you can paint as you please. If you gesso a set of playing cards in advance, you can spend a cozy evening painting several playing cards. Or, pop some popcorn, warm up some apple cider, and have what my teenagers refer to as “Family Bonding Time.”
When your miniature paintings are complete, let them dry somewhere that the cat can’t step on them. ASK ME WHY I SAID THIS.
Step 3: Punch a hole for hanging, and add twine.
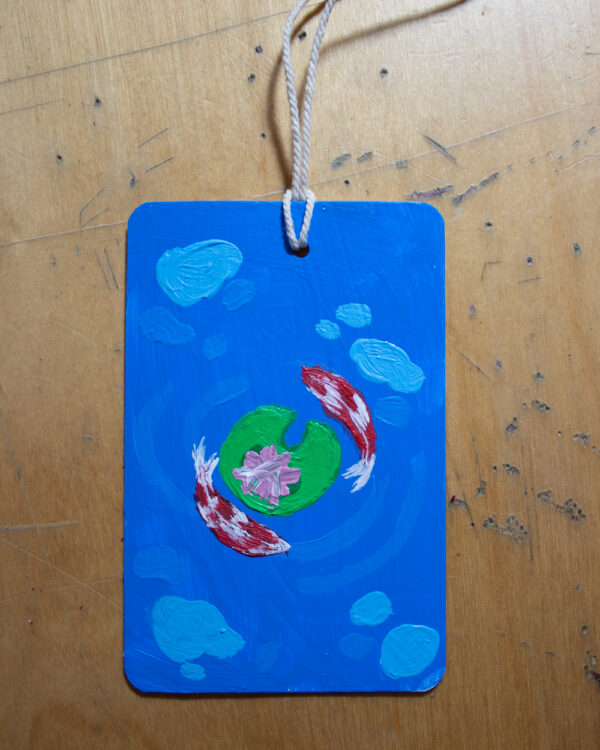
Punch a hole at the top center of the playing card (do a better job centering it than I did on the card in the photo above!). Cut a length of twine, then use a lark’s head knot to attach it to the playing card.
Step 4. Embellish the twine hanger, and tie a loop.
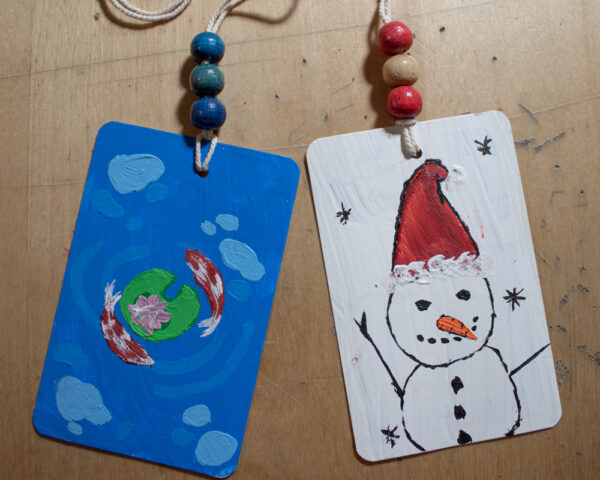
Beads look pretty on these twine hangers; the beads in the above photo came from a garage sale necklace, and I’m pleased with how well they match the art!
Any loop knot works to finish off the twine hangers. In the case of these playing cards, I made a surgeon’s loop while keeping both strands of twine together. I then cut off the excess twine.
These altered playing card ornaments look so cute on a Christmas tree, but they’re also really adaptable for other holidays. Paint them with skeletons and hang them on your dead branch Halloween tree, or stencil them with letters and string them together to make a birthday bunting. Skip the hole punch and twine hanger and hand them out as valentines, or use the back side for your contact information and hand them out as business cards.
Whatever you do, you’ll be keeping waste out of the landfill and making art!