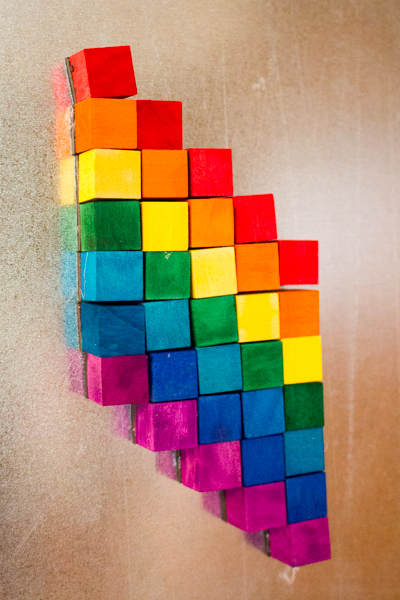
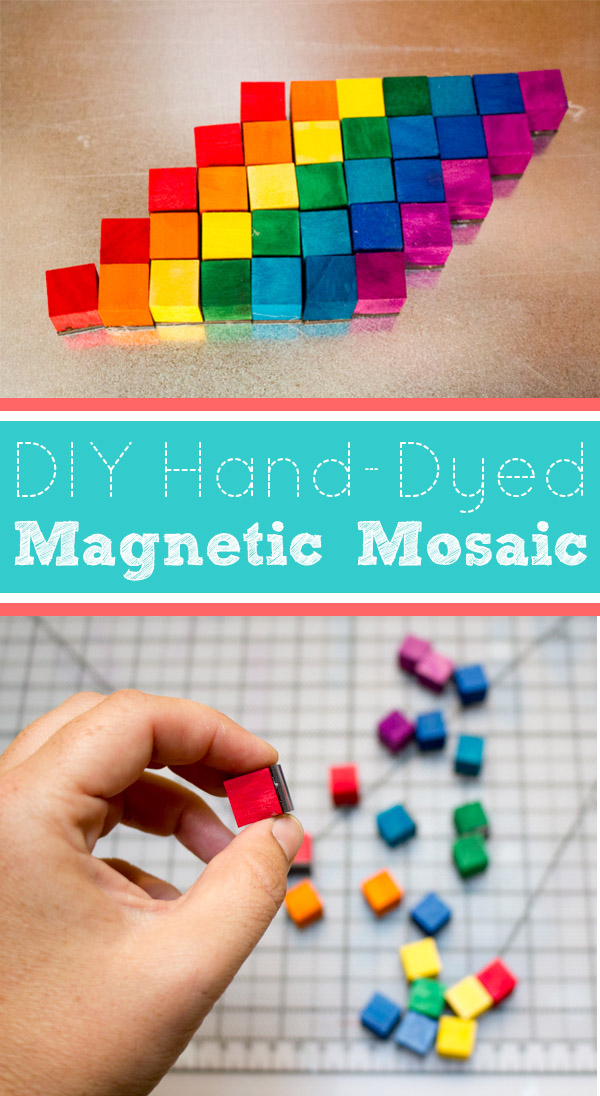
Hand-dye your own DIY magnetic mosaic kit. You can make it as big or small as you want in colors of your choice!
Do you ever have one of those moments when you look at something store-bought and think, “Hey, I could make that!”
That’s what I thought one day when I took a good look at the magnetic mosaic kit that my kid was playing with in the car. Of course, not only did I decide that I could make that, but I also decided that I could make my own DIY magnetic mosaic set WAY larger, AND put it on the giant magnetic memo board that my husband and I put in our kitchen. That way, everyone can play!
This is a very easy project, although it’s a little time-consuming. The finished result, though, is totally gorgeous and super-fun. Here’s how to make it!
DIY Magnetic Mosaic Kit
You will need:
+ small wooden cubes. I buy mine from Casey’s Wood Products in Maine.
+ liquid watercolors and zip-top plastic baggies. I’m picky about the brand of liquid watercolors that we use, because we use them a LOT. My go-to brands are Colorations or the Dick Blick store brand.
+ magnetic tape. Normally, I go for the strongest magnets possible in the size that I want, but these mosaic magnets are just for fun, not for sticking art to the wall. For the easiest project, choose tape in the same width as your wooden cubes.
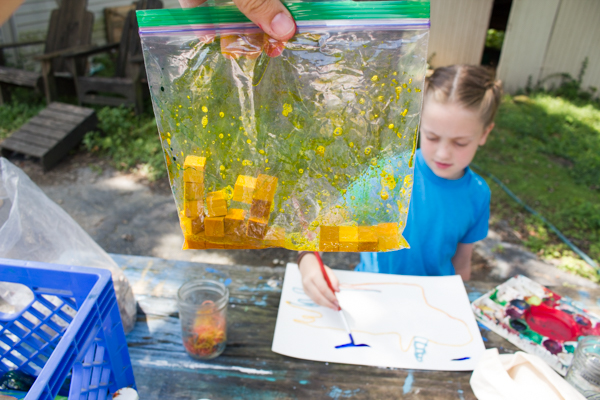
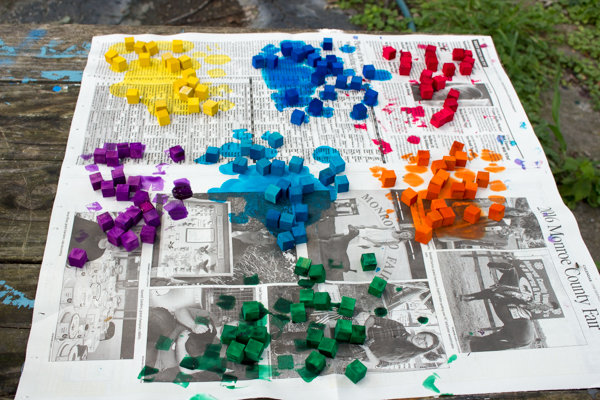
1. Stain the small wooden cubes. I’ve written a few tutorials for this process, so click here to see exactly how to stain wood with liquid watercolors. Unfortunately, my method does require the use of a plastic zip-top baggie (although I’m almost certain that you could also do this in a small glass jar), but the good news is that you can re-use that baggie indefinitely. I seal them and keep them with our liquid watercolors, and use them over and over again with the same color.
This liquid watercolor stain is mostly water-resistant, but not completely. It’s not intended for use by children who still mouth objects (and to be fair, neither are the small wooden cubes!), but if you deeply need the objects to stand up to the occasional immersion in water, then you can either soak them in vinegar to release the excess dye or you can seal them with your favorite clear sealant.
Let the cubes dry completely before you begin the next step.
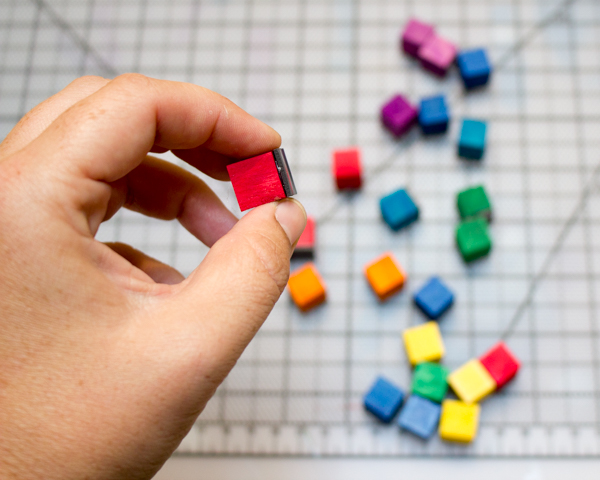
2. Add the magnets. Cut the magnetic tape to size (you can usually do this by scoring the magnetic tape in the correct intervals as you measure it with a ruler on top of a gridded cutting mat, then breaking the tape at the scores) and remove the backing.
Although the magnetic tape will usually come with a sticky backing, that stuff is a joke. Instead, place a dab of hot glue on the back of each cube and glue that magnetic tape down yourself!
3. Enjoy! We like this magnetic mosaic kit best on our large magnetic wall board, where anyone who happens by can play with them and change the pattern, but if you’ve got a metal cookie sheet, then you can play with these anywhere, and if you’ve got a metal tin, then you can even come full circle and play with them in the car.