
I’m back again with more tales of the Wonders of Geometry!
Have you ever found an online tutorial or template that you love, but it’s not quite exactly what you’re looking for? Maybe the thing that you really wanted to make is a few inches bigger or smaller or has a differently angled curve. The heart wants what it wants, you know?
There’s often no need to settle for something less than your vision because often, creating your own template from scratch is surprisingly workable. Here, for instance, I’m going to walk you through how to create a template to make a wood star.
No matter how big you want your star to be, or how many points you want it to have, you can make the pattern for it completely from scratch, and the assembly is the same no matter which type you create.
So grab your ruler and grab your scroll saw, because it’s time for some hands-on geometry!
Tools & Supplies
To make your own wood star from scratch, you will need:
- Scrap wood. Old barn wood is practically de rigueur for making wood stars (and you should definitely score some if you can!), but old pallet wood gives much the same effect and is often much more easily obtainable, and scrap pieces of clean, new wood require less sanding and much less prep work before painting.
- Ruler and compass, OR template and a straight edge. You can draw your star template completely from scratch using a ruler and a compass, or you can skip a few steps by using my template of concentric circles with divisions already marked.
- Scroll saw or circular saw. Technically, you can use any saw that will cut a straight line for this project, but I like using a circular saw.
- Sandpaper. A palm sander is unnecessary but saves a ton of time.
- Wood glue and wood putty. Because your star won’t come together by magic!
- Drill and bit (optional)
1. Create the Pattern for Your Wood Star
If you want to start completely from scratch, use your compass to draw a series of concentric circles on a piece of large-format paper. Start with a circle with a radius of 1″, and draw each successive circle with a radius 1″ larger, until you’ve reached the maximum diameter of the star that you want to make. For a large star that makes a good tree topper, I like a circle with a radius of 7″. For a smaller star that makes a good ornament, I like a circle with a radius of 4″.
Next, choose the number of points that you want your star to have, double that number, and evenly intersect your circle with that number of lines. For a four-point star, then, you’ll need to divide your circle into eighths, and a traditional five-point star will need a circle divided into tenths.
Want a shortcut? Print out this cheat sheet!
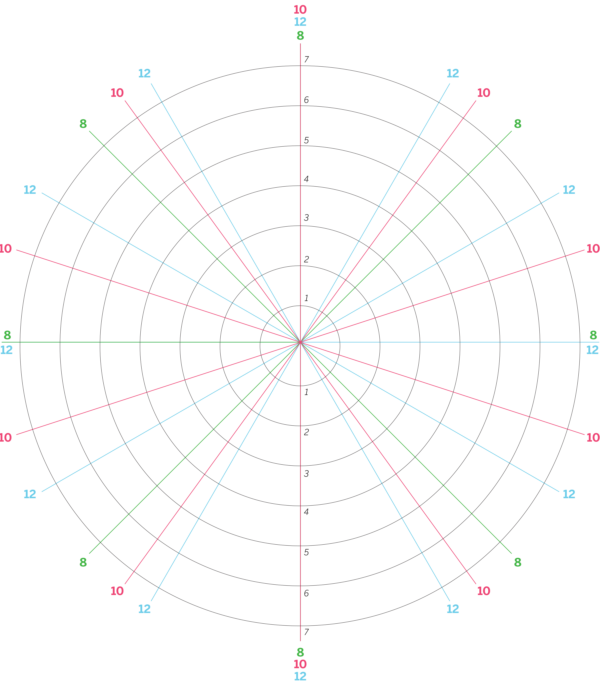
There are a LOT of benefits to having a spouse who’s a graphic designer, and one big benefit is being able to get custom concentric circles divided according to my specifications!
The pattern piece for your wood star will be a diamond. To draw the diamond, you’re going to use your segmented concentric circles template. The bottom of the diamond is the center of the circle, and the top point will touch the largest concentric circle. Make a dot where one of your lines touches this circle.
Go to the next line that segments the circle, and decide which smaller concentric circle represents where you want the widest part of the diamond to be. Make a dot where that line touches that circle, then connect the two dots using a straight edge. The next line around the circle gets a dot up high, and the line after that gets a dot down low. Connect all those dots, and you’ve got half your template made.
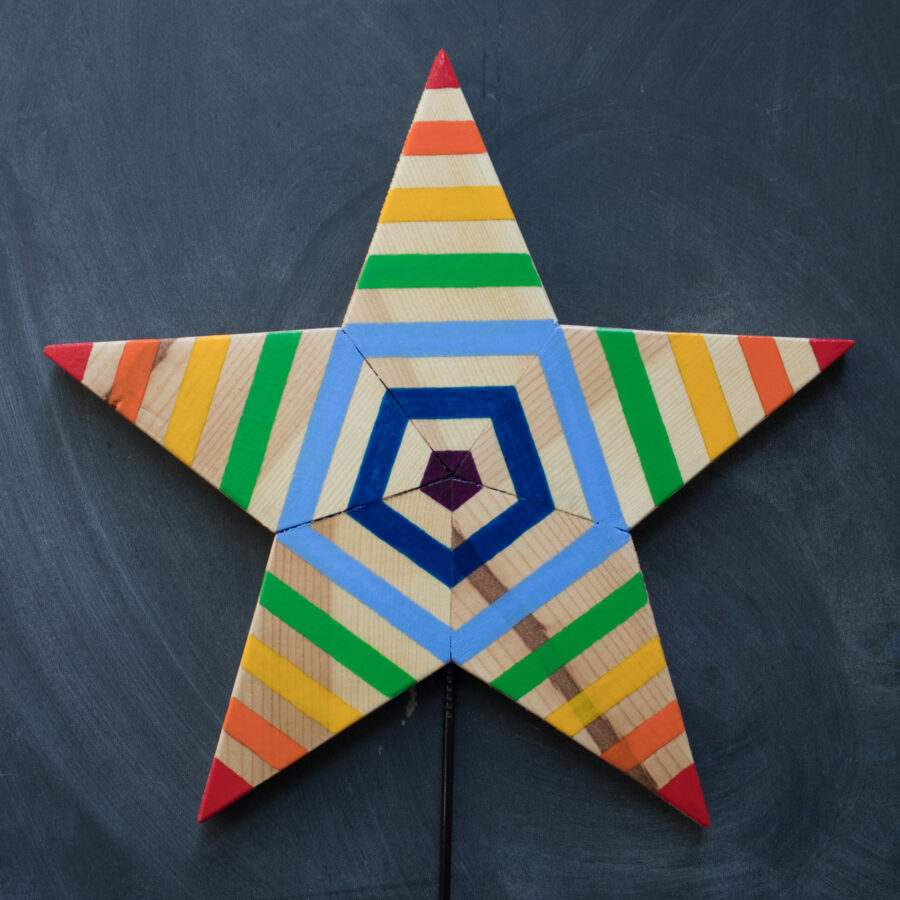
To finish it, trace the lines from each low dot down to the center of the circle. This will complete your star, which is now made from a series of identical diamonds. Below is the template on which I drew a four-point, five-point, and six-point star in different colors:
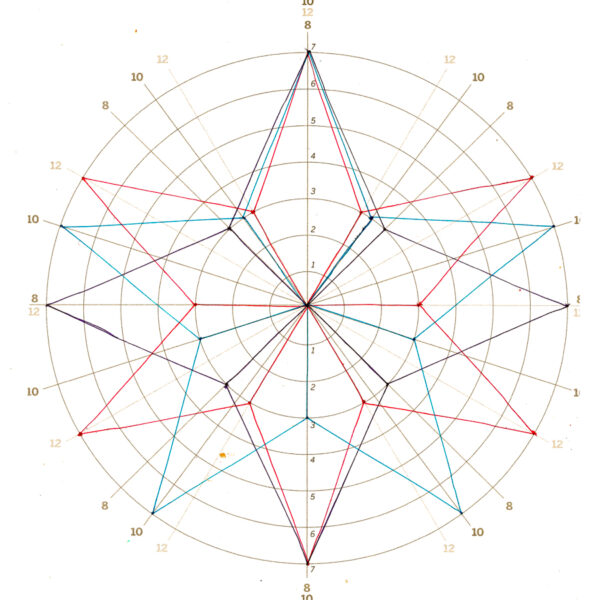
My largest circle on this template has a radius of 7″, so the entire star will be 14″ in diameter. I chose the circle with a 3″ radius to mark the widest part of the diamond for each star.
2. Cut the Star Pieces Out of Wood
Cut out just one of the diamonds from your paper template, and trace it onto the wood. Repeat until you have all the diamonds that you need to construct the star, then cut them out.
3. Sand the Star’s Points
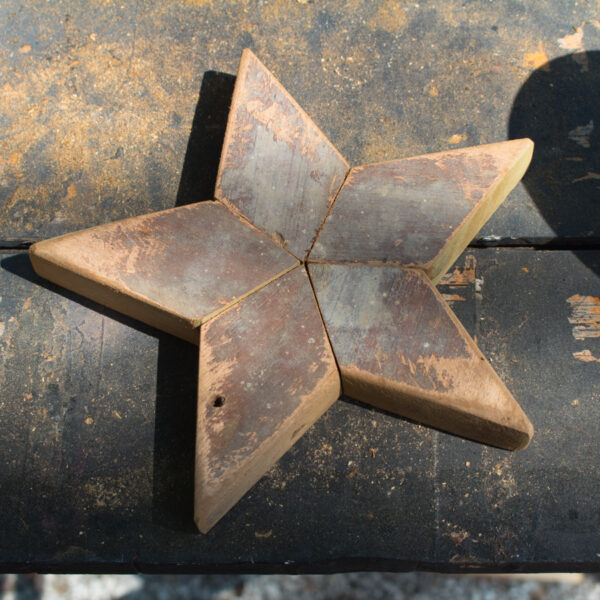
Arrange all your diamonds so that they make your star, and make sure that they’re all nice and even and everything fits together snugly. Don’t worry if you’ve got some gaps, because you can fill those in later with wood putty.
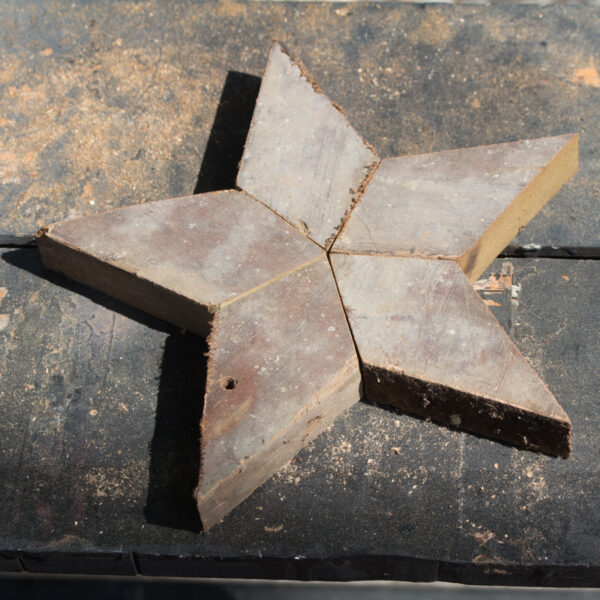
In the photo above, see how my star fits together nicely, but looks raggedy around the edges? The faces that will show on the finished star aren’t super smooth, either. Solve this issue by sanding all of the faces that will show on the finished star, and then use the sandpaper to round the edges on the star’s points. That’s all it takes to turn your star from chunky and amateur to polished and professional!
4. Glue the Star Together
Gluing the diamonds together to construct your star is a pain in the butt, because your star probably won’t have any parallel lines to clamp onto. I’ve seen woodworkers use shims to correct awkward angles while clamping, and I’ve also heard of woodworkers advocating using tape instead of clamps for these kinds of irregular figures, but my main strategy is just to fuss over it.
When the glue has cured, sand away any excess from the front and back of the star. If you plan to paint it, fill in any gaps in the joins with wood putty, then sand again when the putty has cured.
5. Embellish!
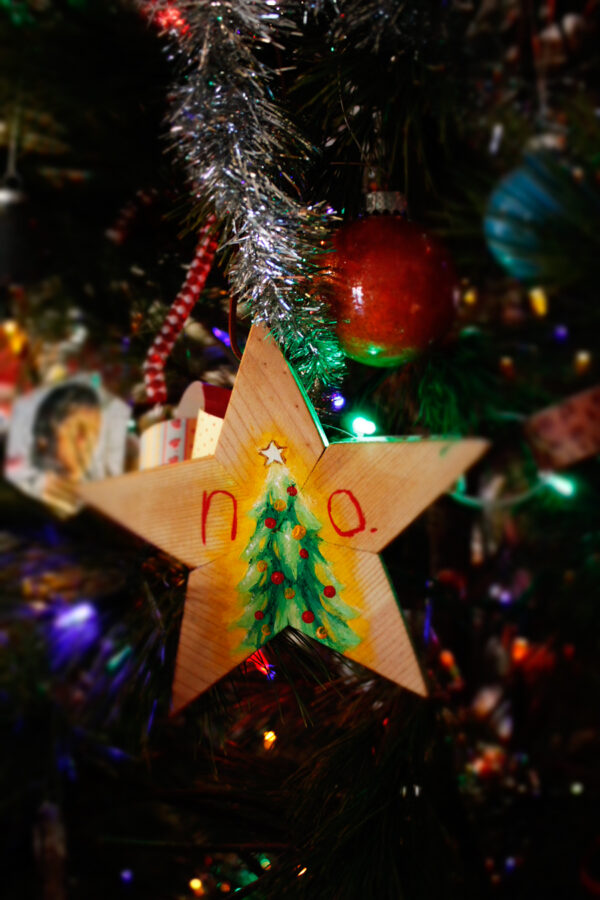
There are so many fun ways embellish and display these stars! To turn your star into an ornament, drill a hole through the top point. To mount it on a dowel as a tree topper or table stand, drill a hole the width of your dowel into the bottom. You can draw and paint on your star, decoupage it and glitter it, or leave it simple and unadorned.
However you choose to embellish your star, a couple of final coats of polyurethane will seal it and keep it new-looking and shiny, because a star this beautiful and well-crafted is a keepsake and heirloom!