
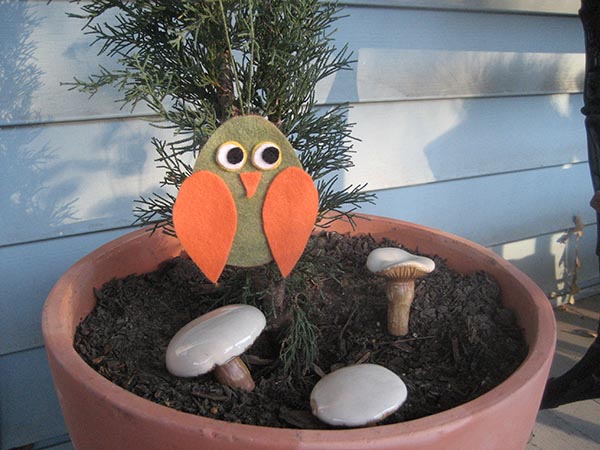
I love some outdoor summer fun, but sometimes you need a little indoor project to beat the heat. This cute little no-sew felt owl is a perfect way to take a break from the summer swelter.
Ready to get crafting? Here we go!
Summer Craft for Kids: No-Sew Owl
You’ll need:
- At least three colors of recycled felt. I went with four colors, using olive green for the body, orange for the wings and beak, and yellow, black, and white for the eyes. You can mix up the colors however you like!
- fabric glue
- scrap piece of ribbon or embroidery thread, about 4″ long
- our Owl Template
- scissors
1. Cut out the template pieces, and trace them onto the felt. Make sure you cut two of the pieces that instruct you to do so. All done? Great! You’re ready to assemble!
2. Start by grabbing the two large oval pieces and your embroidery thread or ribbon. Put a decent amount of glue around the perimeter of one oval, then stack the other one on top. Now, loop over your embroidery thread and sandwich the ends between the two ovals. You’ll want to insert the thread on the skinny side of the ovals.
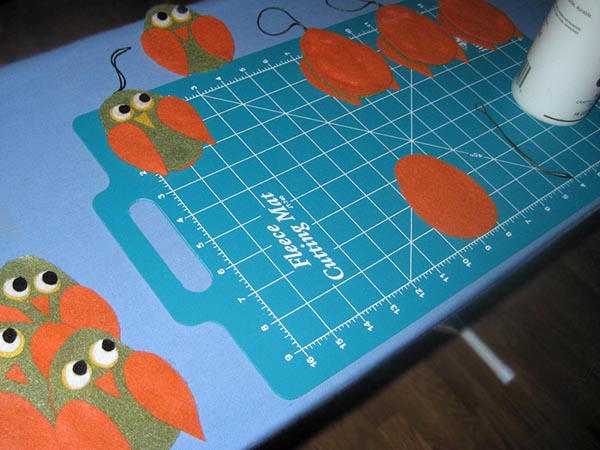
3. Now, you’re ready to attach the wings! Use the picture at the top as a guide. Start with a small amount of glue. You can always use a bit more later to make sure things are secured nicely.
4. Once the wings are attached, you’ll add the eyes. Glue down your colored circle, then glue the white on top and the black eyeballs on top of that. You’ll want to use little drops of glue for this, too. You can always add more once it’s dry if things don’t seem secure. Repeat for the other eye.
5. Last step! Put a small dot of glue on to the little triangular beak that you cut out and attach it right int he center.
You’ll want to allow a few hours at least for everything to dry. If you’ve got the time, let the glue set overnight.


