Do you want the best, strongest, most archival way to preserve a puzzle? I’ve got THE secret answer for you!
The best way to preserve a puzzle is not with regular Mod Podge. It’s not even the Mod Podge marketed just for preserving puzzles–you know, that Mod Podge that’s just the same as regular Mod Podge but more expensive? It’s not duct tape or sticker sheets or foam board across the back, and it’s not packing tape or glass across the front.
It’s so much easier to preserve a puzzle than all of that. All you need is something you probably already own, if you do other DIY or crafty projects, and something that you probably wish you could use up, because it comes in an annoyingly too-large can.
To preserve a puzzle absolutely perfectly, all you really need is water-based polyurethane.
I mean, it makes sense, right? We use water-based polyurethane to seal all kinds of other paper projects. It’s what makes my collaged cardboard trays wipeable and my decoupaged building blocks sturdy enough to withstand a kid’s play. I’ve used it to seal recycled paper beads and papier mache shadow boxes, and to strengthen cardboard that I’m about to turn into the skeleton for a giant pair of moth wings. So why not use it to preserve a puzzle?
The one downside to polyurethane is that it will take a full 24 hours for each side of this puzzle to dry, and then another full week (manufacturer instructions may vary, though!) before the polyurethane is fully set. But if you can spare the space and you’ve got the polyurethane on hand, this is the BEST method to preserve a puzzle!
To preserve a puzzle, you will need:
- polyurethane. Use whatever you have on hand, ideally water-based and low-VOC. If you don’t have any, check in with your Facebook friends or your local no-waste group before you buy a whole can, because they’re all way too big and contain way more than anyone would ever need. Someone you know is surely dying to get rid of their own nearly-full can that they bought for their own single craft project.
- foam brush. These brushes are cheap, but they’re not eco-friendly, so just wash them and re-use. They’ll fall apart eventually, but you can get a surprising amount of use out of them first!
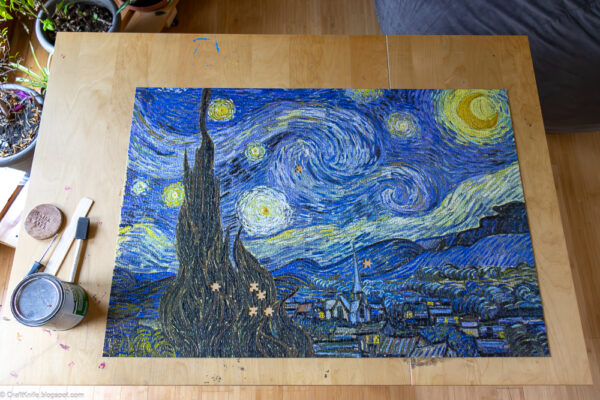
Step 1: Clean and prep your puzzle.
If you’ve been working on your puzzle for a while or bought it second-hand, it’s probably actually pretty grubby, even if you can’t see it. Just run a damp cloth over it and let it dry to be safe.
My puzzle’s pieces interlocked tightly, and anyway that table is trash, so I didn’t prep the table for this project. Your stuff is nicer than mine, though, so of course YOU should carefully slide some newsprint or an old canvas underneath your puzzle to keep your table safe from drips.
Step 2: Seal the front of your puzzle.
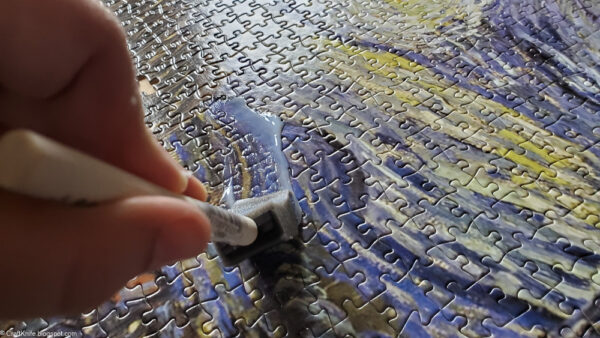
Paint a thin, even coat of polyurethane over the front of the puzzle. If your puzzle is glossy like mine, it’ll actually be super hard to tell where you’ve already painted, so peer at it from all angles before you decide you’re done to make sure you haven’t missed any spots.
Let the first coat dry according to the polyurethane manufacturer’s instructions–for my polyurethane, that’s two hours. After that, paint a second coat over the top of the puzzle and let dry again. My polyurethane’s instructions recommended 24 hours for this final coat to dry. I ended up giving it more like 20 hours, so don’t tell anyone that I cheated!
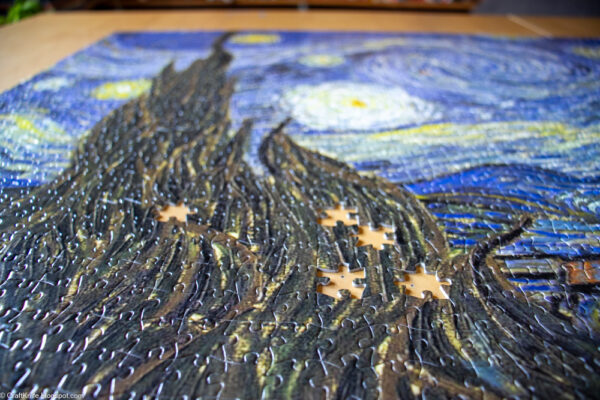
Step 3: Seal the back of the puzzle.
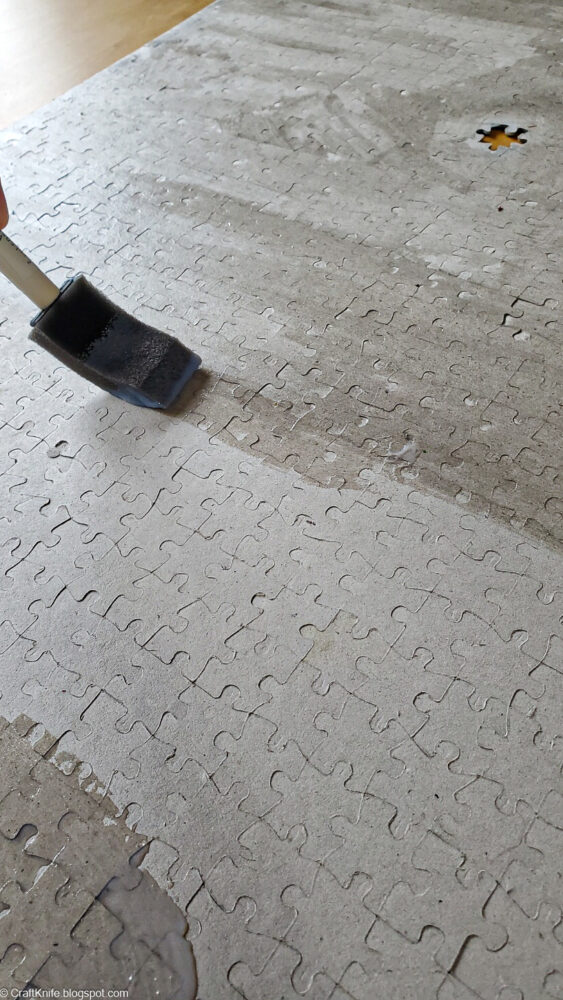
After those two coats of polyurethane and a good long time to dry, your puzzle should be sturdy enough that you can turn it over by hand. If for some reason it feels shaky give it another top coat, but honestly I think you could probably hang the puzzle as-is on your wall at this point and it would be good.
But anything worth doing is worth overdoing, so let’s forge ahead!
Paint another two coats of polyurethane on the back side of the puzzle, again giving it time to dry between coats and after the second coat. I liked painting the back MUCH better than painting the front; the matte finish of the back makes it easy to see where I’ve painted, and the color shift lets me see which parts need to dry longer.
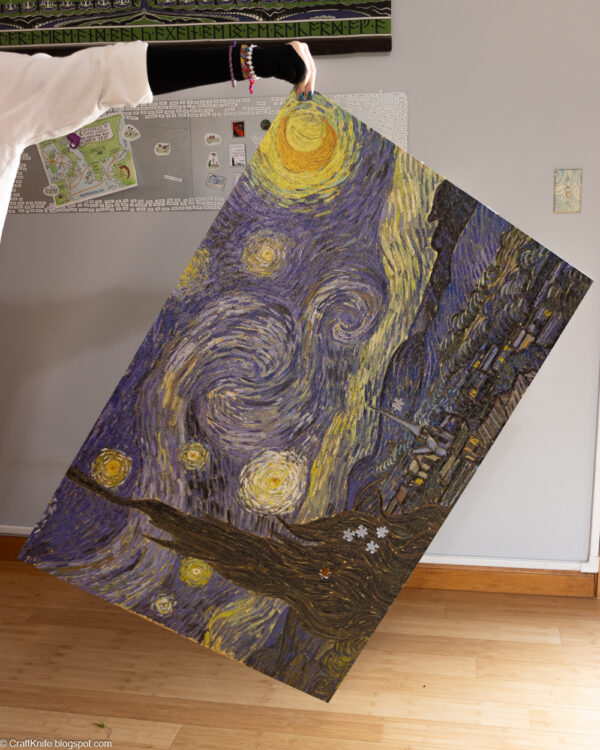
My polyurethane’s manufacturer says that it takes a week for the polyurethane to fully cure, but after that your puzzle should be just about the sturdiest thing you’ve ever encountered in paper. In the photo above, the entire puzzle is hanging from a single piece!
And yes, the stupid puzzle actually has SEVEN missing pieces. It’s kind of a family joke at this point so I’m leaving them, but it IS possible to DIY a missing puzzle piece, for those of you whose families aren’t as weird as mine.
I’m just hanging this puzzle in my hallway with Command strips because I’m boring, but I bet there are so many cool things to do with a puzzle as strong as these turn out. I think it would be fun to cover a piece of furniture or a door, or make a tabletop, or back a book nook…
What would YOU do with the sturdiest puzzle ever polyurethaned?