
When you buy second-hand (or third-, or fourth-, or fifth-hand!), you have more options if you have the skillset to complete some small repairs.
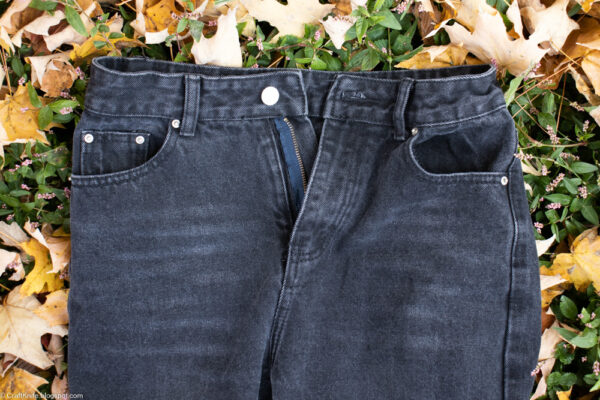
Such was the case when my teenager scored an originally $90 pair of jeans for $8 from our local Goodwill. They were just the style she was looking for. They were black, to match every other piece of clothing that she owns (sigh…). They had the kind of intentional ripping that signals enough disposable income to buy impractical clothing rather than a lifestyle of manual labor. They even fit great…
…until she went to zip them up, and discovered that the zipper was broken.
Never do I have such a smug feeling of pride as I do when a kid hands me some broken thing and asks me if I’ll fix it for them. I used to fix the broken legs on their toy ponies and the knees and butts of their favorite leggings (ripped through honest living, of course, not through capitalist wealth signaling). Now I fix things like the severed wires on their strands of LED twinkle lights, the broken bits of all their costume jewelry, and, apparently, the zippers on their thrifted high fashion jeans.
Be warned: pants zippers are tedious and painstaking to replace. What they are not, however, is difficult. If you’ve sewn with zippers before, and you’re comfortable using a zipper foot, you can make this repair.
Here’s what you will need to replace the broken zipper on your pants:
- seam ripper. Spring for a good one that’s comfortable to hold.
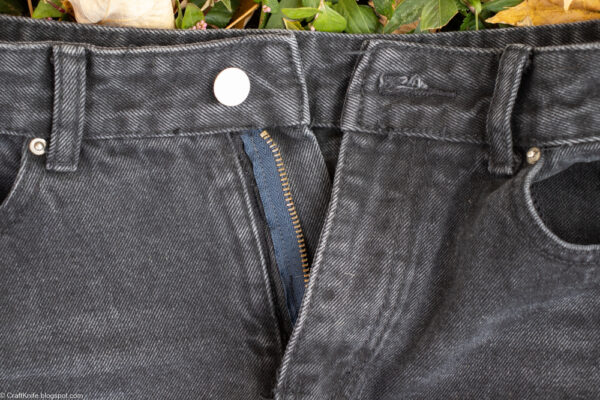
- zipper. For this project, I used a zipper reclaimed from another old pair of pants. It’s navy instead of black, but your zipper really shouldn’t show. To get a perfect match, though, feel free to go ahead and buy new–you’re already an eco-hero by mending this pair of pants!
- sewing supplies. Use a sharp or jeans needle in your sewing machine. You don’t necessarily need that extra-strong jeans thread, though. Sometimes that thread plays havoc with my sewing machine’s tension, so I get out of using it whenever I can. You’ll also need a zipper foot and a regular foot for your sewing machine.
Step 1: Remove the broken zipper.
When I reclaim good zippers from the old jeans in my crafting stash, I seam rip the snot out of every seam in my path. With these jeans, however, you’ll want to use more finesse. Everything that you seam rip will have to be resewn.
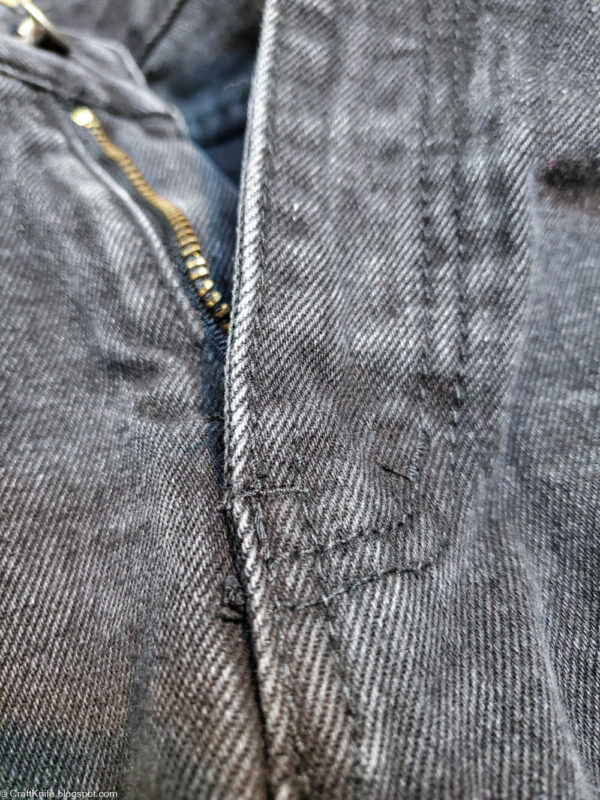
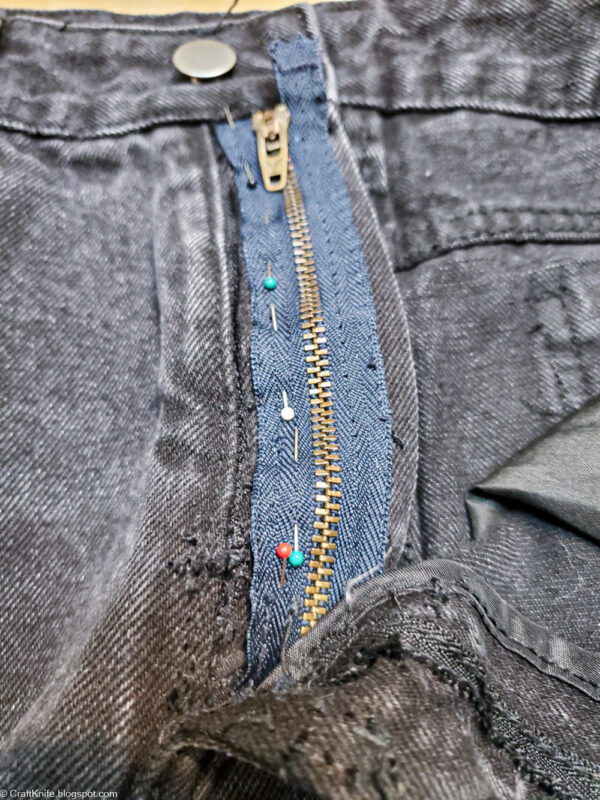
In the above photo, notice the bar tacks at the bottom of the fly. Those stitches are there to hold the bottom of the zipper in place. Carefully seam rip them to expose the bottom of the zipper.
In the photo above, you can see that with the bar tack stitches ripped, you can see the bottom tab of the zipper. You might have to unpick a few more stitches below the tacking to give you enough room to re-sew the new zipper.
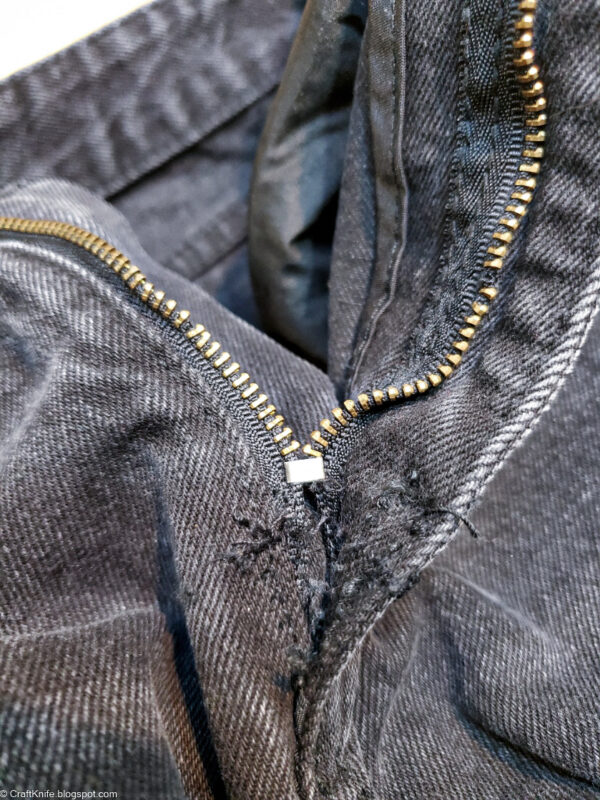
Next, look for the places at the top of the zipper where each side is sewn into the waistband. Again, carefully seam rip enough of that stitching so that you can pull the top of the zipper out of the waistband.

Finally, seam rip down both sides of the zipper.
The polyester fabric that makes up the zipper sides is more fragile than the bottomweight fabric of your pants. When I was teaching you how to reclaim a zipper, I advised you to be careful here so that you don’t unravel the zipper fabric. But now you’re just going to throw that broken zipper away, so unravel to your heart’s content! I’ve seen sewers fray away this side fabric enough that they don’t actually have to seam rip any of these stitches. You might want to do that, too, if your pants fabric feels more fragile than typical bottomweight fabric.
Step 2: Sew in the new zipper.
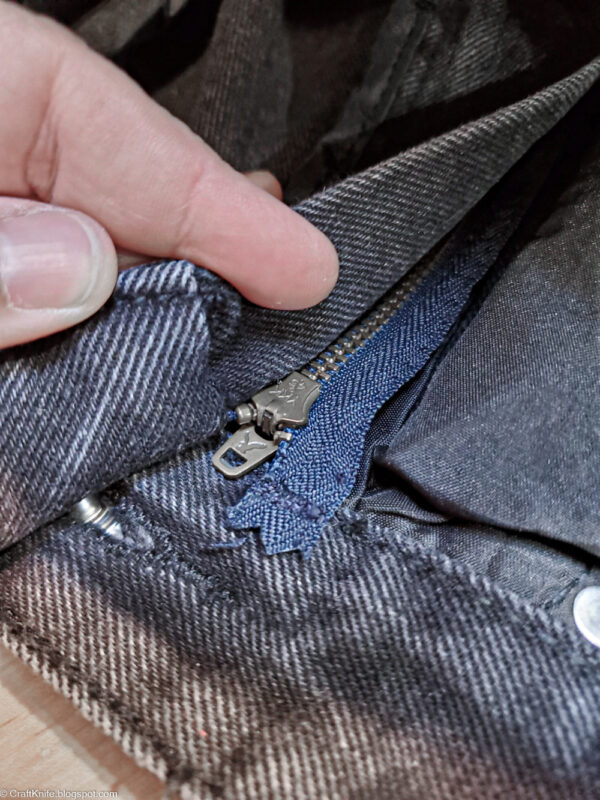
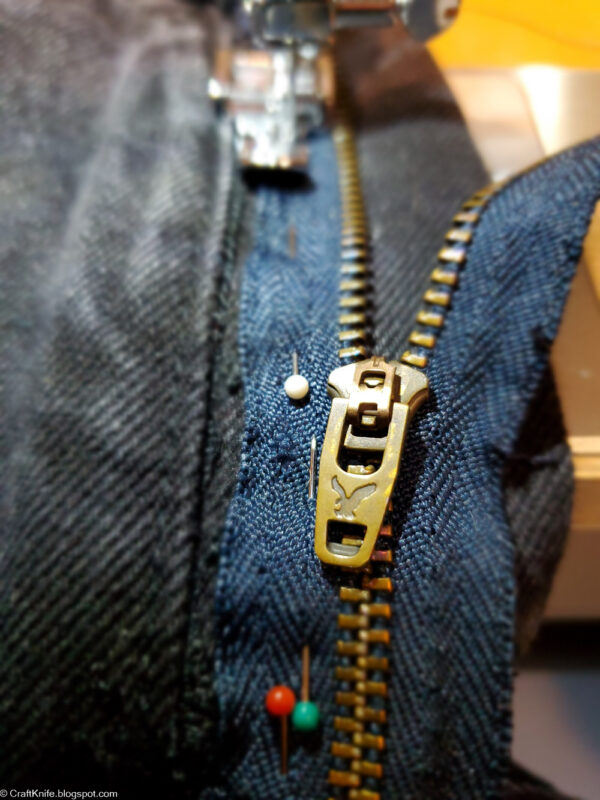
To attach the new zipper in the same place as the old one, first orient it correctly. A backwards or upside-down zipper is not the result we’re looking for! Next, as in the photo above, line up the excess tape at the top of one side of the zipper with the spot in the waistband where it should be sewn in. Use the very careful opening that you seam ripped in the waistband to remove the old zipper tape to guide you.
Insert the top of the zipper tape into that opening in the waistband. Pin down that side of the zipper to hold it fast. Then, stitch over the waistband opening to sew the new top of the zipper into place.
Don’t be afraid to use ALL THE PINS!!!
Install your zipper foot and sew that side of the zipper to the garment.
Now that one side of the zipper is in place, insert the other side of the zipper tape into its waistband opening. Pin that side well, and stitch the waistband closed.

Again using the zipper foot, sew the other side of the zipper tape to the garment.
Pro tip: to get the zipper tab past the presser foot when you’re sewing thick fabric like this, raise the presser foot AND raise the needle until it’s just barely through the fabric, just enough to keep it in place. The higher the needle, the more room you’ll have to navigate the zipper tab past the presser foot.
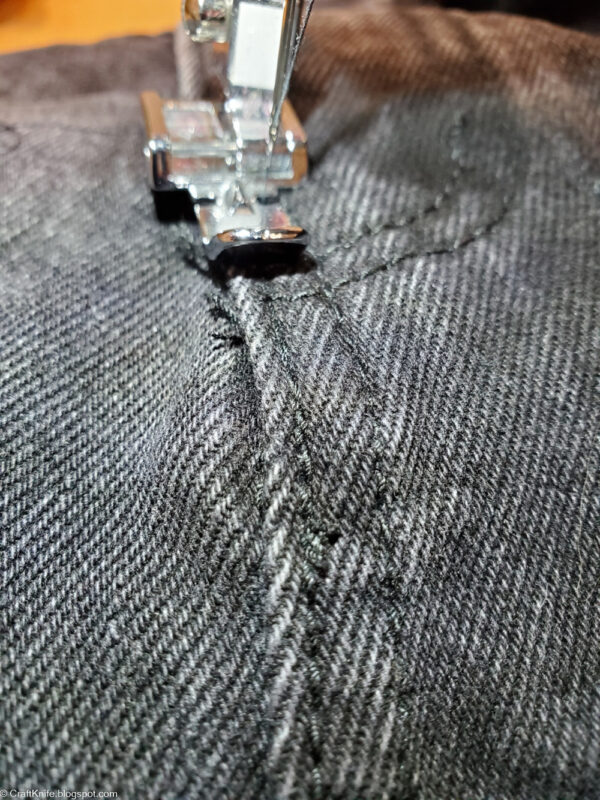
Step 3: Restitch the seams.
Zip the zipper and make sure you’re happy with it. You can even try on the pants at this stage. Just be careful not to further rip that seam ripped stitching that you haven’t yet mended.
When you’re happy with the zipper, re-sew all the stitches that you ripped out at the bottom of the fly.
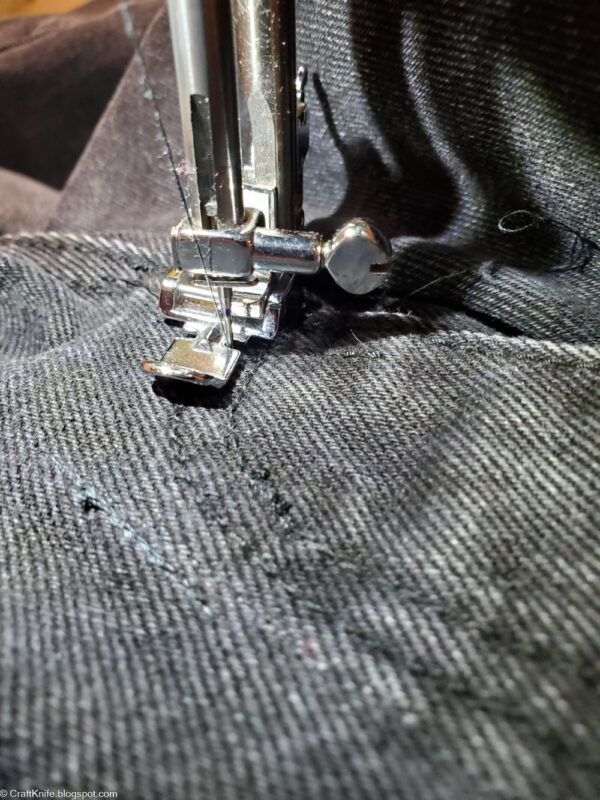
The sewing that you have to do here depends on what you had to seam rip; for me, I had to re-sew the double stitching at the bottom of the fly into the crotch, including sewing new bar tacks at the bottom of my new zipper. I also had to re-sew some of the curved stitching at the fly.
When you’re finished, your pair of pants should be good as new! Go forth and fully enjoy those $90 pants that you only paid $8 for!


