
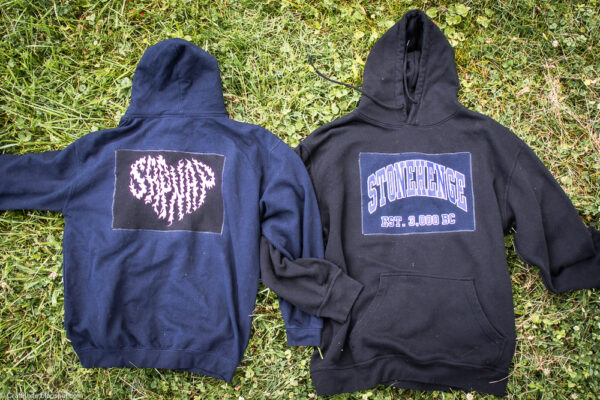
Want to resize a hoodie or reclaim an awesome graphic? Refashion your hoodie by swapping its graphic for something different!
The moral of the story is to ALWAYS try stuff on before you buy it. I’m a fairly standard size XL, so I didn’t bother trying on what I was confident was going to be my new favorite hoodie before laying down 30 whopping pounds for it while on vacation a couple of weeks ago. Instead, I just hugged it to my chest, offered up my credit card, then skipped off to tour Stonehenge!
The temperature in England was delightful for our entire trip, so it wasn’t until I got home and unpacked that I tried on my new Stonehenge hoodie and had a distressing revelation: it was WAAAY too snug! I am 100% side-eyeing English Heritage for their faulty sizing on this one. While I know that some cultures have different standard clothing sizes, I definitely saw other XL British people out and about, so I’m sure it’s not just that my personal XL is not their national XL, ahem.
To prove my point, I had my teenager, size XS, try my hoodie on, and it was perfect for her, slightly oversized and cozy. It was an unlucky coincidence, she noted, because she, herself, had recently also been snookered by a hoodie, but in her case she’d accidentally purchased a size that was WAAAAY too large!
Hmmmm… was there some kind of “The Gift of the Magi”-like scenario going on? Could I somehow swap these hoodies so that we each had our desired graphic in our desired size?
Spoiler alert: I could!
This technique is a terrific way to save the graphic of an outgrown or damaged hoodie, or to refashion a hoodie for more of an on-trend color block look. You could even use this technique to patch a worn spot on your favorite hoodie. You don’t have to do swapsies with two different hoodies the way I did, of course… but you can!
To refashion a hoodie by swapping out its graphic, you will need the following:
- two hoodies. Found a hoodie that is super soft and comfy, but you hate its graphic? That’s the perfect hoodie to refashion for this project! Pair it with any other hoodie that has a graphic you want. You’ll encounter varying fabric weights between hoodies, and that’s okay, but you do want to keep it to a fairly standard sweatshirt-type material. This specific project won’t work to patch in a T-shirt graphic or bit of sweater. If that’s what you want to do, though, let me know–I have ideas for how to accomplish it!
- measuring, cutting, and sewing supplies. Matching thread is particularly important for this project.
- iron-on interfacing. I don’t usually use interfacing in my sewing projects, but it’s essential here. Sort through your stash and use anything lightweight.
Step 1: Measure and cut out the hoodie graphics.
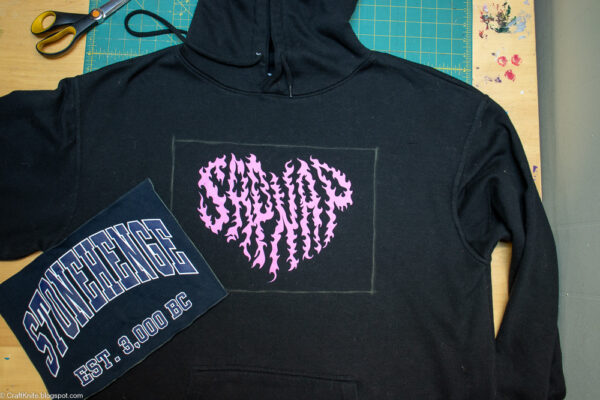
Whichever graphic on whichever hoodie is larger, that’s the one you want to start with. It doesn’t matter if you’re swapping graphics or just transplanting a graphic to a new hoodie.
Cut out the larger graphic, then use it as a template to cut out the smaller graphic. You want the size of each graphic panel to be identical.
Step 2: Use fusible interfacing to set the new graphic in the hoodie.
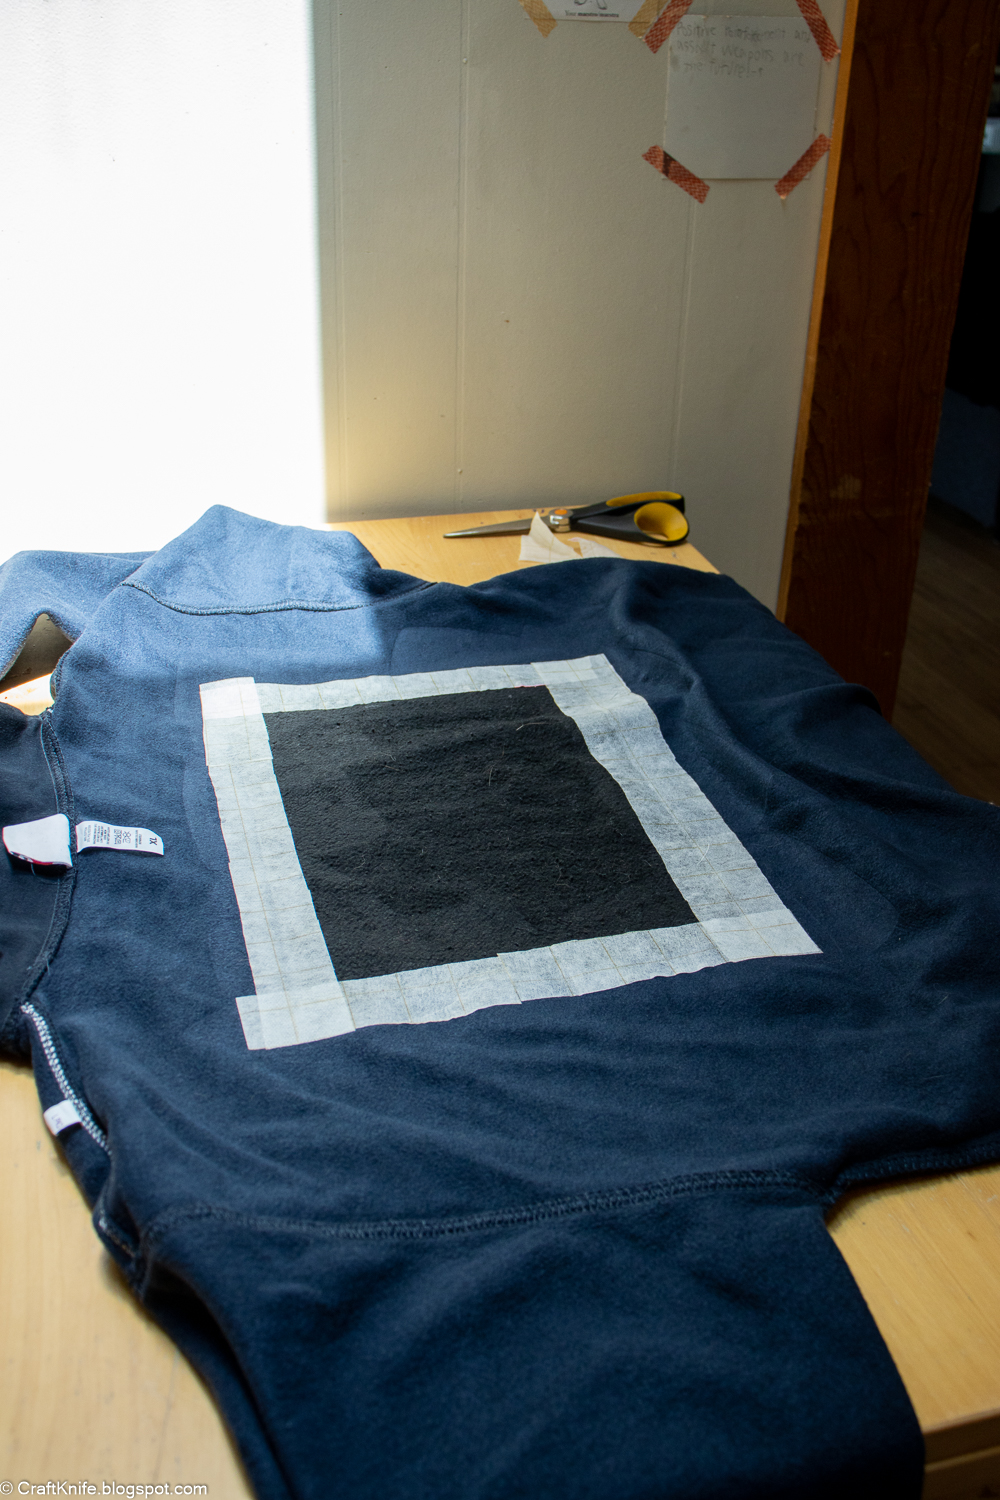
Turn your hoodie inside out, and set the graphic you want to transplant upside-down into the gaping hole left when you cut out that hoodie’s graphic. Line up up the raw edges of the graphic with the raw edges of the opening, with the idea of achieving a snug, perfect fit. Even though you measured super carefully and tried to make them completely identical, you’ll still have to futz the edges together in some spots.
Cut strips of interfacing that are about 2″ wide. Iron the interfacing over the join around the entire graphic–I even overlapped the edges at the corners for additional stability.
When you carefully turn the hoodie right side out, you’ll see that the interfacing does a pretty good job holding the new graphic in place!
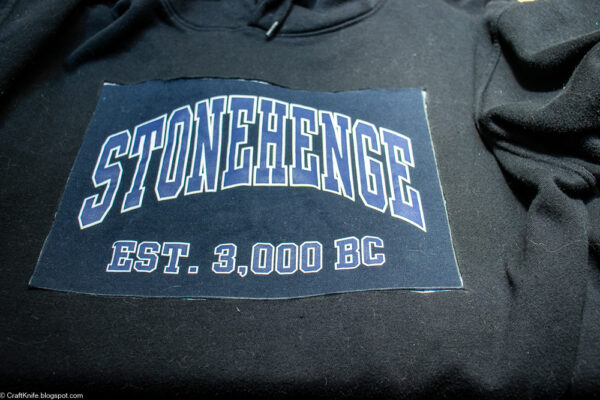
Step 3: Satin stitch the graphic to the hoodie.
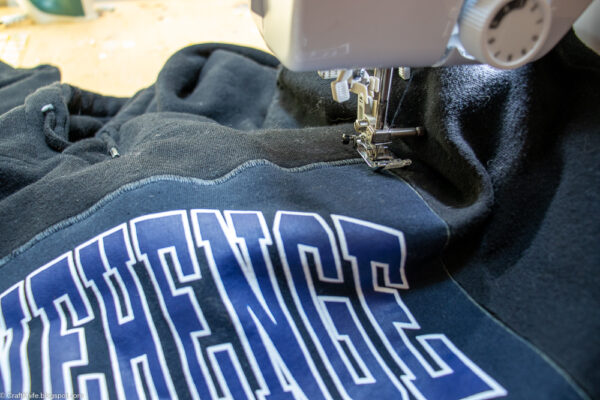
Set your machine to a zigzag stitch that’s very short and very wide. On my machine, I used a length of 1 and a width of 6.
Stitch the graphic to the hoodie, being VERY careful not to push the fabric as it goes under the presser foot–with a length of 1, it will slower than you think it should! The interfacing will help keep the fabric from feeding unevenly, so your job is mainly not to mess it up.
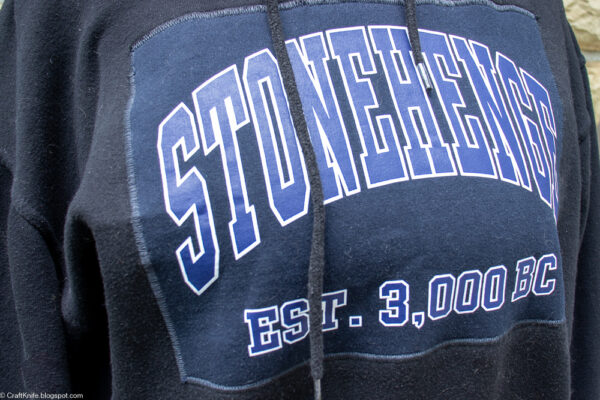
When you’re finished, you’ll have your dream graphic stitched neatly to your dream hoodie! I like how seaming the two pieces together attaches them without bulk. My teenager thinks that the satin stitching makes a nice border to the graphic. I think this was a surprisingly simple refashion project.
And we’re both happy that going swapsies on our hoodie graphics neatly solved both our problems!


