After all that plastic bottle angst, I actually now have a plastic bottle craft that I’ve been loving so much that I’ve literally been begging surplus 2-liter bottles off of friends and acquaintances.
Like, here’s you, a friend of a friend, hosting a lovely barbecue and posting the photos on Facebook.
Here’s me, sliding into your DMs: “Hey, Stranger! I saw you tagged a photo of [Friend] and OMG look how many 2-liter sodas you have on that table! Did y’all drink all those? If so, maybe I can swing by and pick up the empties?”
Last week’s tutorial was a quick and easy way to upcycle a plastic 2-liter bottle into a planter. It’s a great way to use up a ton of bottles in a short amount of time, and the perfect way to pawn off a bunch of Inch Plant cuttings or teach a group how to propagate.
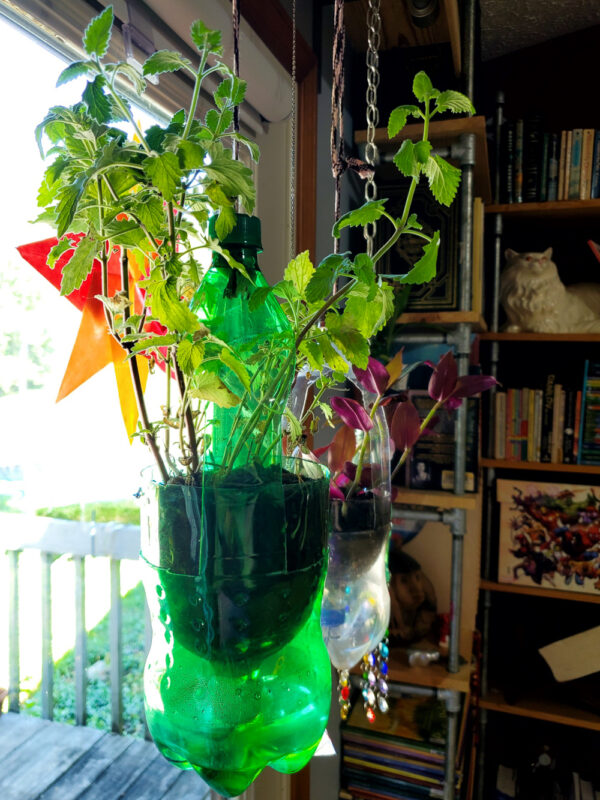
This week’s tutorial is more time consuming and fussier. The result, however, is a much more beautiful and sophisticated way to house a plant. Here, you’ll use two 2-liter plastic bottles to create a hanging planter.
I LOVE the hanging planters that these plastic bottles create. They’re extremely light, so I don’t have to worry about overburdening the curtain rods that I hang a million plants and suncatchers and other dangly things from. They’re self-watering, so I can leave them without worry when I travel. The water reservoirs are transparent, so I can see when I need to refill them.
Basically, I’ve found that I require at least five of these in every sunny window. But if you’d like to start with just one, here’s how to make it!
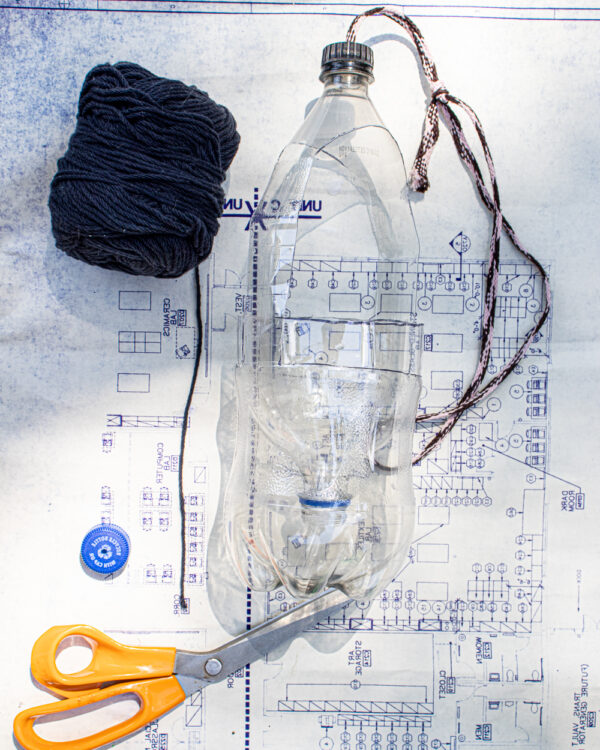
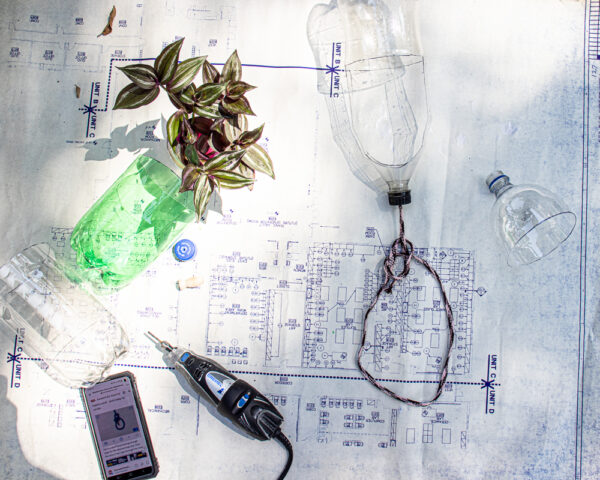
You will need:
- two plastic 2-liter bottles.
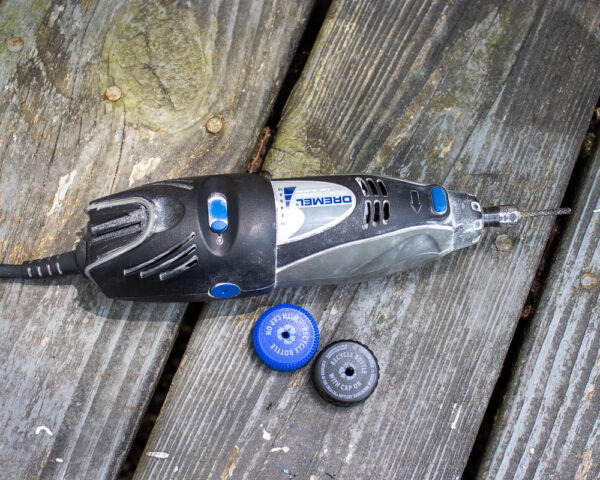
- measuring and cutting tools. I’m using a Dremel with a cutting wheel, but a craft knife or box knife will also work.
- drill.
- cotton yarn.
- marbles, stones, etc. to serve as filler material.
- rope or twine for hanging. I’m upcycling a shoelace, but you can use twine, ribbon, cording, or anything else strong enough to hold your planter.
- plant and potting soil. The plants in these photos are catnip and Inch Plant.
Step 1: Prepare the plastic bottles.
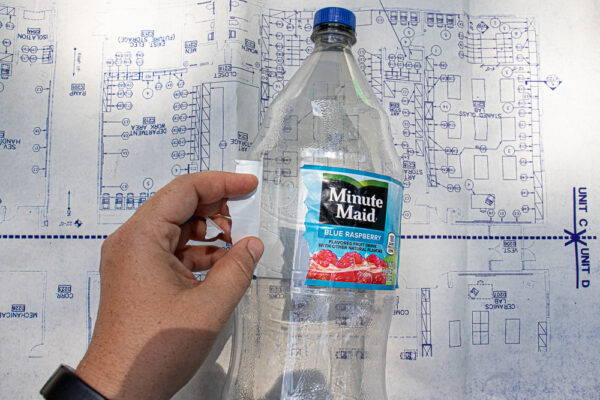
Rinse out both plastic bottles and their caps. Remove the labels and bottle brick them.
Step 2. Mark and cut the bottles.
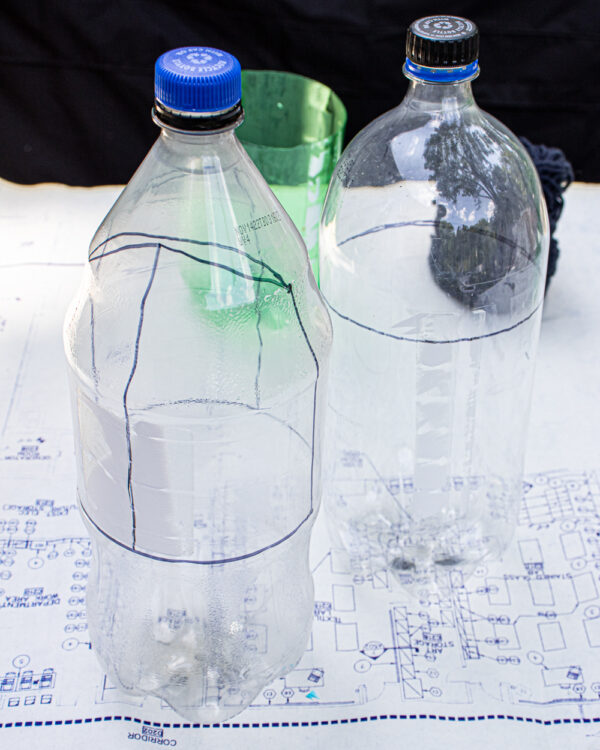
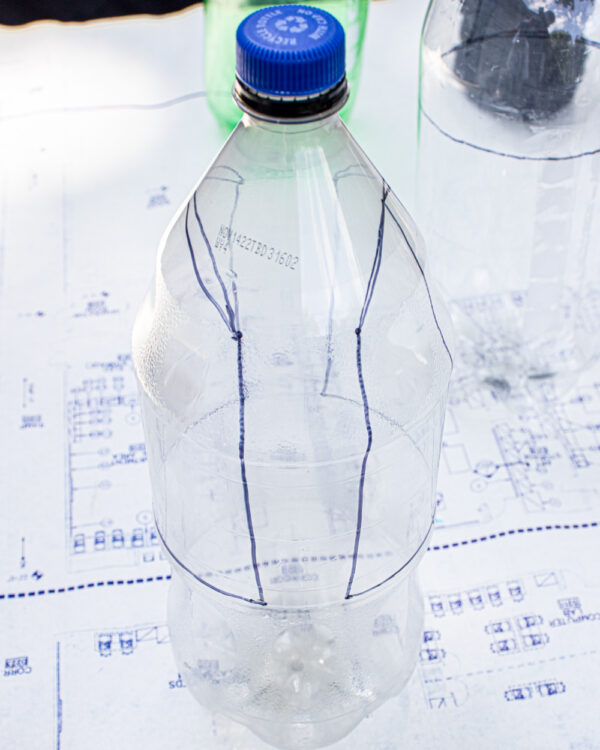
Your hanging planter uses two plastic 2-liter bottles. One bottle serves as the planter’s base. You’ll cut most of the sides away from this bottle, leaving just enough plastic bottle to connect the base to the cap.
To do this, figure out how tall you want the base of your planter to be, and how wide you’d like the pieces connecting the base to the cap to be. In the photos above and below, you can see that I marked a rough arch to indicate the pieces that I want to cut out of the bottle.
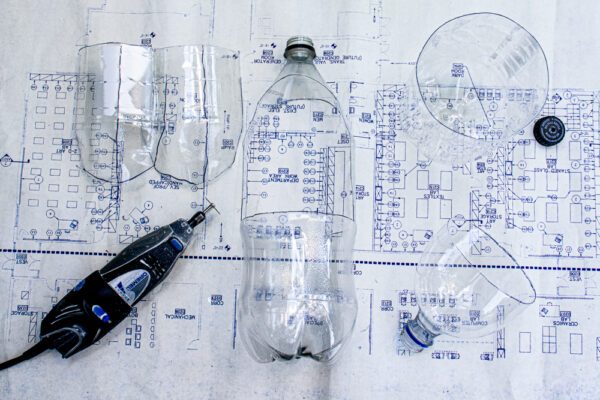
The second bottle is the actual plant pot that will fit into this hanging planter. It will fit upside-down into the hanging planter, with the cap facing down.
To make this pot, measure the distance from the bottom of the hanging planter to the top cut edge of the base. Measure this distance from the top of the second bottle. Then, mark it and cut it all the way around, cutting the top of the bottle completely off.
Use the bottom of that bottle to make a standard planter!
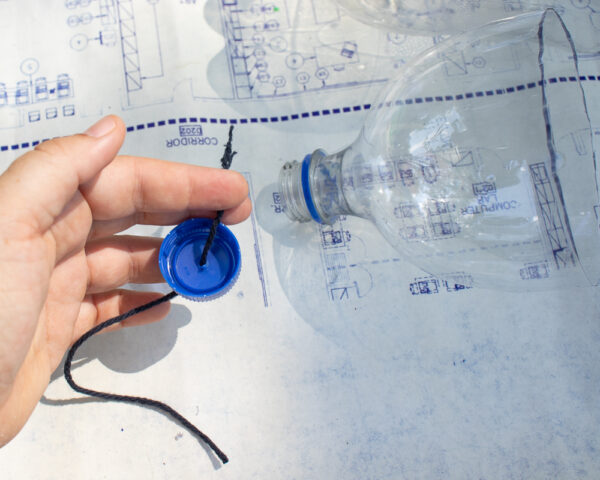
Step 3: Drill holes through the bottle caps.
Both bottle caps will need to have a hole drilled through them. The bottle cap you’ll screw onto the hanging planter should have a hole large enough to thread the cord you’ll be using to hang the planter through. The bottle cap you’ll screw onto the pot should have a hole large enough to thread the cotton yarn through.
Step 4. Attach the hanging cord to the planter.
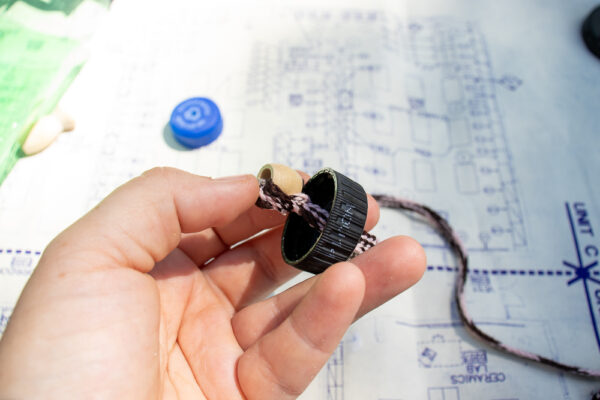
Thread one end of the hanging cord through the bottle cap, and knot it on the inside of the cap. If you prefer, you can knot the cord around a large bead to make sure the knot is large enough not to pull through the hole in the cap.
Screw the bottle cap onto the bottle. Use a bowline knot to create the hanging loop at the other end of the cord.
Step 5: Add the cotton wicking.
Set the plastic bottle pot in the hanging planter. Measure and cut a length of cotton yarn that will reach from the top of the pot to the bottom of the planter.
Thread the cotton yarn through the bottle cap, then screw the cap onto the bottle.
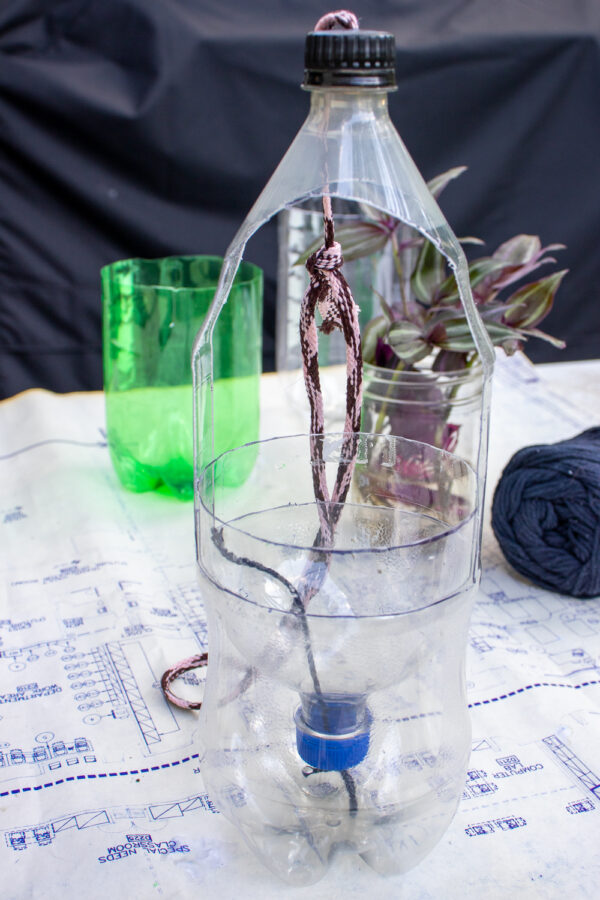
Holding the cotton wicking so it stays in place, fill the neck of the bottle with your chosen filler material.
Step 6. Add the plant.
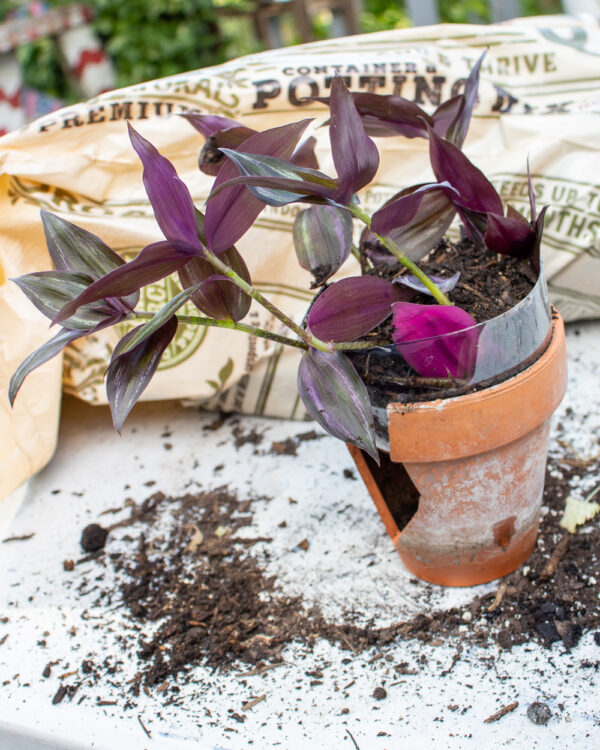
It’s helpful to find something to rest your upside-down bottle planter inside. In the photo above, a broken terracotta pot both works perfectly and illustrates one reason why I am really loving these upcycled plastic container planters!
Add potting soil to the planter, keeping hold of the yarn as you do so to ensure that it reaches the top of the pot.
Finally, repot the plant of your choice. I like any kind of dangly plant for these hanging pots, of course, but I also really like keeping catnip in them. Catnip is… contentious in this household, because my two misbehaving cats have proven themselves to be astonishingly devoted in their pursuit of that magical herb. Growing it in hanging planters that have absolutely nothing nearby to climb on or leap from is the only way to keep it long enough to distribute it properly to said cats.
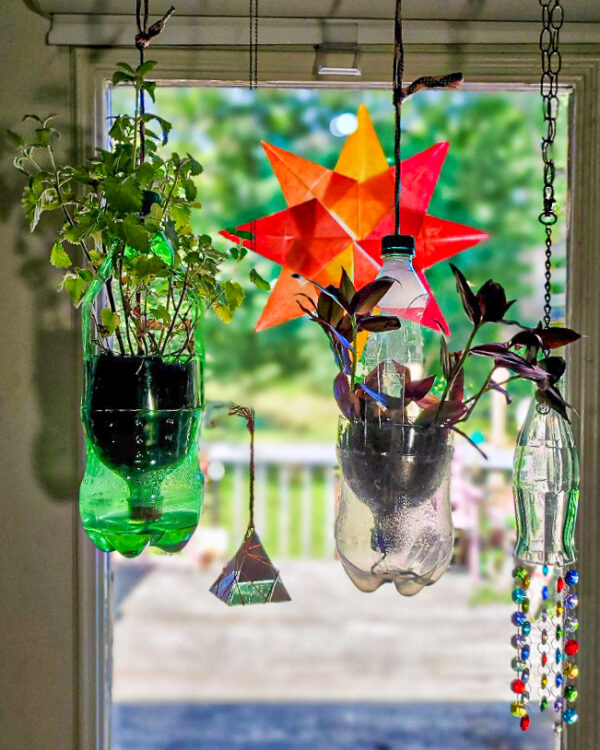
Insert the plant pot into the planter base, guiding the plants leaves so that they have a clear path to grow out of the two large openings in the planter. Add some water, and hang your new planter somewhere sunny!
I’m thrilled with how handy these planters are, and how well they support my goal of having every window in my house concealed by potted plants.
And seriously–if you’ve got any 2-liter bottle empties that you don’t need, send them my way!