
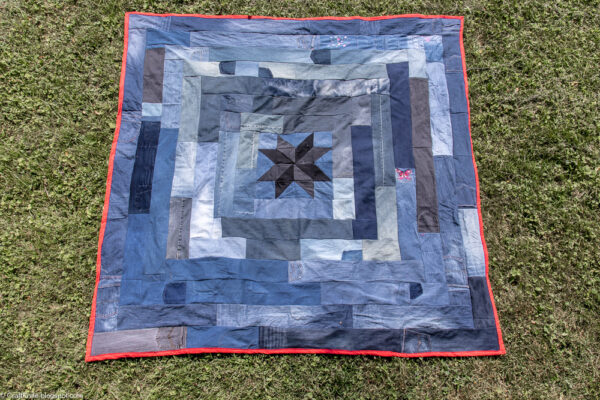
What better summer project could there be than sewing a king-sized upcycled denim log cabin quilt?
I roasted while I sewed all that denim and flannel in the smack middle of June, but I’ll be so comfy this winter!
I’ve had this log cabin quilt sewn from upcycled denim in my mind’s eye for a few years, but it’s the embarrassing state of my fabric stash that finally prodded me into action. I may not have projects in mind for all that quilting cotton and canvas and jersey knit fabric, but sewing the giant plastic bin full of old jeans and that three yards of extra-wide flannel into the quilt of my dreams has certainly made a big dent in my hoard!
Here’s what I used for my quilt:
- soooo much denim. I’ll never lack for fabric to sew with if I can just keep outgrowing my jeans every few years! I’d like to thank Covid and perimenopause for sourcing much of this latest quilt for me.
- extra-wide flannel. I prefer to use thrifted sheets to back quilts, but in this case my thrifting luck deserted me, so I bought three years of extra-wide flannel. At about 108″ x 108″, it was nearly the perfect size to back my king-sized quilt. Just a little bit made it back into the fabric bin for later! The big box fabric store near me has a decent selection of extra-wide fabrics–I can at least get the color I’m aiming for, if not an exciting print.
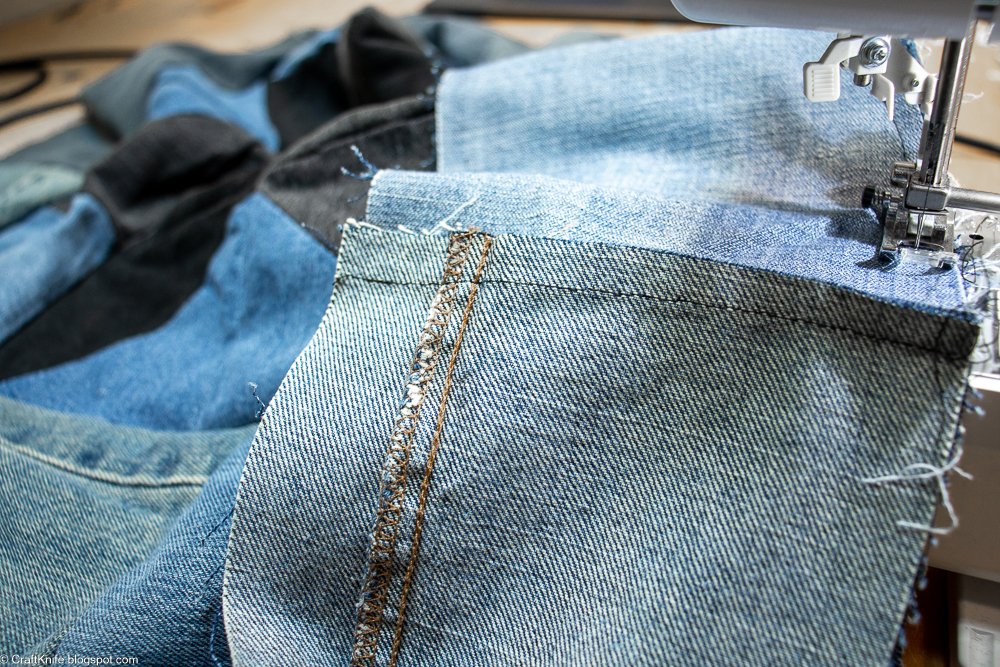
- measuring, cutting, and sewing supplies. You need a sturdy machine to sew over all those denim seams, and a sharp sewing needle.
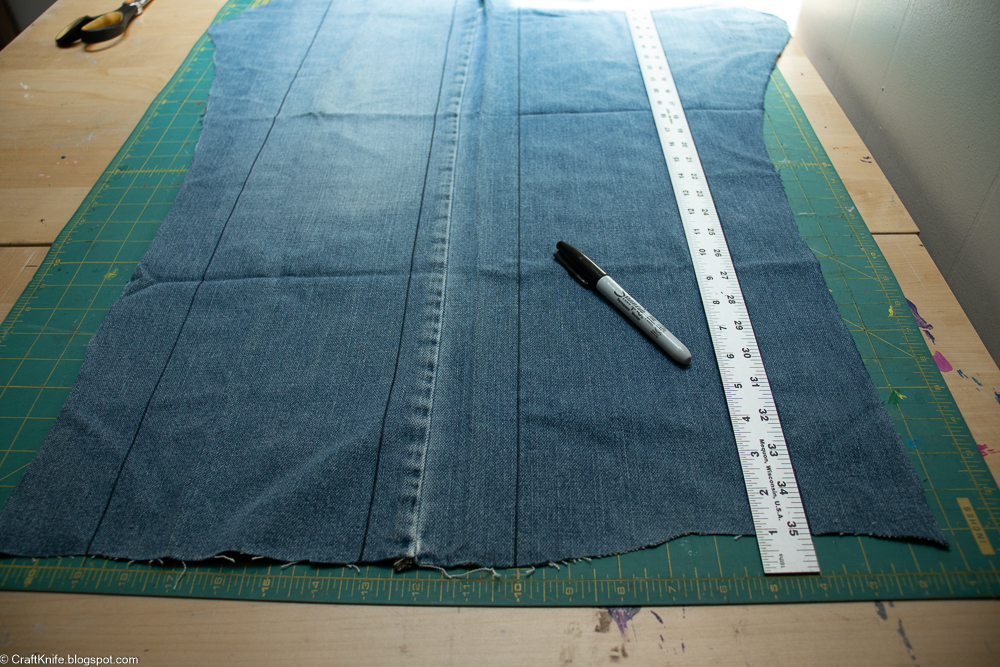
Step 1: Measure and Cut Log Cabin Pieces
The beauty of sewing a king-sized quilt is that it can be a giant square–anywhere between 90″ and 110″ looks good and fits the space well.
For a log cabin quilt, this means that you can sew the entire quilt as if it’s one giant log cabin quilt block!
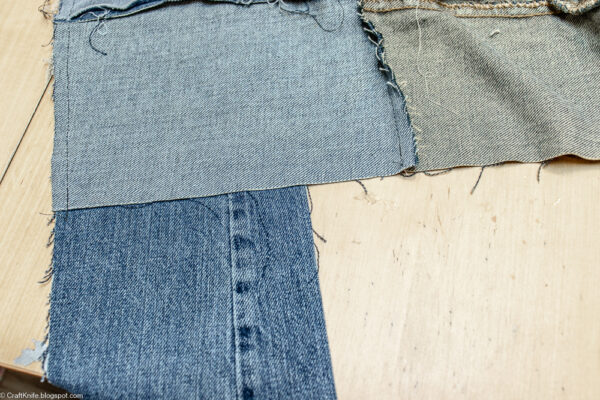
Because I’m the laziest, I wanted to make my strips as wide as I could get away with. For the jeans I’ve got in my stash, 6″ wide was a good choice, resulting in the least waste and looking proportionate in the oversized quilt. But of course the beauty of a log cabin quilt is that you can be really creative with it, so feel free to have fun with your sizing.
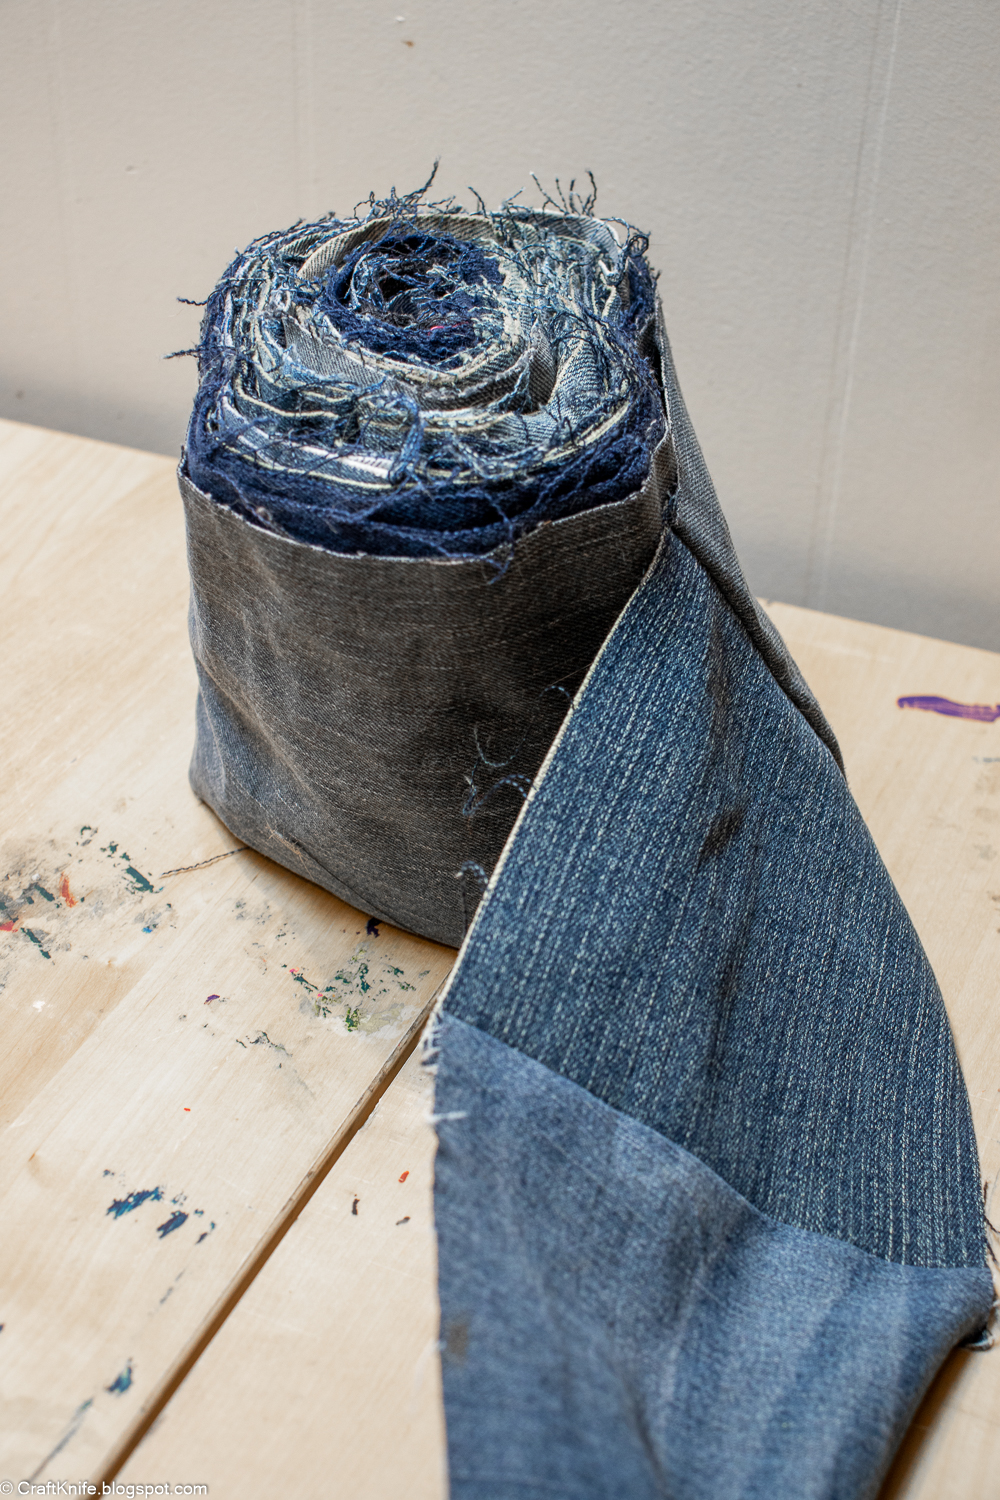
When I had a huge stack of strips, I sewed them all into a single strip, short sides together. Because the denim was all different weights, I finger-pressed each seam to the side that felt thinner or lighter… or, tbh, just in the direction that it seemed to want to go. No reason to stop being lazy now!
I can’t even tell you how many pairs of jeans I used in this quilt, but I got through a lot of podcast episodes just cutting log cabin pieces!
Step 2: Sew a Center Panel (Optional)
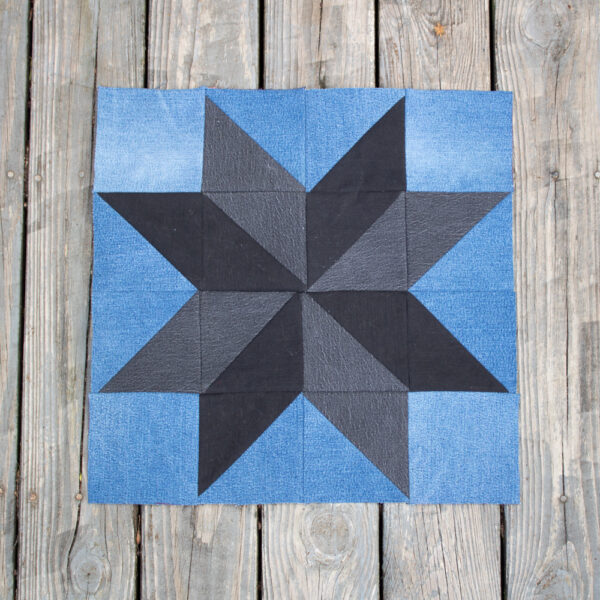
You don’t have to have a special center panel for a log cabin quilt, and when I first sewed this half-square triangle from upcycled denim, I thought that it would be a pillow front. But sometimes items change their purpose when they’re on my sewing table, and this one became the center panel for my quilt!
Step 3: Piece the Oversized Log Cabin Quilt Block
I sewed my pieced strip around and around my center panel, cutting the strip even at the end of each seam and beginning it again on the adjacent side.
This quilt would have had more of a log cabin look–and a really stunning one, too!–if I’d used a single color per strip, but that would have taken a lot of effort to sort my denim by color, and as I’ve mentioned, I’m the laziest!
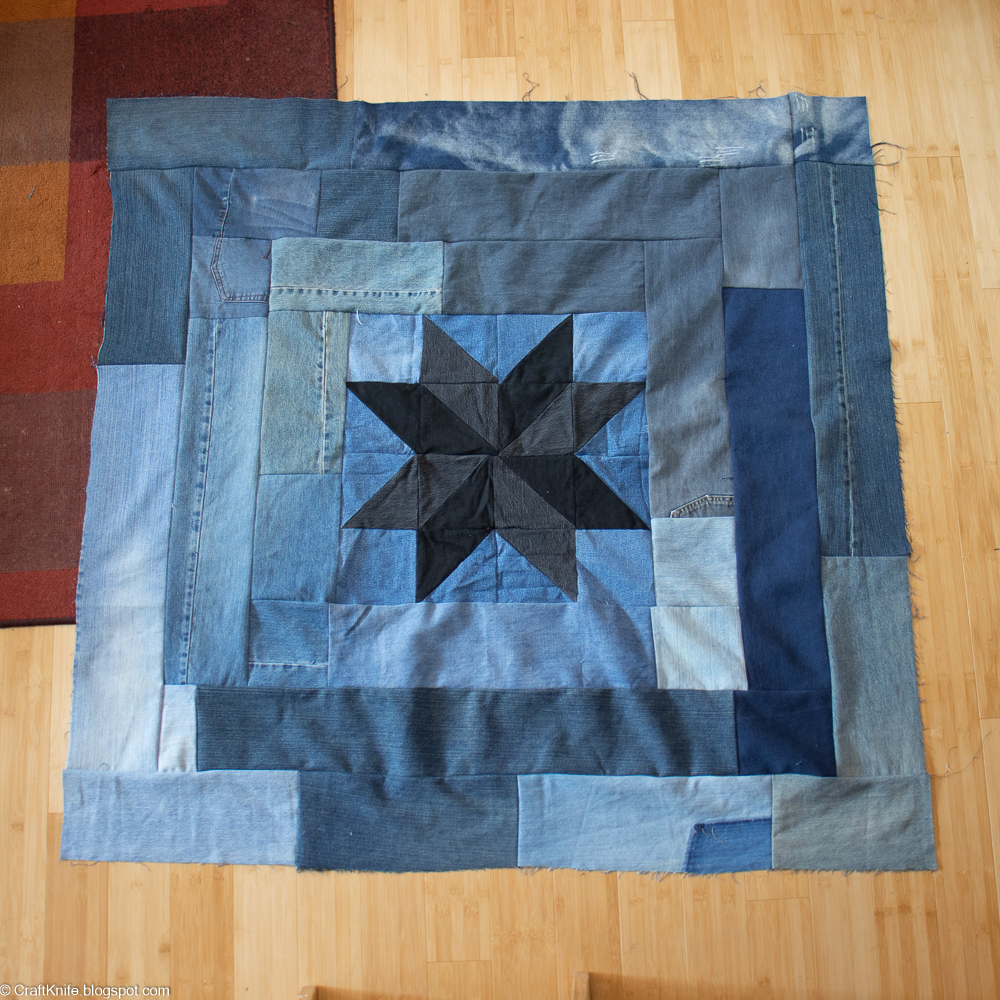
At the end of every podcast episode, my favorite thing was to lay the quilt out to see how it was growing.
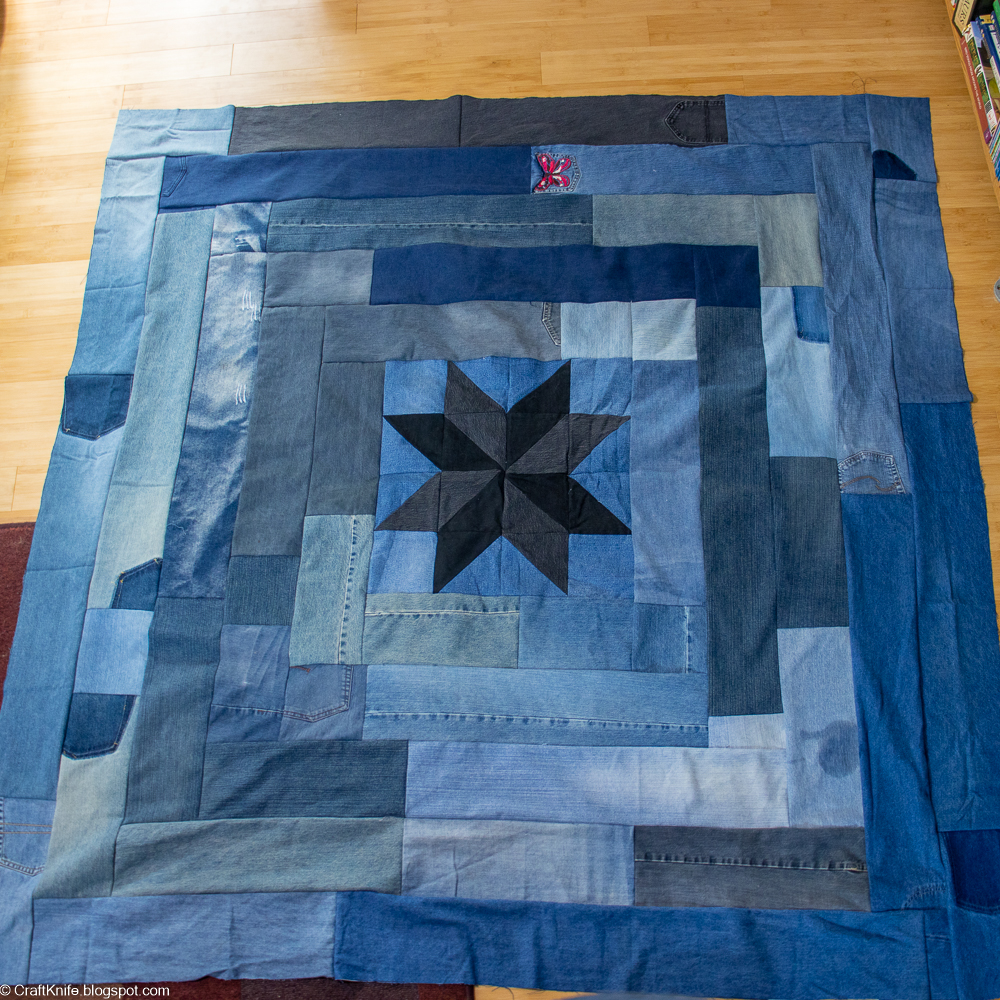
When it got to the point of having to move furniture to make it fit, I knew that I was almost done!
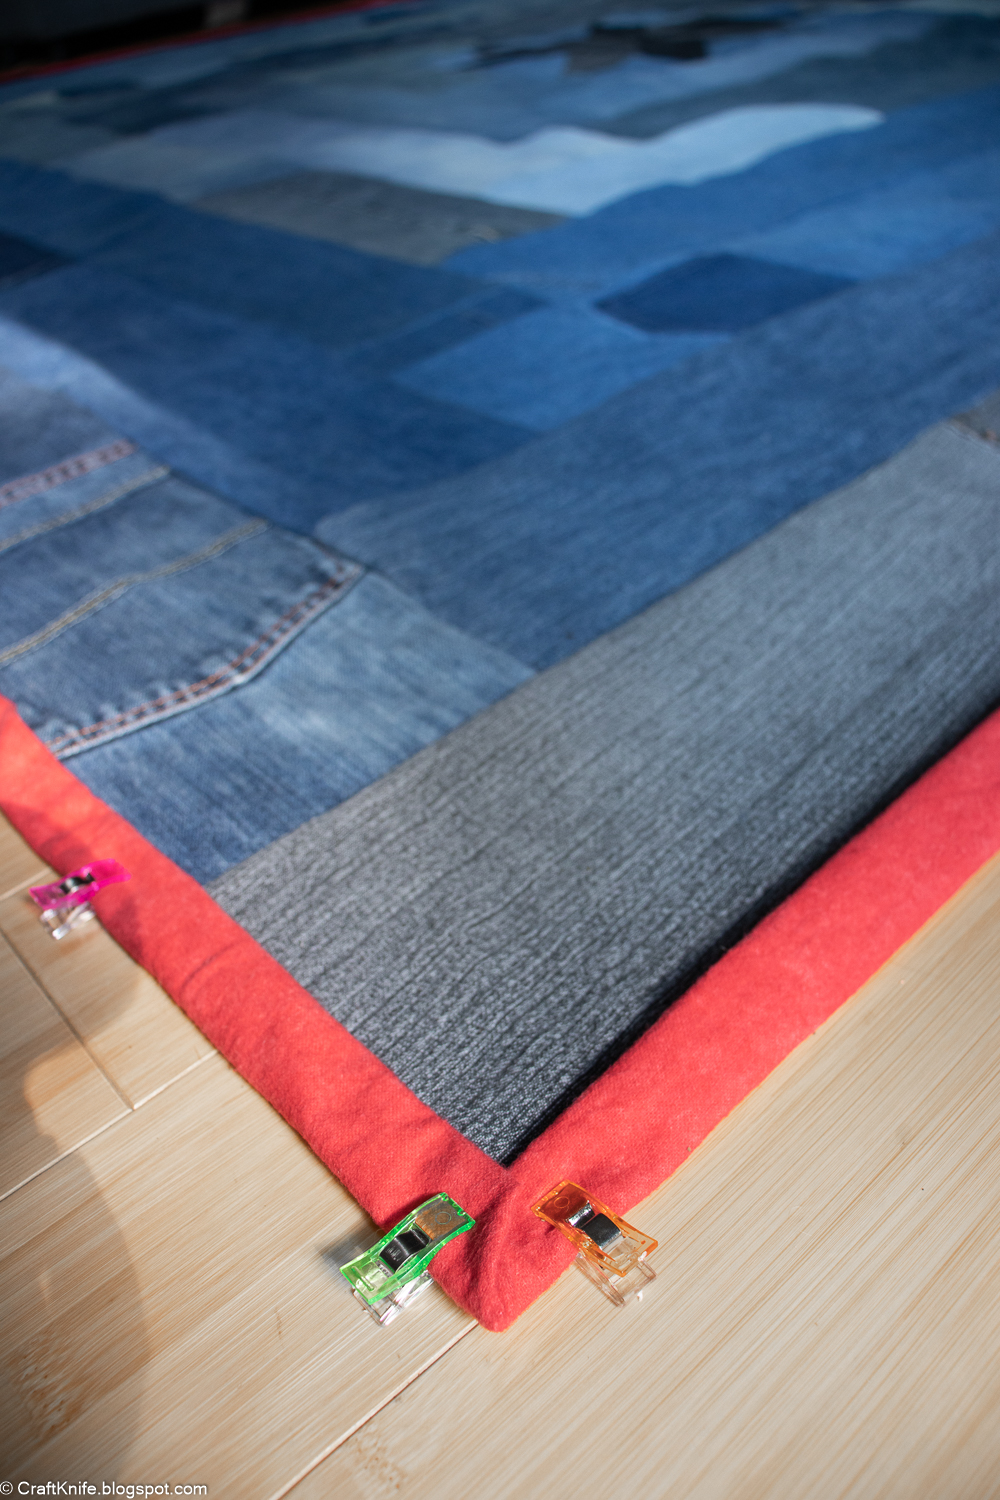
Step 4: Add the back and binding.
I am in the process of working through my sadness that I didn’t actually quilt this, so don’t make me feel worse about it. I even had a cute design in mind, but my at-home sewing machine can only do so much! By the time I finished this, I wasn’t sure if I could even fit the entire thing under my sewing machine anymore. Next time, I’ll think through some kind of quilt-as-you-go method, perhaps.
As it was, my family had to help me move half the furniture in the family room to make space for me to lay down the flannel fabric, tape it taut, lay the quilt top over it, trim the backing to 2″ past the quilt on all sides, then double-fold it around the quilt and pin it.
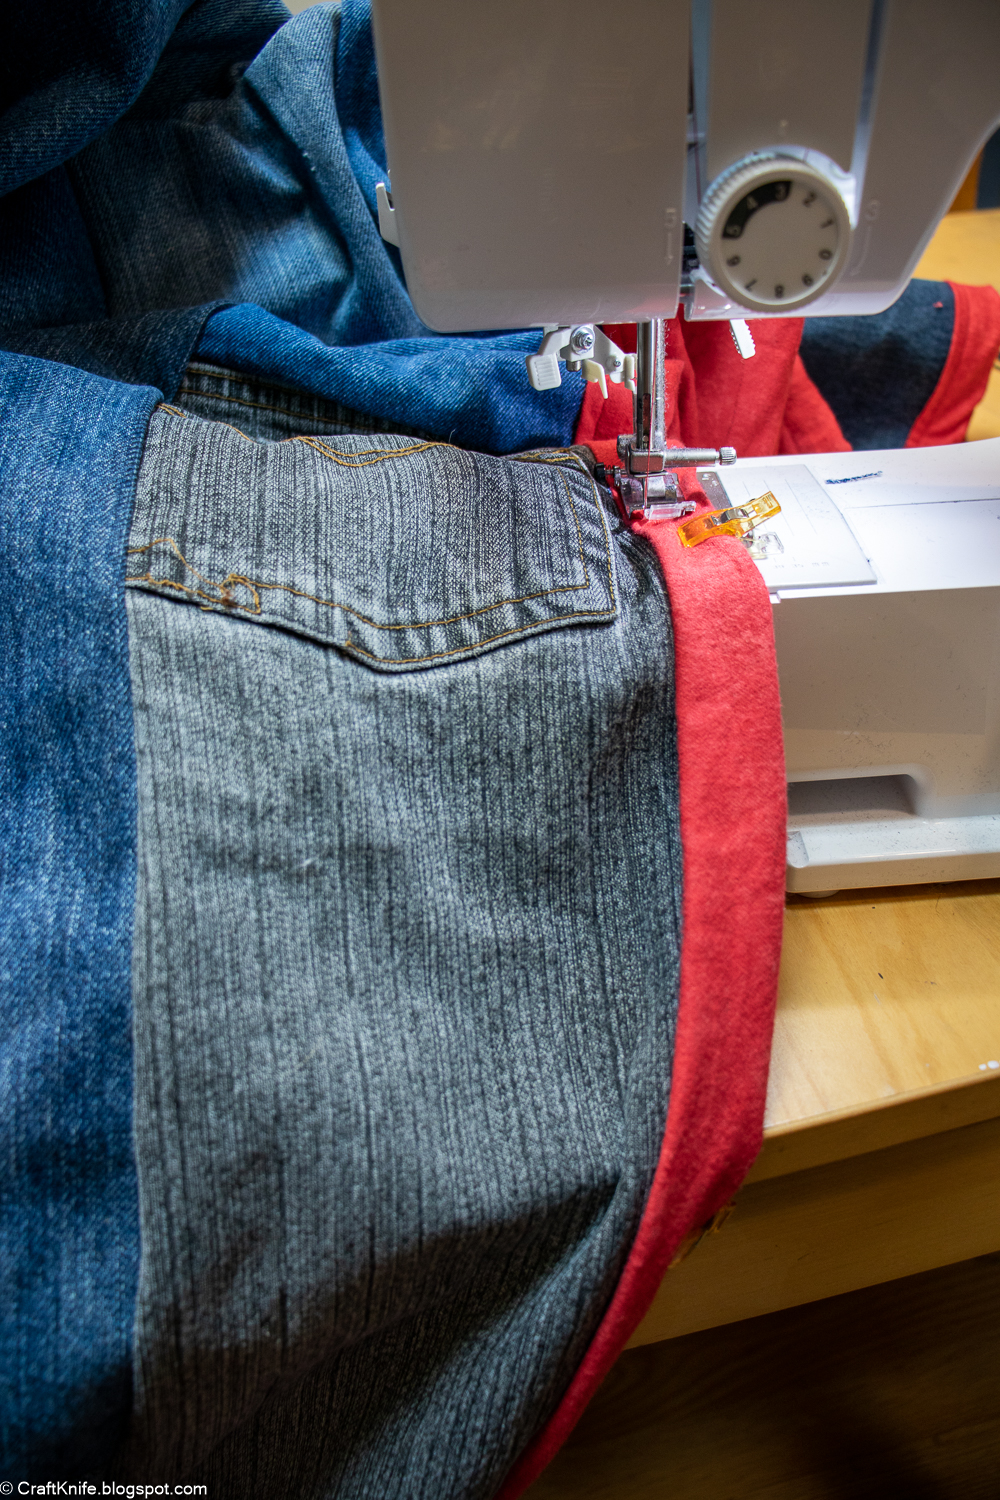
Four more straight seams later, and the king-sized upcycled denim log cabin quilt of my dreams was done!

I should probably be more careful of it considering how much time I put into it, but I believe that quilts are meant to be used, and this giant quilt DOES make an excellent summer picnic blanket! It’s super heavy and warm, too, so I’m excited about using it this winter.
My new goal is to think up some throw pillow covers that I can also sew from upcycled denim, but that won’t be so matchy that it looks too country… Pixelated skulls, perhaps? Or maybe monograms?


Thanks so much for your ingenious log cabin quilt idea. I LOVE IT! I’ve been storing old denim for about 30 years and you inspired me to get my quilt done! When my friends saw what I was doing, they brought over old Levi and Lee tags for me to add. I used lumberjack red and black check flannel for the back. Where we live, we jokingly call jeans and a ‘jack shirt a “Surrey Tuxedo”! You said that this was the lazy way to make a quilt, but I’ve always said there is a very fine line between lazy and efficient! The height of laziness . . . I used jean studs to quilt it, instead of hand- or machine-sewing. Now I just need my husband to buy me a cabin on a lake to go with my quilt!