
After decorating the dishes, let the marker cure for 24 hours, then put them in a single layer in a cold oven. Preheat the oven and bake the dishes for the time and temperature noted in the ceramic markers’ instructions.
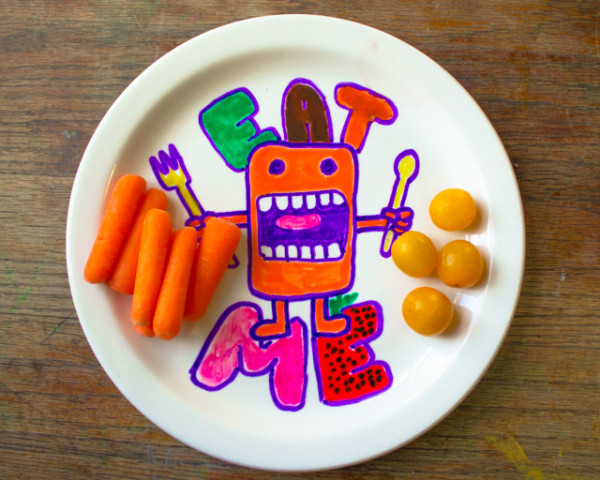
Once the dishes have been cured, baked, and cooled, they’re ready to enjoy.
You’ll definitely want to use ceramics markers for this project. I’ve seen some projects floating around the internet that use baked-on Sharpies to decorate coffee mugs, but I don’t get why. Ceramics markers are designed to be baked on, whereas baking on Sharpies is more of a DIY hack, and it doesn’t always work. I’m not super skeezed out by weird chemicals, but I know that many of YOU are, and although I’m not writing about the chemical make-up of various markers here, I’m just going to assume for the moment that a set of markers that is designed to be baked onto foodware is safer to use than a set of markers that is not designed to be baked onto foodware.
Anyway, off my soapbox.


That is such an awesome idea. Cant wait to try it out with my daughter.
Pingback: Crafting a Green World | The home for green crafts and tutorials!