
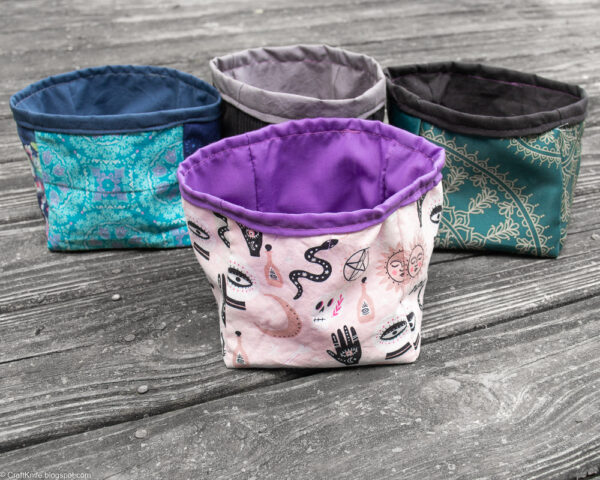
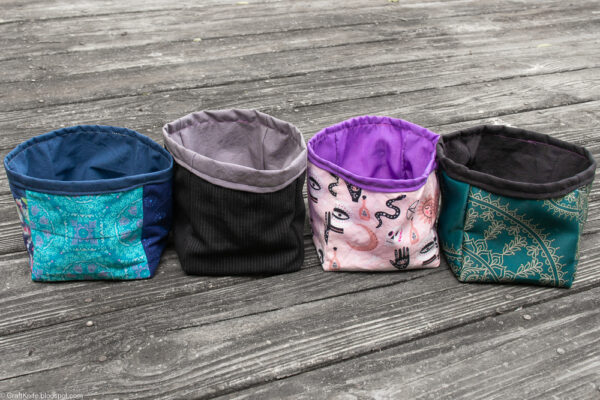
If you have enough fabric baskets to hold all your stuff, then obviously you don’t have too much stuff!
So what if my solution to my minor tendency to hoard interesting rocks, empty thread spools, soda can pull tabs, and pretty matchbooks is just to toss them into these beautiful sewn fabric baskets? The stuff is out of the way, attractively stored, and if one day you really need me to make you some pull tab chainmail, I will be able to get right to it!
These fabric baskets are purposefully a bit on the droopy side, because I don’t like to sew with artificial materials like interfacing. A little interfacing or even cereal box cardboard would firm them up, though, if you prefer that look. I like my baskets to look as slouchy as I am!
To make these baskets, then, you won’t need interfacing, but you WILL need the following:
- five 6″ squares of outside fabric. I generally use quilting cotton for this, although I’ve also upcycled some curtain fabric that was definitely some kind of polyester, and it turned out beautifully.
- five 6″ squares of lining fabric. Quilting cotton is also great for this, but I’ve also used old bedsheets or other random yardage in my stash.
- cutting and sewing supplies. I know it’s just one more thing to buy, but I finally gave in and bought myself some of those plastic sewing clips that are on trend. I’m not as obsessed with them as Tiktok, is, and they’re a lot less eco-friendly than the steel pins that were good enough for your granny, but I WILL say that I never again want to sew binding without them!
Step 1: Cut the outside and the lining fabric.
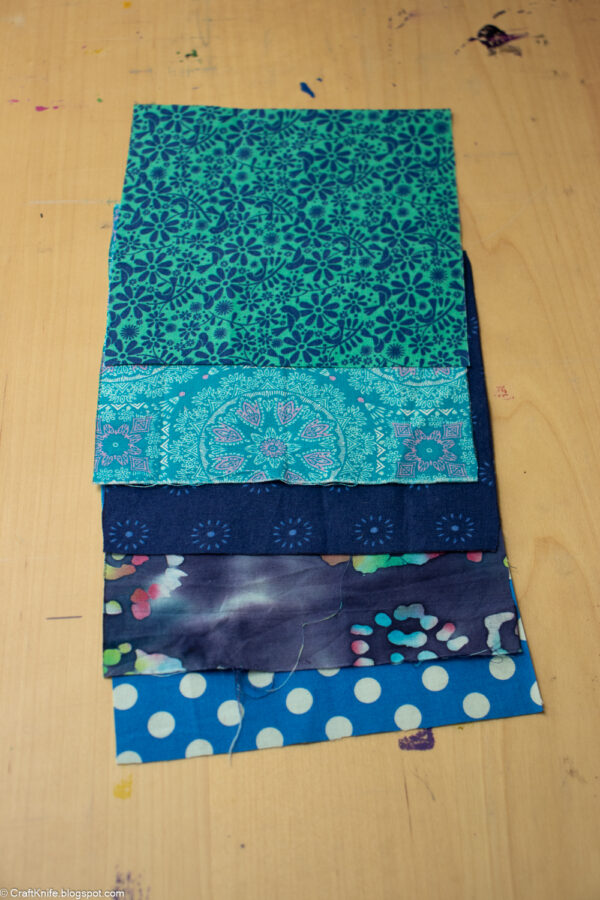
Cut five pieces of fabric that are 6″ square for the outside of the basket, and another five pieces for the inside. Arrange your pieces like this:
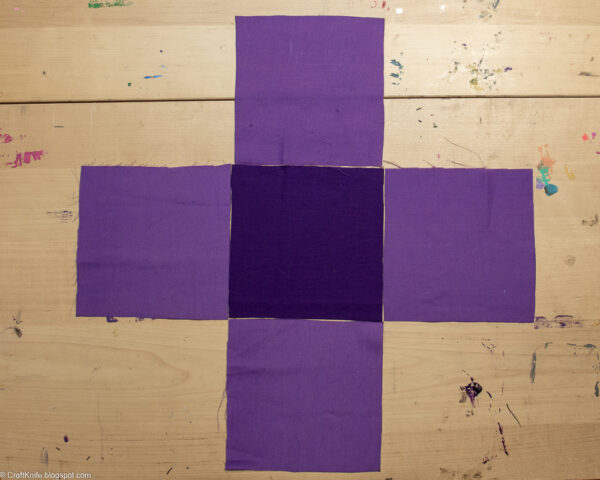
If you’ve ever in your life done any math, then right now you’re asking me why you have to cut five different squares of fabric for these baskets, when obviously you could just cut one piece of fabric three times that length and save yourself sewing two seams.
The answer is that 1) I own a 6″x12″ gridded quilting ruler that I’m obsessed with and all I do all day is think of things to cut that are 6″ or 12″, and 2) the seams help the basket have crisper edges. If you want to save yourself a couple of seams I won’t stop you, but your basket won’t look as cute.
Also, if you’re sewing a print fabric, like my pink one in the finished photos, you can rotate each piece so that its aligned in the proper direction before you sew it. No upside-down prints on YOUR baskets!
Step 2: Sew the pieces into a T-shape.

In order to make these baskets look the best, you need to be REALLy precise with your seams here. If you have trouble sewing a perfect seam, consider drawing yourself a sewing line in washable ink.
You will sew each piece with a precise .5″ seam, and you will start and stop precisely .5″ from the end of each edges. I know it’s fiddly, but your baskets will look soooo nice this way!
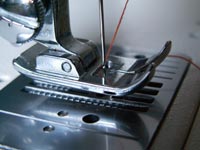
Ironing each seam open also really helps you sew precise seams on those cross-pieces. In the photo below, the stitching line is my starting point for sewing a cross-piece. At the end of the seam, the other stitching line is my stopping point!
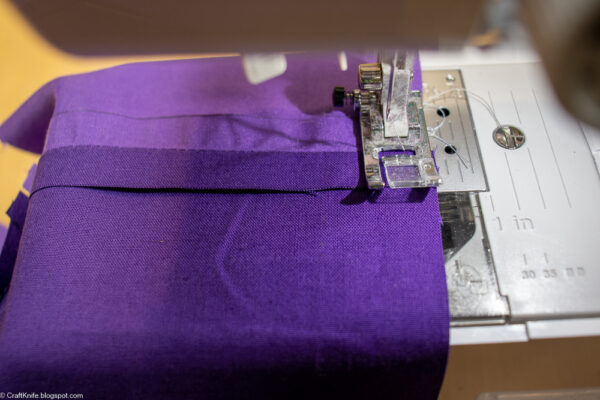
Do this for both the outside fabric and the lining fabric, until you have two perfect T pieces.
Step 3: Sew adjacent sides together to form a cube with an open top.
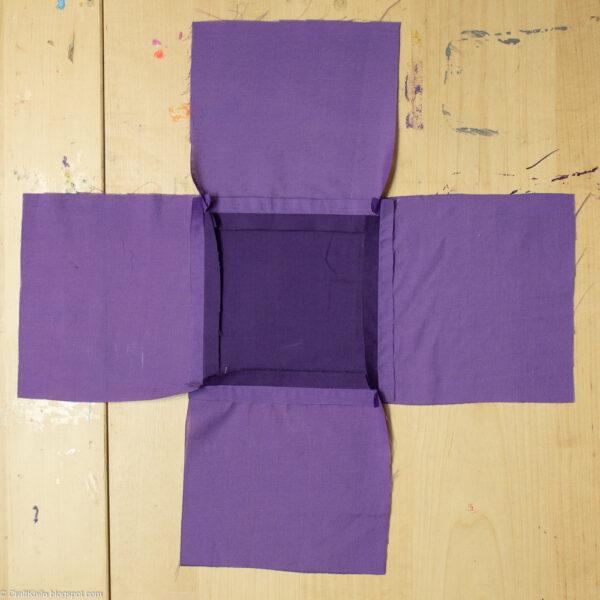
Sew each adjacent side together, again with a .5″ seam allowance. You can start sewing right at the top of each seam, but down at the corners, stop again .5″ from the end. If you’ve been really precise sewing your T, you will see exactly where to stop stitching, because that’s where all the stitch lines will meet. If you overshot on a piece or two, though, just snip the stitches that went too far.
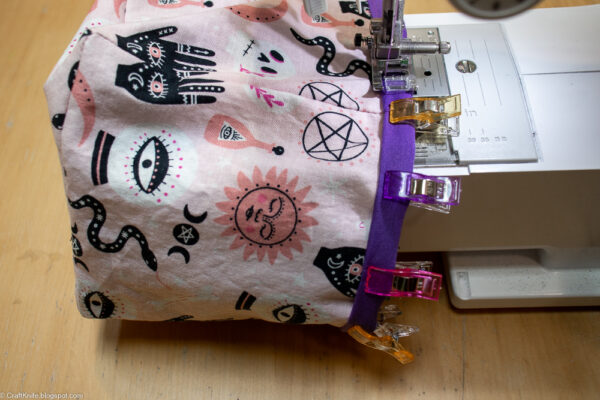
Step 4: Insert the lining into the outer fabric and sew a fold-over binding.
Insert the lining fabric into the outer fabric, wrong sides together. Make sure the corners match and that the seams are lined up.
Fold the top of the lining and the outer fabric over twice, so that the raw edges of both pieces are enclosed. Two .25″ folds will give you a perfectly square basket, but feel free to fold them over more if you’d like a shallower basket and a wider binding.
Pin the binding well with the pin or clip of your choice!
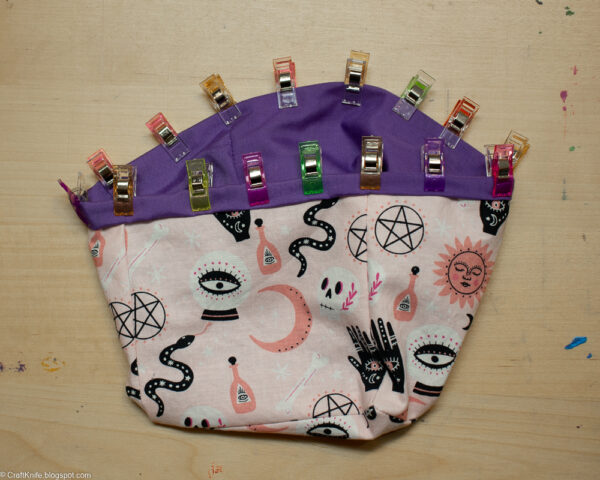
Edge stitch the binding in place.
These sewn fabric baskets are so quick to make that they’re an easy way to give some handmade love to your loved ones. Every now and then I’ll surprise one of my teenagers with a new little basket that matches their room decor, and that homemade matching game that I made a few weeks ago was lovingly packed into its own little fabric storage basket when I sent it to my niece.
The most important use of the fabric baskets, though?
Holding all my pull tabs, empty thread spools, interesting rocks, and best bits of sea glass, of course!


I too love the little plastic clips but once when I was at my daughter’s without them, I found steel hair clips that worked well as a substitute if the plastic guilt gets to you.
GASP, that is so smart! Thank you! And I bet steel hair clips come in a variety of sizes, too, which would be even handier!