Socks don’t have to be disposable. A well-made sock can stand up to a lot of wear, and when a hole does finally work its way through, then you can darn that sock to make it even better than it was when it was new.
Here, I’ll show you how I darned a pair of my eight-year-old wool hiking socks using embroidery floss and a blunt needle. Follow the same process with socks made from cotton or bamboo, although you’ll want to change the weight of your floss or thread to match the fabric. It’s especially fun to darn super thick and cozy socks, because you can usually use fluffy yarn!
Materials
- socks to be darned. Sturdy, thick socks are the best candidates for darning, although feel free to experiment. Rips, holes, and worn spots are all types of damage that you can mend by darning.
- embroidery floss, yarn, or thread. I use embroidery floss to darn lighter-weight hiking socks like these. Match the floss to the fabric to make your darning practically invisible. I prefer, though, to contrast my floss color so the darning stands out–I think it looks cute!
- spherical object. You don’t own a darning egg. Heck, I darn pretty regularly, and *I* don’t own a darning egg! What I do own, however, are baseballs, Christmas ornaments, and large wooden Easter eggs. Any of those can be used in a pinch. If you don’t have any of those, use an apple or an orange!
- floss or yarn. Embroidery floss is my weapon of choice here.
- blunt needle. Honestly, any needle will do, as long as the eye is large enough for your floss or yarn. Since you’re not doing much actual stitching, though, a blunt needle is a good choice.
- scissors. Snip the extra floss off or it will bother you forever!
Step 1: DIY Darning Egg
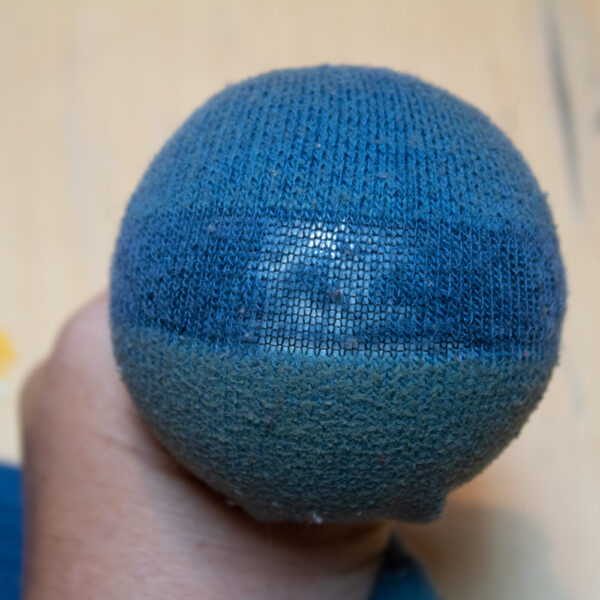
Insert the DIY darning egg, whether it be a baseball or a Christmas ornament, into the sock. Push it down to the spot you want to mend, and pull it tight. You can tie the sock off with a rubber band, but it works best just to keep it stretched with your non-stitching hand.
Step 2: Running Stitch
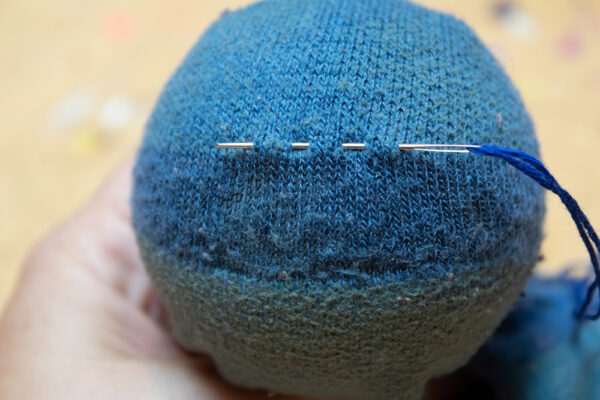
Thread the needle and sew a running stitch around the perimeter of the flaw. Leave a tail on the floss for later.
Pro tip: be careful to sew the running stitch into undamaged parts of the sock around the damaged area. Your running stitch is your anchor, so you want it anchored in sound fabric.
Step 3: Warp
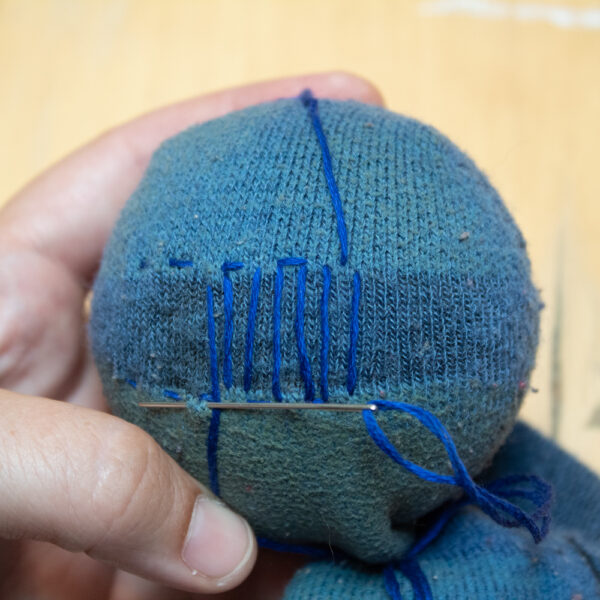
Using the running stitches as a guide to keep your spacing even, begin to stitch warp threads back and forth across the narrower distance to be darned. Do this all the way across the damaged area.
Step 4: Weft
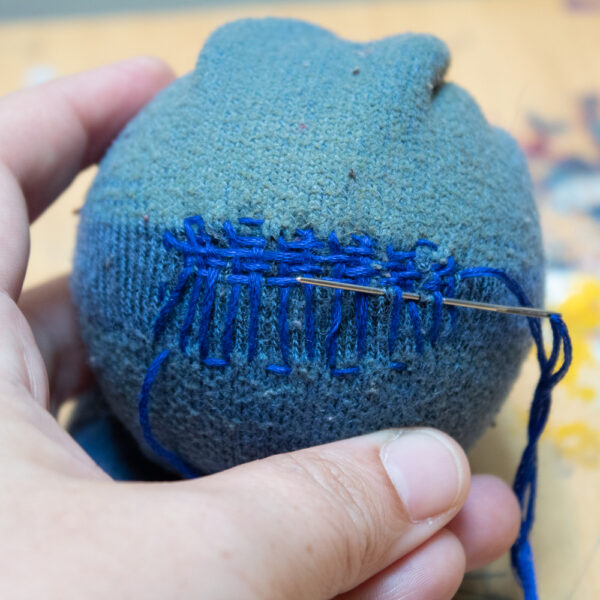
After you’ve finished stitching the warp threads, don’t cut cut or tie off the thread. Instead, use the needle as a shuttle to help you weave weft threads over and under the warp threads.
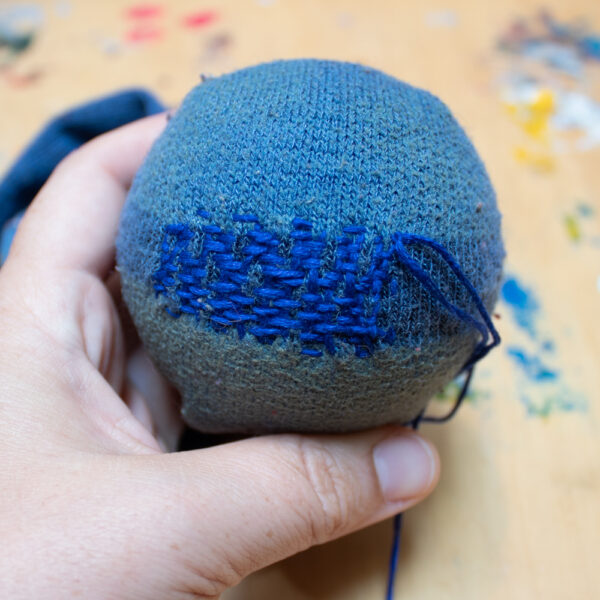
Weave a row of floss across the warp by alternately bringing your needle over a stitch, then under the next stitch, then over the next stitch, continuing to the end of the row. Go back the other way, again alternating under and over, making sure that the floss is alternating in the opposite way to the row above it.
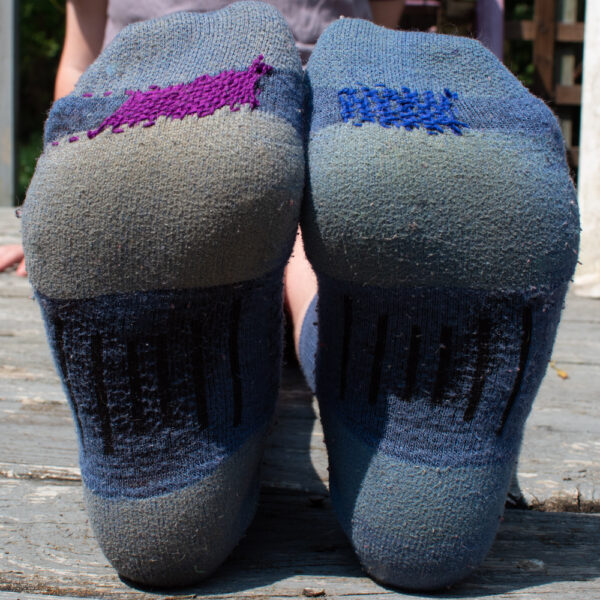
Pro tip: you don’t usually stitch into the sock at this point, but if I’m darning a spot that’s simply worn, not ripped through or holey, I will sometimes stitch into the sock. I think it holds the darning in place, decreases friction between the darn and the sock, and does a better job stabilizing the damage. In these photos, I’ve taken a few stitches into the sock that I’ve darned with navy floss, but I haven’t with the purple-darned sock. Can you see the difference?
Step 5: Knot It!
End your weaving close to the tail of floss that you left back when you began your running stitches. If you cut yourself a generous amount of floss, you might have been able to make this entire repair with one single length!
There are a few ways to tie unobtrusive knots–and yes, you want a knot that’s as unobtrusive as possible in your sock!–but I’ve found that tying the two tails into a square knot works really well for me. Cut off the remaining tails of floss.
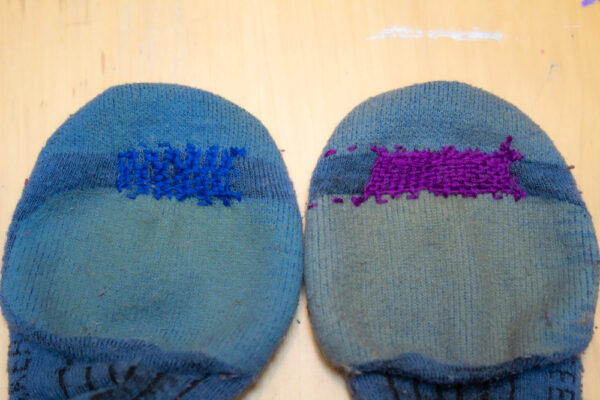
I know you don’t super want to see photos of my dingy, old hiking socks, but look how lovely the darning is on them! The navy darning, in which I took a few stitches into the sock, doesn’t look as tidy as the purple darning, but I do think it holds a little better.
The quality of your repair is as good as the quality of the floss, thread, or yarn that you used. I probably won’t be able to go another eight years before these darns need to be redone, but I should be able to go at least a couple of years!
P.S. Got a sock that’s completely beyond repair, or lost its beloved mate? Upcycle it!