Everyone knows about stenciling cute things onto new shirts or just-created sewing projects, but not everyone remembers that freezer paper stenciling?
It can also liven up something boring and old!
I have an unwritten rule for my kids that whenever I mend something for them, I also add something new to make that thing a little cuter. Remember the toy horse whose leg I repaired with a pin? That horsey also got a new sewn saddlepad! If I lengthen kid pants with a ruffle, I use a cute fabric. If I patch a hole, I add some embroidery.
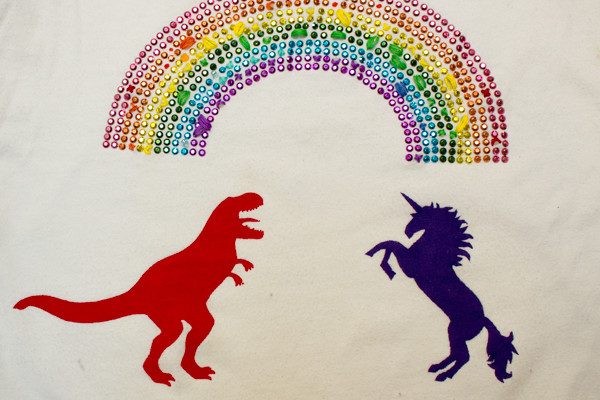
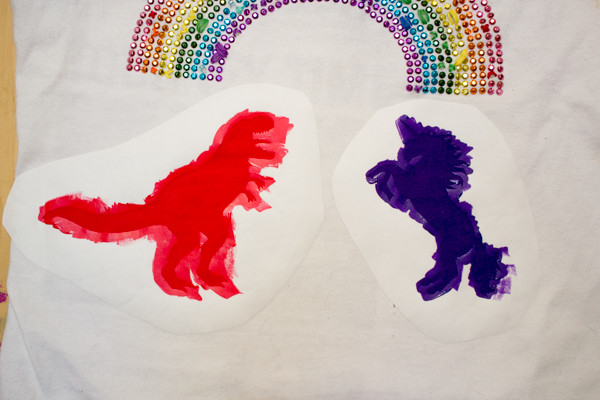
So when I showed you how I repaired the embellishments on this old shirt of my kid’s, I didn’t show you the entire story, because as soon as I took the final photo for that project, I got out a bunch more supplies and added the freezer paper stenciling to make this shirt now become DINOSAUR VS. UNICORN AT THE ENDS OF THE RAINBOW!!!
To freezer paper stencil, all you need are:
freezer paper. You can buy this in sheets that are perfectly-sized to fit in your printer, but I prefer to buy it by the roll–it’s more economical in the long-term, and you can cut any stencil perfectly to size.
stencils. Freehand them, find them using a Google image search, check out a clip art book from the library, or cut them out with a die cutter.
fabric paint. My brand of choice is Jacquard Neopaque or Lumiere–it’s pricey, but it gives great coverage, and a little goes a long way, which I also think makes it more economical over the long-term.
1. Cut out your stencil. I used my Cricut to cut out the T-rex directly into freezer paper, but I went old-school for the unicorn: I Googled an image that I liked, printed it out, then transferred it by hand to freezer paper. Do you know how to do that? It’s easy!
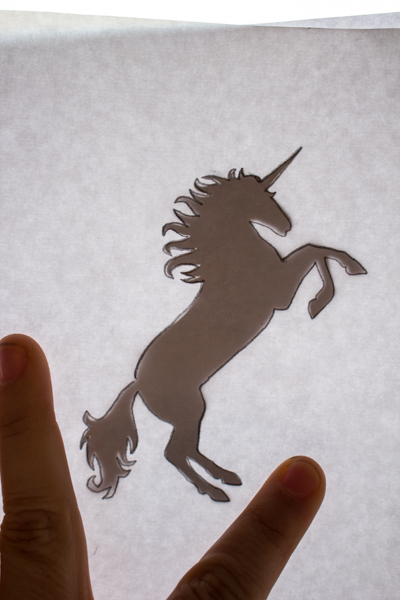
See? All you do is put the freezer paper on top of the image, then hold them both up to a window. You’ll be able to see the image well enough to trace it, then you can cut it out with an x-acto knife.

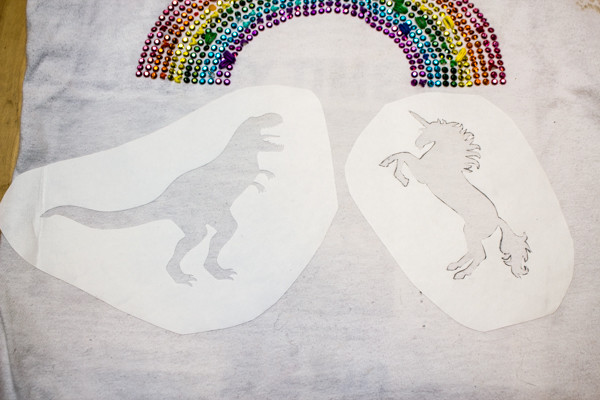
2. Iron the stencil to the fabric. Be mindful that you iron all the fiddly edges of the stencil to the fabric so that the paint doesn’t bleed, but also don’t go so crazy with the iron that you melt off all the plastic from the freezer paper. Moderation is key!
3. Paint. The key to painting a stencil is to push the paint away from the edges of the stencil. If you paint towards the edges, you can push paint underneath it no matter how well you’ve ironed. So paint from the outside in, and you’ll be all set!
4. Peel the stencil away. I like to do this after the excess paint on top of the freezer paper has dried, but before the paint has cured; sometimes, if I wait too long to peel up the stencil, I’ve found that it pulls at the fabric and can peel away some of the paint, but messing with a wet stencil is, of course, a recipe for disaster, as well.
5. Cure and heat-set the paint according to the manufacturer’s instructions. Generally, this will involve letting the paint dry for 24 hours, then ironing it.
Here’s another trick that I’m going to share with you, because I like you: a freezer paper stencil is an excellent way to cover up a mysterious stain that just won’t go away. I wouldn’t use it for a grease stain, say, but I HAVE used it, numerous times, to cover up Sharpie stains, tomato sauce, and other mystery stains that might mar an otherwise super cute shirt.