
When I first became enamored of crafting with buttons, I built my vintage button stash using ebay and the Classifieds section in my local newspaper. It was great to have a huge variety of vintage buttons to play around with, but I have a lot less tolerance for stuff these days, and I’ve reallocated most of my craft supplies budget to the Disney World fund, so I wouldn’t spend that much money on buttons anymore.
These days, I’m more interested in making new stuff using stuff that I already own–it clears up clutter, and it’s certainly cheaper! For instance, regarding my button obsession: using tools ranging from scissors to drills, using materials ranging from fallen tree branches to clamshell packaging, and, most importantly, using absolutely no additional money, I’ve been able to make a wide variety of sturdy buttons for all my sewing and craft projects. Check out the following tutorials to see how to make some DIY buttons of your own:
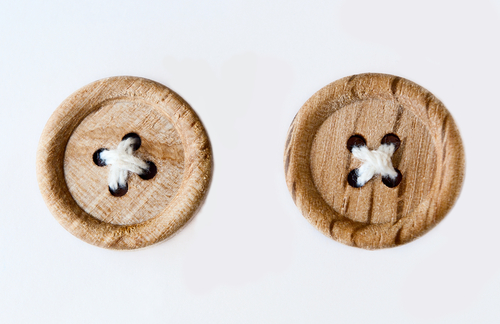
tree branch buttons: A fine-tooth saw, a fallen tree branch, and a small-bit drill are the basic tools that you need to create these wooden buttons from Just Crafty Enough, although the vise that I have on my Wish List would certainly come in handy. Instead of the polyurethane that the tutorial calls for to shine up the buttons and waterproof them, try out a nice beeswax polish for a completely natural finished product.
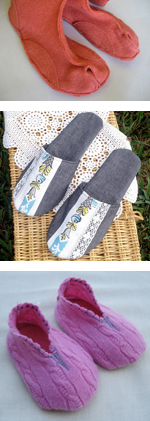
 fabric-covered buttons: Even DIY fabric-covered buttons are a bit spendy, because you have to purchase the tool to make them and the findings for each one, but if you’re a collector of lovely fabrics and you hate to toss a single square inch of your favorite print, or if you’re searching for perfectly-matched buttons for a particular project, then they’re the way to go. These embroidered fabric-covered buttons, tutorial from Shwin&Shwin, are extra-special, because it’s that little bit of embroidery that takes the buttons from mitchy-matchy to just right to complement the outfit as a whole.
paper buttons: If you plan to use your buttons for scrapbooking or other purely decorative projects, then try out this paper button tutorial from Splitcoaststampers. The finished buttons look just as real as factory-manufactured buttons, but since you’re making them yourself with stacked paper and hole punches, you can make them any shape, any color, any size, and any pattern that you like. The ability to make something exactly the way that I want it to be is my absolute favorite reason for crafting!
shrink plastic buttons: They will look like the Shrinky Dinks you remember from your childhood, and they won’t be as sturdy as most other buttons, but shrink plastic buttons do have the major benefit of having a blank surface that you can draw detailed, permanent designs on. The designs just get more intricate-looking as the plastic shrinks, and can be quite impressive when sewn onto a fancy outfit or other garment that won’t suffer heavy wear. ScissorsPaperWok offers an excellent DIY shrink plastic button tutorial, complete with a well-sized template and advice about what large-format circle punch to use to make consistent buttons. You’re going to make one change to the tutorial, however–you’re not going to purchase shrink plastic from the store; you’re going to recycle some #6 plastic from your recycling bin, instead, because #6 plastic is shrinky!
[wooden buttons image via Shutterstock; fabric-covered buttons image by Shwin&Shwin, used with attribution]
http://ecovillagegreen.com/903/what-do-the-plastic-recycling-numbers-mean/
#6 plastic is hazardous when heated. Probably not a good choice if you want to save the environment.
Depends on your outlook. In my ethic, in which there’s room for everyone who tries to make a difference, re-using something instead of discarding it and purchasing something new that has been manufactured and shipped to my location is always a good choice, even if it may off-gas a take-out container’s worth of gases.
Pingback: Button Up | Blackle Mag
Pingback: Feelgood Style | Sustainable fashion reporting, organic beauty tips, DIY projects + tutorials, + natural product reviews.
Pingback: Crafting a Green World | The home for green crafts and tutorials!
Pingback: Recycled St. Patrick's Day Garland