A DIY coloring book lets you customize exactly the coloring pages you want!
I was in the market for a new adult coloring book the other day, but I just could not find what I wanted! Honestly, how hard could it be to find a small-scale book with spoopy images that would be fairly quick to color and would have no swears, but also wouldn’t be baby-ish?
Ugh, it was SO hard!
Eventually, I went back to the only sure-fire way to get something that is EXACTLY the way I want it: DIY!
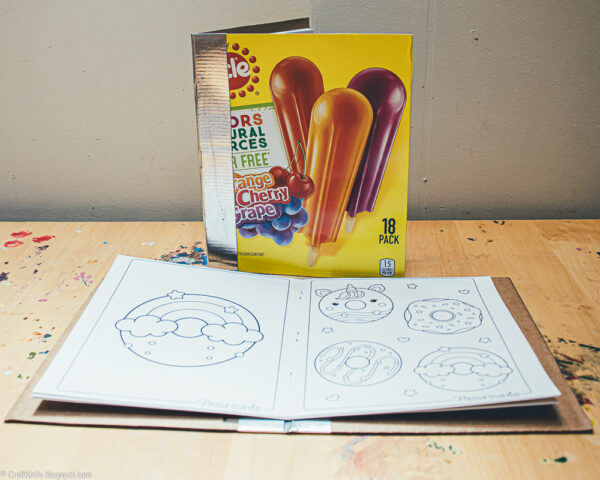
I modified my go-to DIY journal with a cover made from upcycled cardboard, and filled it with coloring pages downloaded from the interwebs. It’s exactly what I wanted, and here’s how you can make one, too!
To make your own DIY coloring book with an upcycled cover, you will need:
- coloring pages. Yes, you CAN print coloring pages in an eco-friendly manner! For each coloring book, you’ll want 10-12 coloring pages, printed two-to-a-page on cardstock. You’ll only be using one side of this cardstock, so feel free to use up the back sides of cardstock that’s already been printed on one side. Need coloring page inspiration? Check out the Crafting a Green World coloring pages here!
- upcycled cardboard. You need two pieces, each about 6″x7″. Any weight from cardboard food packaging to corrugated shipping box cardboard works well–in these photos, I’ve used both!
- metal butter knife. A bone folder or back of a spoon also works well.
- stapler and (optional) rubber block eraser. If you don’t have a long reach stapler, I’ll show you how to get the same effect with a regular stapler and a wedge eraser.
- measuring and cutting supplies. I used a gridded quilting ruler and guillotine paper cutter.
Step 1: Arrange and trim the coloring pages.

Print 10-12 coloring pages two to a page on cardstock, so that you have 5-6 of these sheets for your coloring book.
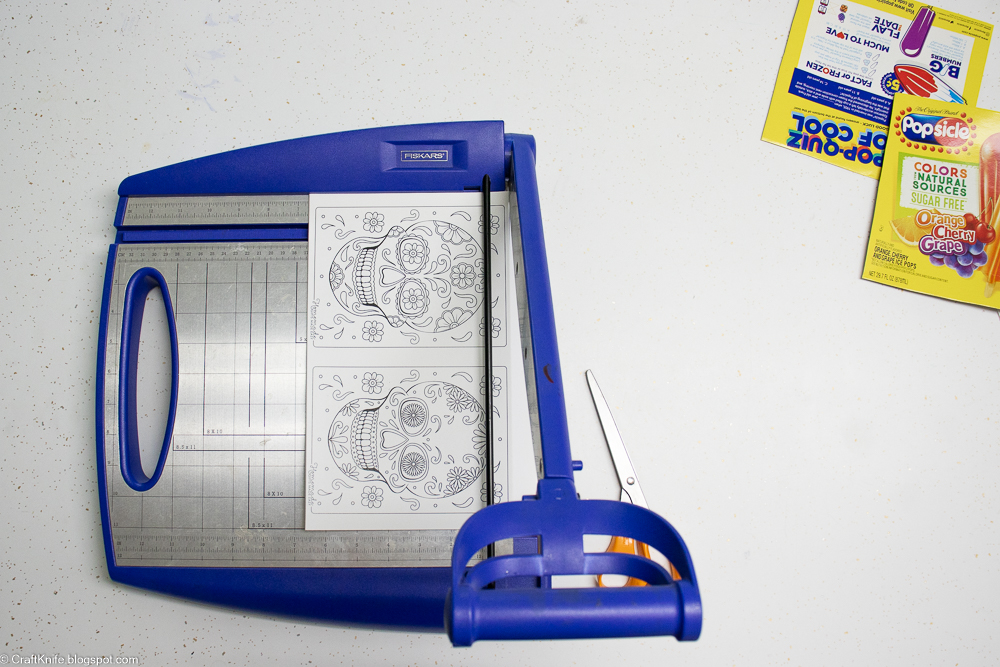
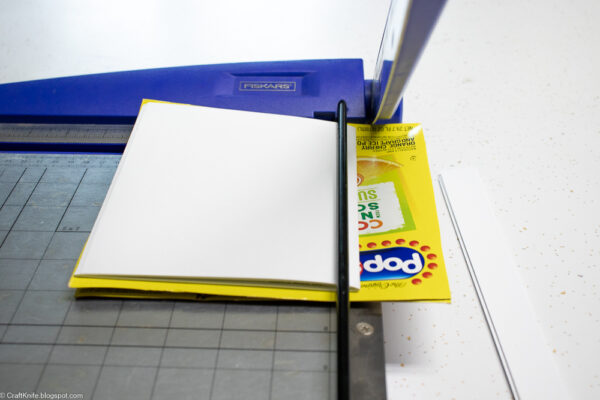
Trim the excess paper from the top and bottom of your sheets. If you have a good guillotine paper cutter, you can stack the sheets together and trim them all at once!
Step 2: Measure and cut the upcycled cardboard book cover.
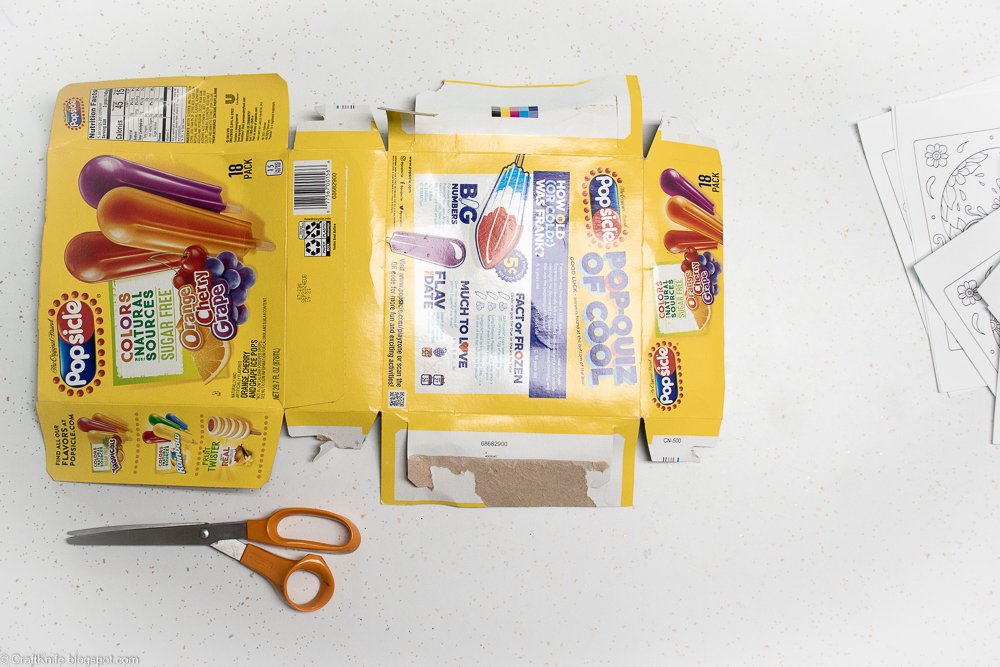
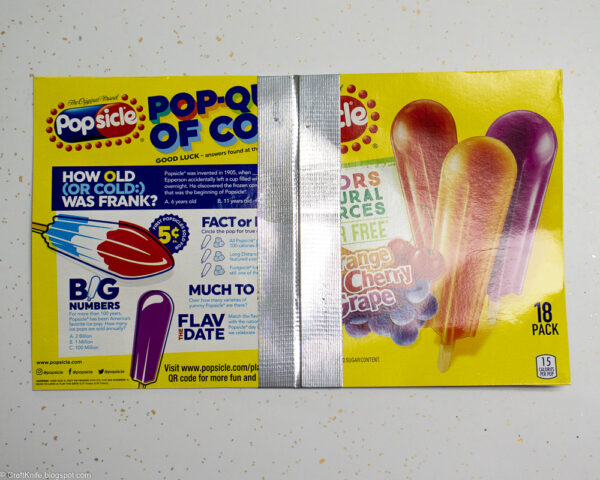
Most types of cardboard should work well for this project… even thin food packaging, like this empty popsicle box that I rescued from my recycling bin!
Open the box so that it lies flat, then fussy cut two pieces of cardboard to serve as the book cover. You want the dimensions of the cover to be slightly larger than the dimensions of each page; for this half-scale coloring book, with top and bottom margins trimmed away, 6″x7″ was perfect.
Step 3: Trim and tape the book cover.
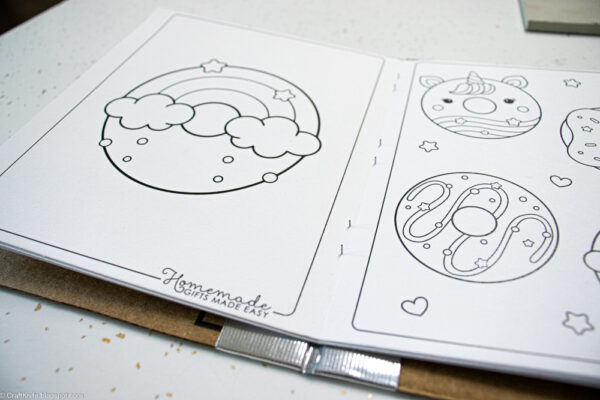
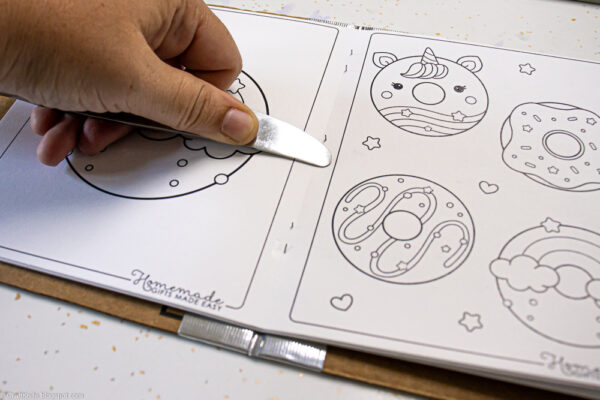
Order the coloring book pages, then fold them sharply in half, coloring images to the inside. Burnish the fold with the butt end of the butter knife to make it even sharper.
Compare the sizing of the finished quire to the book cover, and trim as needed. Above, I’m using the quire as a visual aid to mark where I want to trim my cover, because I’m too lazy to measure!
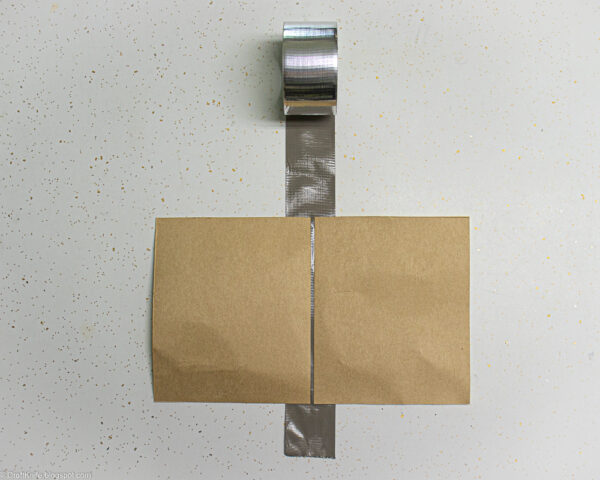
Now comes the magical part! Lay a length of duct tape, sticky side up, on your work surface. Set the two pieces of book cover on the tape, with about a 1/8″ gap between them. Tear off enough tape to fold over the spine completely and overlap just a bit. There shouldn’t be any sticky side left uncovered!
Use your fingernail or knife tip to burnish down that crack between the two halves of the cover, then turn the cover over and burnish the other side, as well. When you’re finished, you will have a complete book cover with a duct tape hinge.
Step 4: Staple the pages into the book.
Center the coloring book pages inside the cover so that the fold of the pages lines up with the duct tape hinge of the cover. You’ll have to flip this whole book over and staple it from the other side to keep the staple ends hidden, so feel free to secure the quire to the cover with a bit of washi tape, if you’d like.
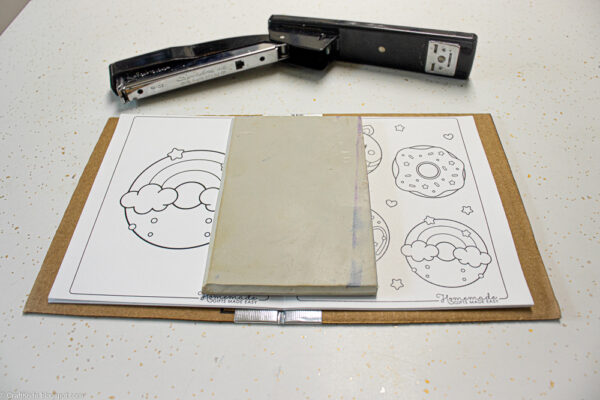
If you’re lucky enough to own a long-reach stapler, just staple the cover to the pages from the outside. However, if you have a standard stapler, get a rubber wedge eraser or, as in the photo above, a stamp-carving blank, and center it underneath the spot where you want to staple.

Unhinge the stapler and staple the hinge from the outside, stapling into that rubber wedge eraser. Repeat for each of the other two staples you’ll put into the hinge from the outside.
Turn the book over and remove the rubber eraser, and you’ll see all the pointy staple ends sticking up alarmingly.
To solve the problem of pointy staple ends, just use the flat side of the butter knife to push them down!
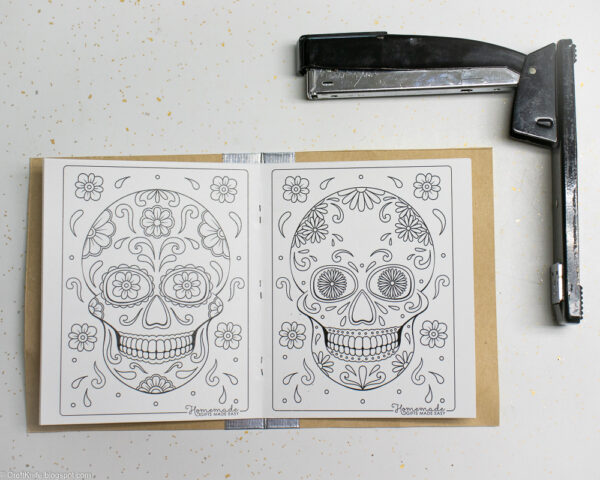
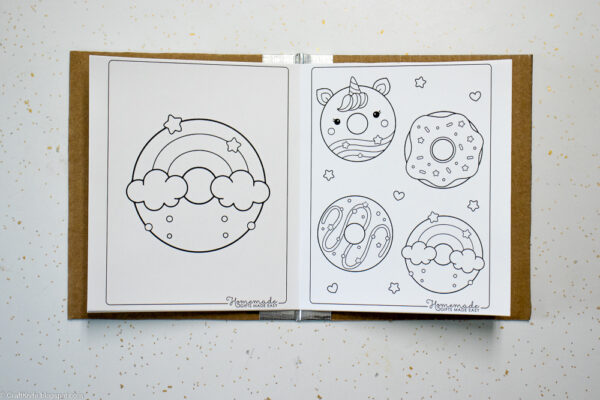
This is a handy little coloring book to keep in your backpack in readiness for any time that boredom might strike. I’ve been wanting to color in some Halloween designs for upcoming holiday projects, so this book is especially perfect for that purpose: when I’ve finished the pages that I want to use in a project, this little book is easy to disassemble, and all the cardstock and cardboard that I’m not using can go back in the recycling bin where I originally found it!