
Last week, I wrote a tutorial for turning a pair of well-fitting pants into a pair of awesome bell bottoms. That tutorial worked perfectly on the pair of pants my kid thrifted, since those pants already fit her well in both the waist and the inseam.
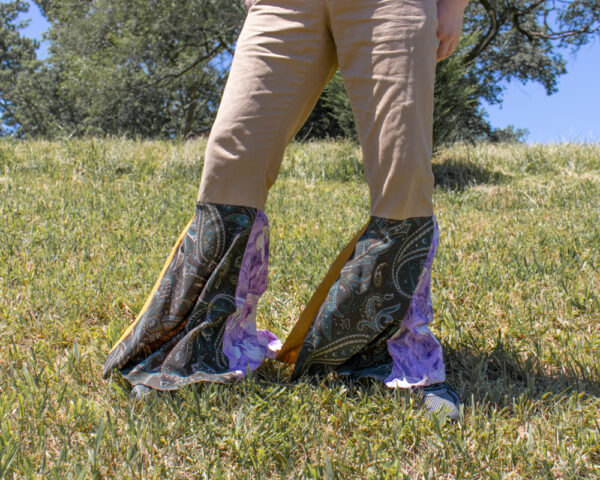
The pants that my husband thrifted, however, fit great at the waist but were a few inches too short at the inseam. Just opening up the side seams of those pants and adding a panel wouldn’t have worked to create good-looking bell bottoms. Instead, I hacked his pants off at the knees and turned them into bell bottoms a completely different way!
This method results in a pair of bell bottoms that are wide and blousy and flowy. You couldn’t get away with wearing them in all circumstances, but they’re also super dramatic and super fun for every bell bottom-appropriate occasion.
Here’s what you will need to make these bell bottoms:
- pants that fit well at the waist, and look good at least to the knees. Denim and khakis look good as bell bottoms, but feel free to be creative!
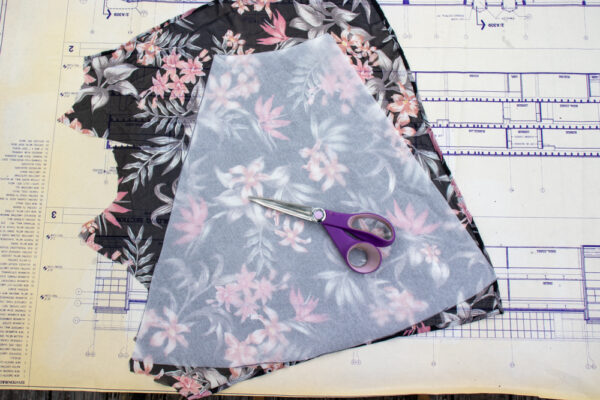
- lightweight fabric scraps. I don’t sew with a lot of non-cotton fabrics, but my kid loves to upcycle bits and pieces of old dress shirts and blouses, so I’ve got a LOT of that in my scraps bin. This was a great excuse to dig through our scraps and pull out all of those silky, shiny, flowy polyester blends that have been accumulating.
- measuring and cutting tools. You’ll need a circle skirt template, as well as your usual measuring and cutting tools.
- sewing tools. You’ll want both a universal needle and a denim/sharp needle for this project.
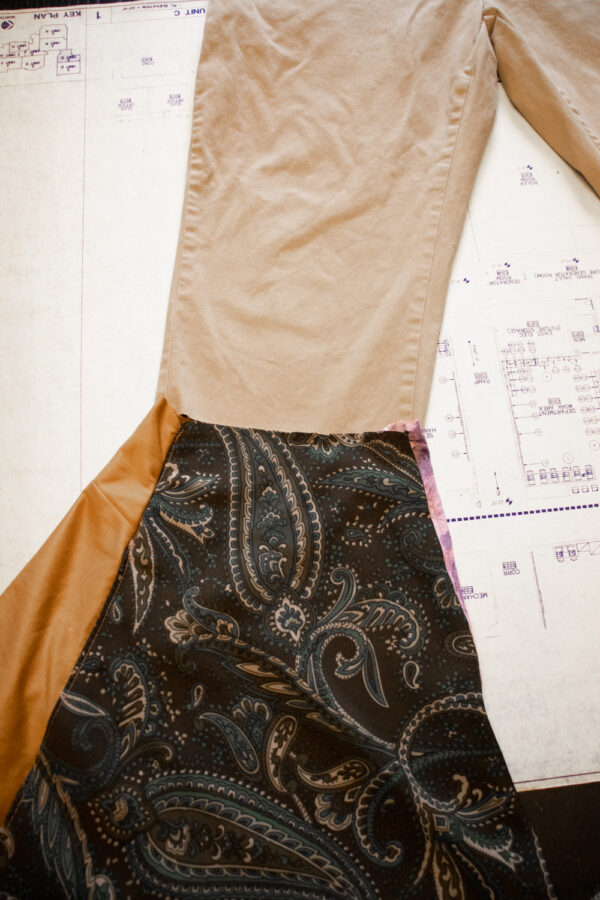
Step 1: Cut pants off at the knee.
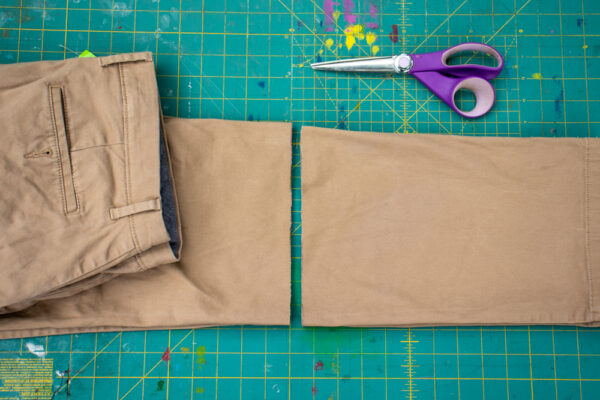
Put the pants on, and mark the leg just below the knee. Cut both pants legs off at that mark.
If the fabric you cut off is still in good condition, send it to join its brethren in the scraps bin. You’ll make a new life for it someday!
Step 2. Create the template for the bell bottoms panels.
These bell bottoms are essentially miniature circle skirts that you’ll sew to each pants leg.
To decide how many panels you want to use to make up each circle, take a look at the fabric you’ll be using. I had a lot of smaller scrippy scraps, so I made a template that’s 1/4 of a circle, using four panels of fabric per circle.
Next, figure out the dimensions of each panel. Measure the circumference of the pants leg at the raw edge, and the distance between that raw edge and the desired inseam. Add double your seam allowance to that distance measurement.
When you know the circumference of the top of your circle and the distance from that measurement to the inseam, you’re ready to create your template! If you want to do it the old-fashioned way, you can calculate it by hand using my DIY circle skirt tutorial. If you’d rather have a computer math all the math for you, choose your favorite among the tons of circle skirt calculators that live online. I like this one because it lets you choose an exact length, instead of selecting from a few set lengths.
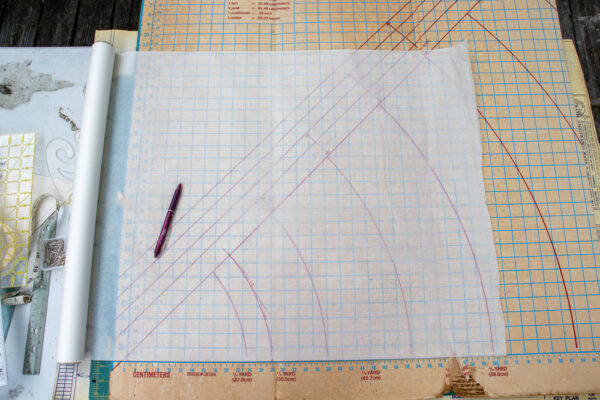
Regardless of which method you choose, make sure that your panel template includes the seam allowance on both sides. Below, I’m drawing the seam allowance that I added by hand to the circle skirt panel template that I traced:
And remember that you don’t need a seam allowance for the top and bottom of the panel template, because you added that to your original measurement!
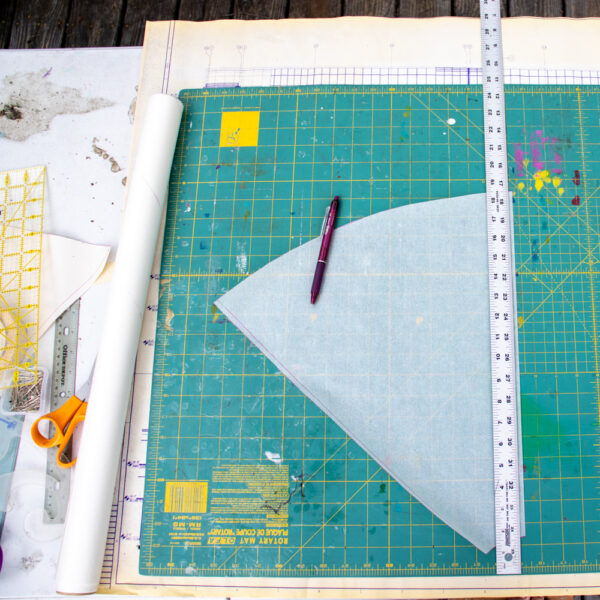
Step 3: Piece the panels.
Trace and cut the panels for each bell bottom, then piece them by sewing them right sides together with the correct seam allowance.
Before you sew that last seam to close the circle, do a visual comparison between the the bell bottom and the pants leg to make sure your math is correct. If you do need to add or subtract some fabric from the bell bottom, I can assure you from experience (ahem) that this will not be noticeable at all on the finished pants.
Step 4: Attach the bell bottoms to the pants.
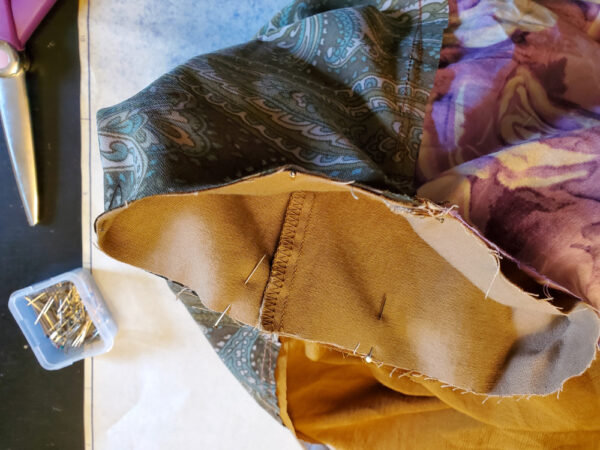
Align the top of a bell bottom piece to the raw edge of a pants leg, right sides together, and pin and pin and pin! Sew, then repeat with the other pants leg and bell bottom piece.
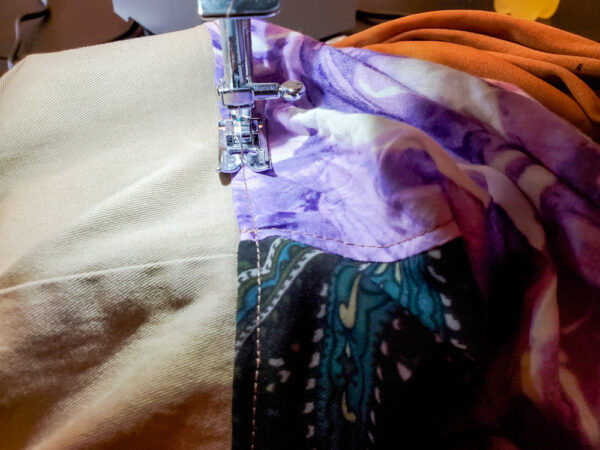
Smooth the seams towards the bell bottom piece (I was wary of ironing my fabric, since I have no idea what most of it is made of), then top stitch.
Hem the bell bottoms by either turning the raw edges under twice and stitching, or sewing bias tape over the raw edges. I liked bias tape for my previous bell bottoms tutorial, but for these bell bottoms, I preferred the look of turning and stitching.

Here’s a photo comparing my two methods of DIYing bell bottoms. Which one do YOU prefer?


I don’t quite get how you determine how wide the bell will be. I get the leg opening measurement at the knee (plus seam allowance) to make sure it fits there, but how do you decide how full the bell is going to be on the bottom?
This is made like a circle skirt, so the fullness is baked in. Once you do the math or run the circle skirt calculator, the pattern that you create from those measurements will result in a bell that makes a full circle at the bottom.
Hello! I think I’m overthinking how you created the template panel. Can you give an example of the process using actual numbers? When I plug my numbers into the online circle skirt calculator (choosing full circle skirt), I get a radius of 2.1″ which seams way to narrow for what I need to cover. Help please! -Lynda
I think you’re okay! A radius of 2.1″ translates to a circumference of about 18.2″, which is a completely reasonable circumference for the top edge of your bell.