If you want a winter pick-me-up (AND a way to finish up all that ground cinnamon you bought for holiday baking), you will be delighted with cinnamon dough.
Cinnamon dough smells amazing. It’s as easy to make and use as play dough. It dries to near-permanence with just a couple of hours in the oven. It’s been my favorite winter activity to do with my kids ever since they were tiny, and now I’m sharing it with YOU!
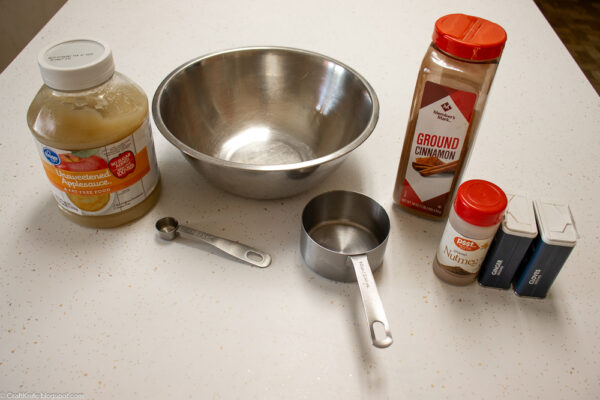
Here’s all you need to make your own batch of cinnamon dough:
- one cup of cinnamon. Yes, one CUP!!! This project is made for those people (*cough, cough* it me *cough*) who overbuy the giant spice container every winter out of a fear of somehow running out during holiday baking. The struggle IS real, though: one year I 100% found myself Googling “DIY powdered sugar” at 9pm on Christmas Eve, and I never want to relive that experience.
- up to 5 tsp aromatic spices. I like to put in those spices that I know I’m not going to use before they expire (I’m looking at you, Allspice! And YOU, Ground Cloves!).
- .5 to 1 cup applesauce. Choose the cheapest store-brand sugar-free applesauce for this, although I won’t judge you if you find yourself panic-emptying a couple of pouches because you simply cannot go back to the freaking grocery store one more time today. Once upon a time, I made my kids a batch of play dough using organic flour because that’s what I had on hand. It wasn’t my finest moment, but I DID get to stay in my jammy pants!
- cookie sheet.
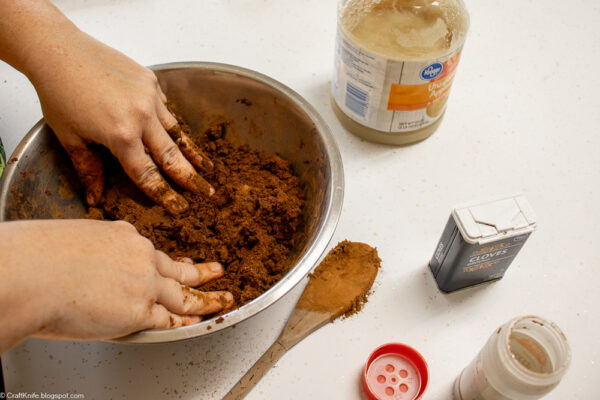
Step 1: Mix all ingredients.
Add all the dry ingredients to a bowl, then stir to combine.
Starting with 1/2 cup applesauce, mix/knead the applesauce into the other ingredients in batches. I’ve never figured out exactly why my cinnamon dough requires a slightly different amount of applesauce every year–is it the humidity? The age/variety of spices? It’s not the applesauce itself, because I always use that exact kind in the photo–but indeed, I make this cinnamon dough every single winter, and every single winter I have to play the exact amount of applesauce by ear.
You’re looking for a consistency like any other dough in your life–not crumbly, not sticky. If you’re working with younger kids, err on the side of making the dough a little wet and sticky, because a crumbly dough that doesn’t hold together with ease is almost immediately frustrating to little kids.
And yes, I’m sorry, but you will have to get your hands into it. It’s dough! If it’s any consolation, though, cinnamon is pretty nice for your skin!
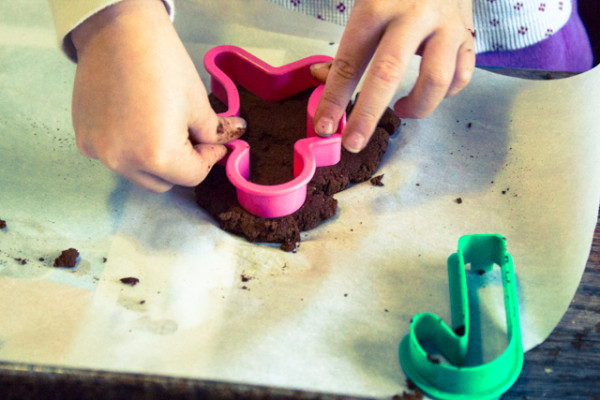
Step 2: Decorate!
You can sculpt with this cinnamon dough just like you would with any dough, but my family’s favorite way to enjoy it has always been to get out the cookie cutters and make ornaments and garlands.
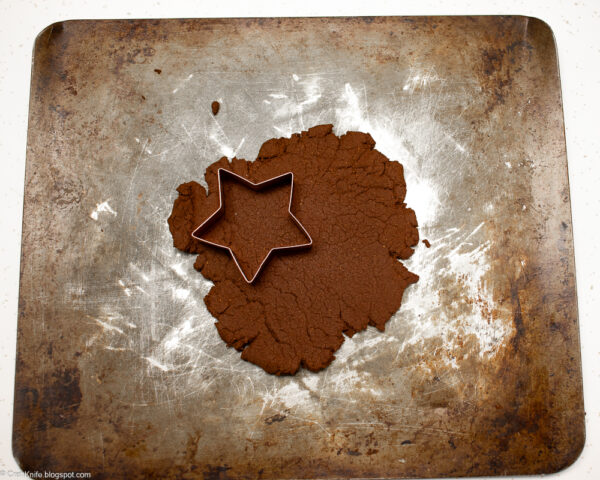
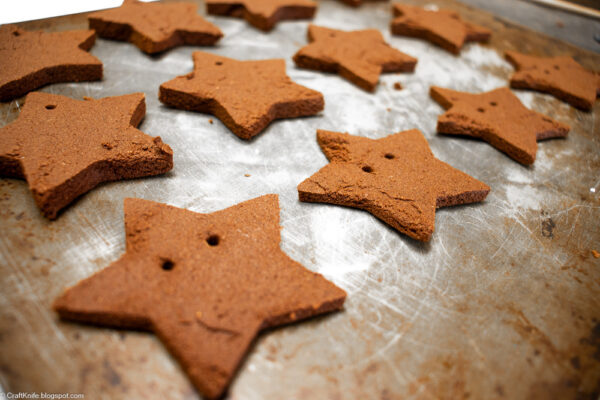
To make your own cinnamon dough ornaments, roll the dough no thicker than 1/4″, then cut with cookie cutters. Make a small hole for stringing onto a garland using the tip of a chopstick, or a larger hole for attaching an ornament hanger using a straw.
If you’re making a fiddly design, you can roll the dough directly onto parchment paper, then move your design, parchment paper and all, onto the cookie sheet for baking.
Just beware of trying to work with the dough when it’s cold from the refrigerator. It’s fine to store the dough in the fridge for a couple of weeks, but it will cooperate a LOT better at room temperature.
Step 3: Bake.
While you’re working with the dough, preheat the oven to around 200 degrees (depending on my oven’s capabilities over the years, I’ve used temps anywhere between 200-250 degrees with similar results. One of these days, I’ll even get around to experimenting with my dehydrator!).
This dough won’t expand, so don’t worry about placement; just set them onto an ungreased cookie sheet and set the time for an hour.
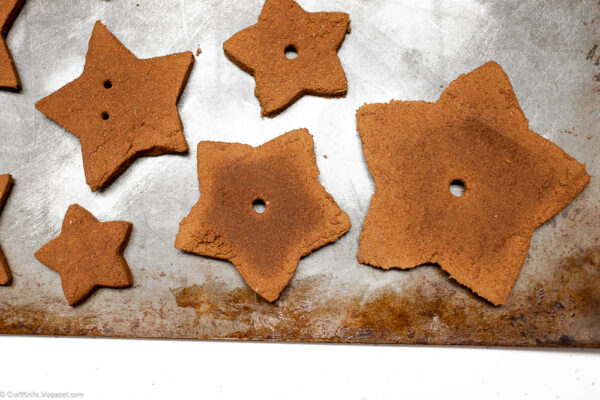
After one hour, I like to check on my ornaments and flip them. See in the above photo how the centers of the larger ornaments that I just flipped over are darker? That’s the bottom middle that hasn’t dried yet, so flipping them over and putting them back in the oven lets them dry out evenly.
After a couple of hours, the ornaments should start to be ready, depending on how big they are. I start to check on them about every 20 minutes, removing the ones that are bone-dry whenever I check. I don’t really enjoy a lot of hands-on kitchen stuff, so I’m always VERY excited when that last ornament is dry and I can finally turn the oven off!
Step 4: Attach ornament hangers.
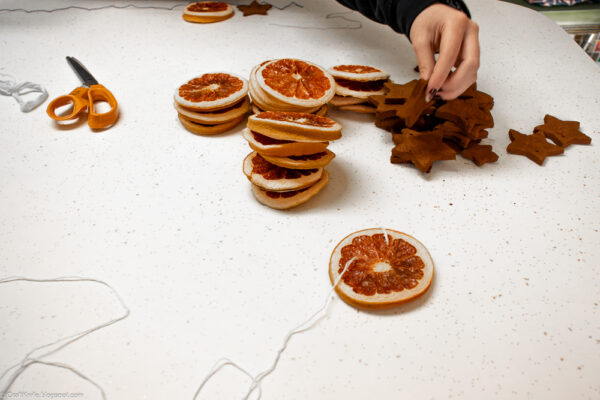
This year, my teenager and I combined these cinnamon dough ornaments with dried grapefruit slices to make some lovely (and lovely-smelling!) winter garlands that we hope to keep on display through February.
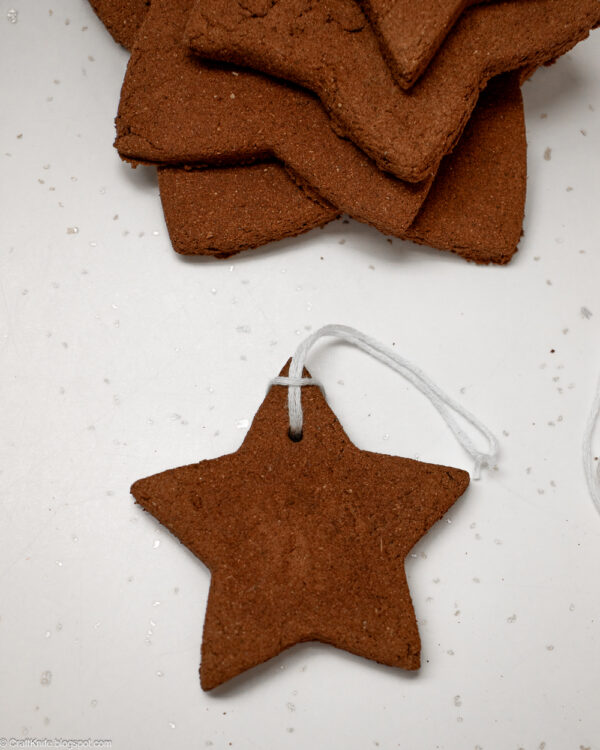
I tied loops of embroidery floss through the holes on the other ornaments, and we put them right onto our tree.
With careful storage, these cinnamon dough ornaments should last for multiple years. A couple of years ago, after probably a decade of making them yearly and storing the survivors (it’s hard to be a Christmas tree ornament in this house!) with our other ornaments in the garage during the off-seasons, all of our cinnamon dough ornaments came out of storage a little moldy. They must have gotten damp or come into contact with something that ruined them, but it remains a mystery!
But whether you try to store them (I think I *will* try again this year!) or simply compost them in the Spring, or even just enjoy the dough as a process-oriented sensory experience and don’t keep them at all, I think this cinnamon dough will be a delightful addition to your winter craft projects!