Get ready to make your neighbors jealous, because you’re about to carve the craftiest Jack-o-Lantern on the block!
I love a Jack-o-lantern that shows off my personality, and now that I’m an perimenopausal empty-nester, that personality is apparently sewing, sewing, and nothing but sewing (Okay, I’ve also developed an interest in Civil War battlefields, but that one is so objectively cringe that I’m not ready to talk about it yet). Like, y’all. I used to like sewing back well enough when my kids were little, but now I am obsessed. I genuinely CANNOT STOP SEWING. I just keep thinking of new things I want to sew! I do not even have time to sew all the things I currently want to sew, and yet I keep on finding more things to sew!
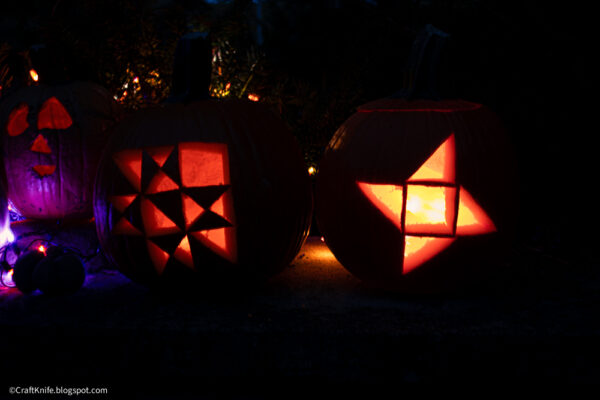
ANYWAY, thanks to my possible midlife crisis that is resolving itself through sewing, obviously my Jack-o-lantern this year had to be sewing-themed. And the best way to make a Jack-o-lantern that looks like an obvious sewing project is to make it into a quilt block! Fortunately, carving a quilt block into a Jack-o-lantern is surprisingly easy, and absolutely much easier than a lot of more conventional Jack-o-lantern templates.
Materials
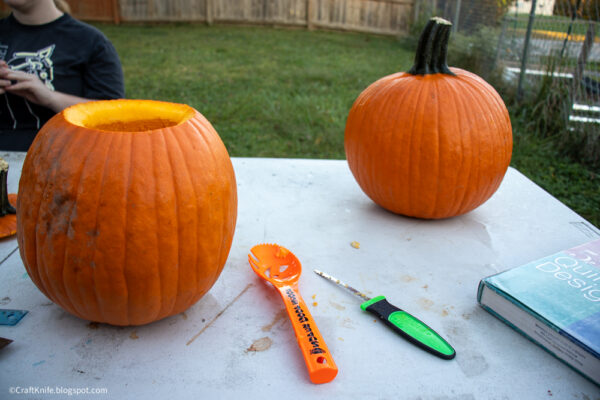
Here is everything that you need to carve your own quilt block Jack-o-lantern:
- pumpkin. Of course! A real pumpkin is obviously the most eco-friendly, but you can also make a very realistic, carvable pumpkin from papier mache. Carvable store-bought pumpkins are generally not eco-friendly, but if you can find one of those second-hand, then at least you’re saving it from the waste stream!
- pumpkin-carving supplies. Pumpkin carving is so much more comfortable with these janky-looking little plastic pumpkin carving sets! I did throw a tiny fit when my husband came home from the store with a cheap kit of plastic pumpkin-carving tools back when the kids were babies (I was DEEP into the “my babies shall not touch plastic” era), but I changed my tune as soon as I saw how genuinely easier it is to carve pumpkins with them, and we’ve used that same dang set every year for the past 20 years, so I should probably apologize to my husband at some point. I absolutely will not, but I should!
- measuring and marking supplies. The thing that I like the most about these quilt block carvings is that you don’t need a template. You can measure out your template right onto the pumpkin using a ruler or tape measure, and mark it with a washable marker. If you want your marks to be less vulnerable, use a Sharpie, and then wipe off any extraneous marks with an alcohol wipe or hand sanitizer.
Step 1: Choose your quilt block and draw it onto the pumpkin.
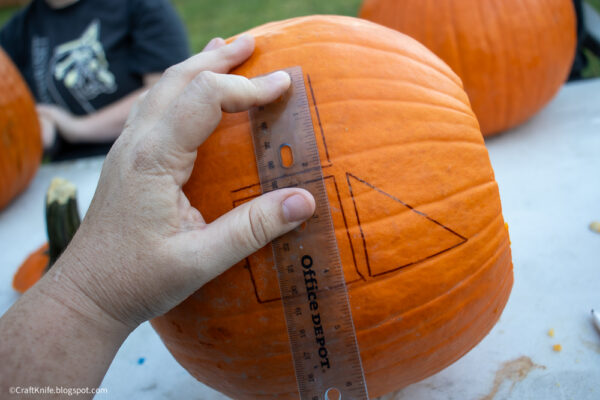
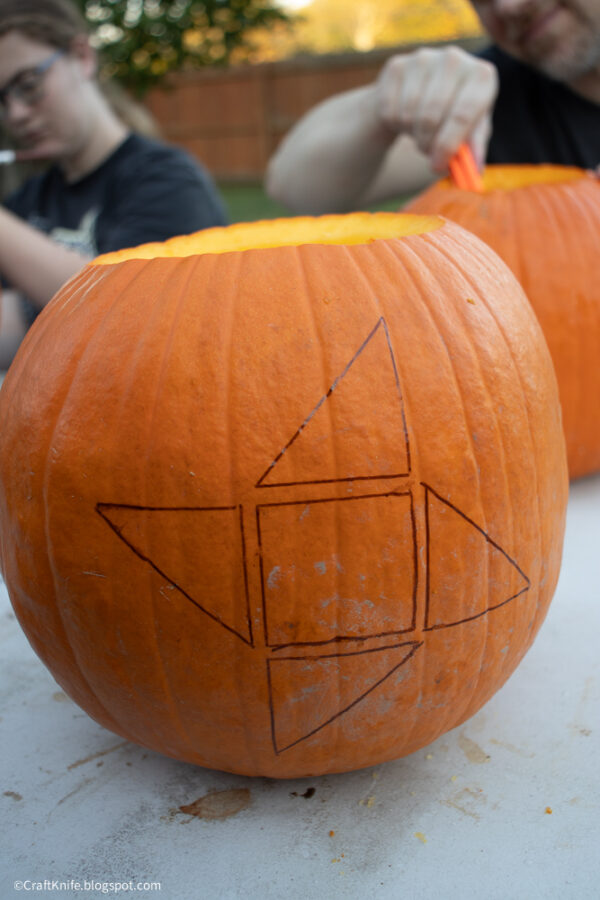
A surprising number of quilt blocks work well as Jack-o-lanterns, including Nine Patch, Shoofly, Eccentric Star, and Bear Paw. The trick I use is to leave approximately .25″ between the pieces I want to cut away in order to preserve the sense of the pattern being pieced together.
Choose an simple quilt block pattern that is easy to calculate and draw onto a pumpkin. This Friendship Star pattern, for instance, is super easy to measure out, with a square in the center, surrounded by right triangles whose two adjacent sides are the same length as one side of the square.
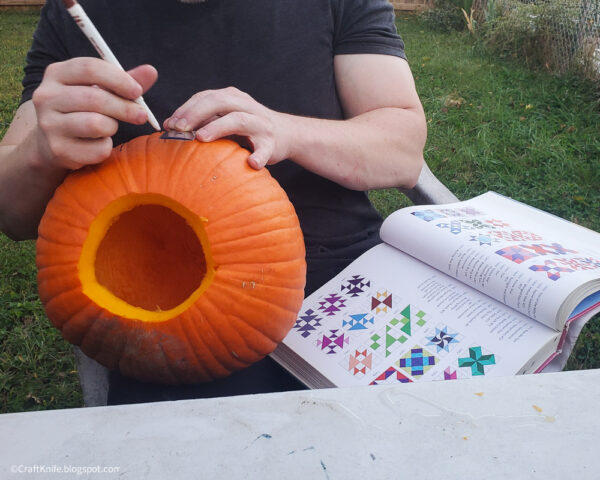
You can use a reference book like 5,500 Quilt Block Designs for inspiration, and don’t be afraid to eyeball a design instead of painstakingly measuring it out. Jack-o-lanterns are supposed to look a little wonky!
Step 2: Carve your design into the pumpkin.
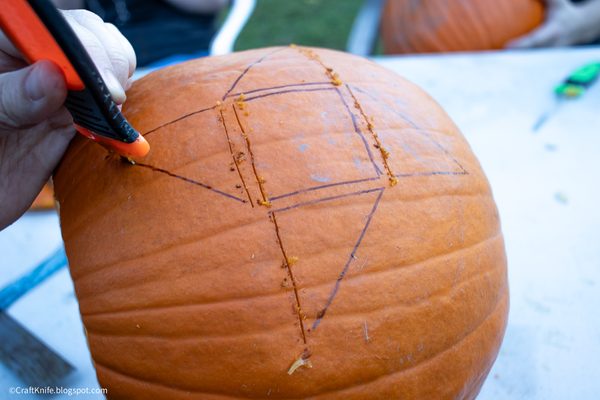
Carve your pumpkin by cutting through the lines that you drew. I don’t understand why those little saws work so well, but they do! They also make it a LOT easier to cut these precise lines, especially compared to my pre-kid giant carving knife method.
Be careful when carving out thin pieces–I usually do this with one hand stuck inside my pumpkin, bracing it from the inside. Putting a quarter-inch between pieces gives you plenty of cutting room in case you accidentally over-extend a cut, but in terms of the worst-case scenario, you can stick a piece back on with a toothpick!
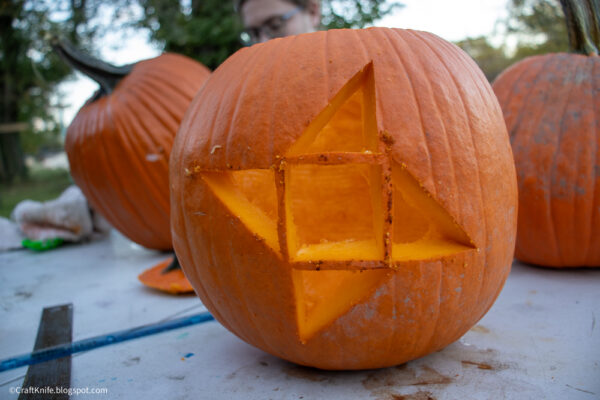
When you’re finished with your design, pop a tea light inside (or do what we do and make a little hole in the back to stick twinkle lights through), put the top back on, and enjoy your new quilt block Jack-o-lantern!
I LOVE my quilt block Jack-o-lanterns, and I think they look so pretty lit up on my porch at night. Now, onto my next project: sewing an American Girl doll-sized black T-shirt and leggings set and appliqueing an even tinier skeleton onto it! Stay tuned!
P.S. Love Halloween, but cross-stitching is more your jam than pumpkin carving? Check out my list of my all-time favorite Halloween cross-stitch patterns!