
One of your kid’s T-shirts (at least!) has a mystery stain that nothing will remove.
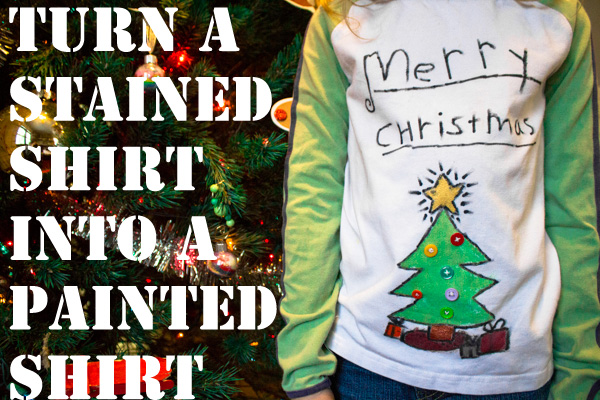
Here’s an easy way to make that gross shirt look brand-new, completely concealing that ugly stain while adding an adorable festive motif! All you need are fabric paints, vintage buttons, and a creative kid to do the art.
1. Prepare your shirt. Lay the shirt completely flat on a tabletop, ironing it if it’s wrinkled. Place a few layers of newspaper flat inside the shirt, so that your painting on the shirt’s front won’t bleed onto the back.
 2. Paint a Christmas design onto the shirt’s front. I pointed out the stains that I’d like to cover to my kiddos, then told them the master plan: create a holiday scene with paint and sewn button embellishments. A Christmas tree T-shirt would be nice, with button ornaments. So would a snowy forest T-shirt, with button snowflakes. Or perhaps a reindeer T-shirt, with button eyes (sounds creepy to me, but you never know…).
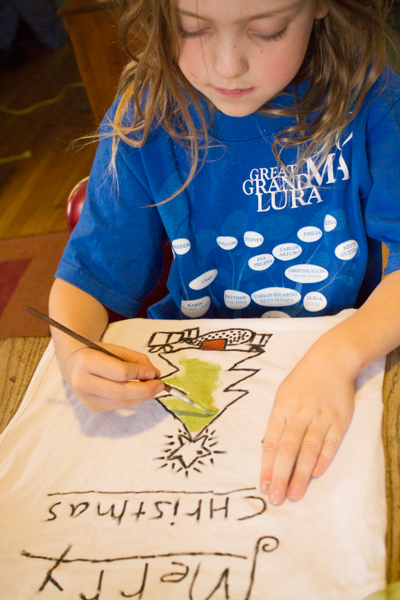
I gave the kids Tee Juice markers and Jacquard Lumiere and Neopaque fabric paints
, and suggested that they might want to draw their creations with the markers first, then paint the pictures in with the fabric paint. One kid did this, and the other just painted, making a glorious mess and having a grand old time and resulting in nothing particularly wearable, but it was a pretty trashed T-shirt, anyway.
Let the finished painting dry and cure for 24 hours, then heat set it according to the fabric paint’s instructions.
3. Sew on button ornaments. When the Christmas tree T-shirts are dry, heat set, and ready to go, put the section that you’d like to embellish with buttons into an embroidery hoop, to make it easy to sew.

I gave the kids my giant bin full of vintage buttons to play with and fight over. I reminded them how to thread a needle, showed them how to sew starting from the back of the shirt and finish at the back, and left them to it. The kids sorted buttons, traded buttons, sewed a couple of buttons on, and played some more. Eventually, after a lot of stacking and re-stacking and organizing, a lot of pretend button play, and a lot of clutter that they didn’t feel like picking up later, each kid’s painted Christmas tree had a bounty of button ornaments upon it.
To make doubly sure after all that kid sewing that I witnessed, I later put a dab of washable fabric glue on the back of each sewn button. Those buttons aren’t going anywhere!
To finish the shirt, briefly iron it again to remove the marks made by the embroidery hoop.
When the entire project was completed, the kids had managed to turn two ratty shirts that they couldn’t wear anywhere nice into their special Christmas shirts that will get a ton of wear in the next couple of weeks, and will be the shirts that they wear on Christmas Day (saving me from having to purchase anything cute for them to wear that day, which I would not have done anyway, so there).


I love this idea. I have a few of my shirts that I keep splattering with coconut oil while cooking that could use this treatment.
Great job Syd, the shirt looks great!
Do you ever wear an apron? I just can’t stand wearing one, even though I *know* it would help. So I join you as someone else with coconut oil splatters all over my shirts!
Um.. despite the fact that I made myself one specifically for that purpose, no. I don’t. They drive me crazy. Although, I do now have a “cooking sweatshirt.” It’s a zip up so it’s easy to take on and off.
Not sure what I’ll do come summer though.