
My mom is an elementary school teacher and has developed an obsession with cool peace signs for her classroom. When discussing a how to project this week, she asked me to make her a peace sign out of recycled materials. You guys know I’m all about fun wall art like the Laundry Cup Wall Art, Newspaper Art, and Burlap Chevron Paintings— so I was totally pumped to take on this challenge! After searching around the house, I grabbed a cardboard box they had left over from moving and a bag of pop-tops that my grandma had collected. Here’s how to make your very own pop top peace sign!
What You Will Need:
1. Cardboard– you could use an old box, a pizza box, etc.
2. Pop Tops.
3. Scissors or a razor blade.
4. Hot glue/hot glue gun.
5. Pencil.
How To Do It:
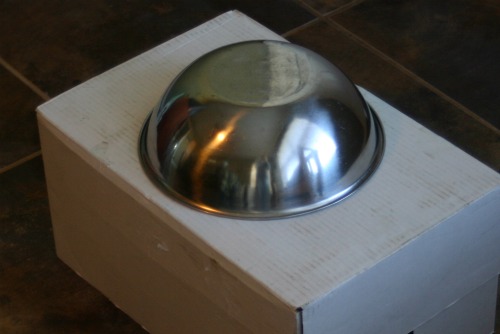
1. Draw a peace sign on your cardboard. I used a bowl to make the circle and then used a ruler to draw the rest.
My peace sign looked like this:
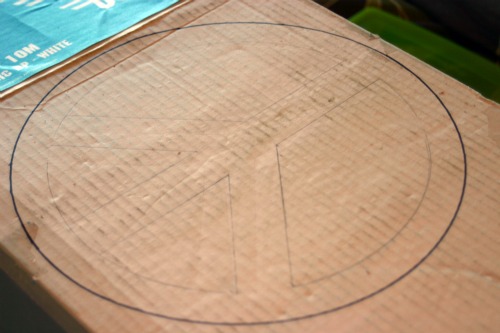
2. Cut out your peace sign. I first used scissors to cut it out, but I realized that using a razor blade would be much quicker. It’s up to you to choose which one, but please be careful if you decide to use a razor blade.
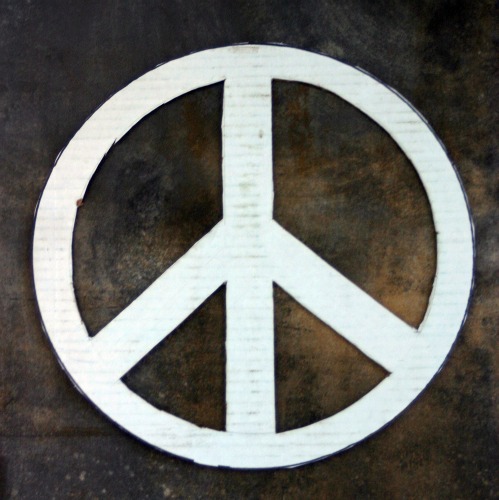
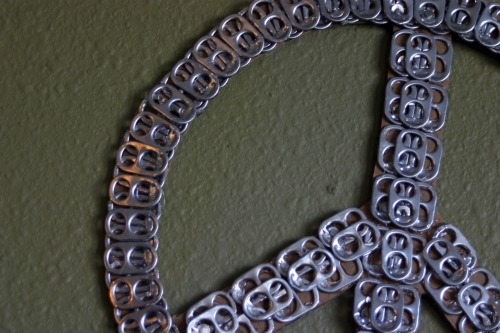
3. Start gluing your pop tops to your peace sign. (Warning: Work quickly! Pop tops are aluminum, so your hot glue will heat up the entire pop top–not just the place you’re putting the glue– causing your fingers to burn! I know from experience, unfortunately.) I turned the peace sign over to the cardboard side, instead of the white side shown above, because I wanted to hide as much of the cardboard as I could. I started gluing the pop tops in the middle section first to make sure everything was as even as I could get it. You will notice that I cut some of the pop tops in half in areas where I ran out of room. This is what the first layer of pop tops looked like:
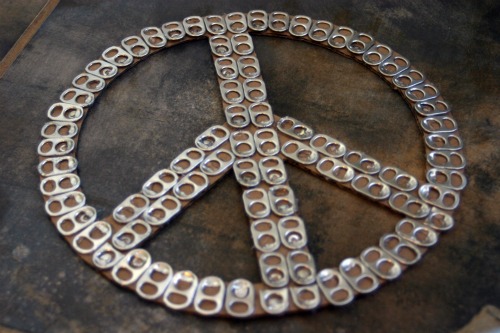
4. I didn’t like how you could still see the cardboard, so I put another layer of pop tops on it. Don’t put the second layer directly on top of the first one– vary it a bit so it really fills in the gaps.
Now your peace sign is ready to be hung up!
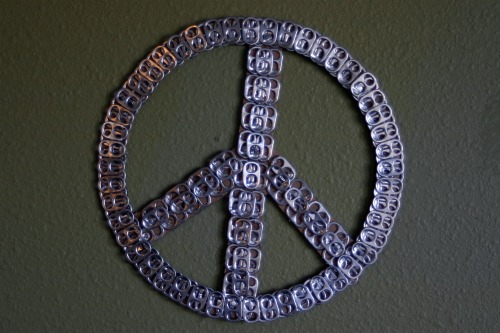
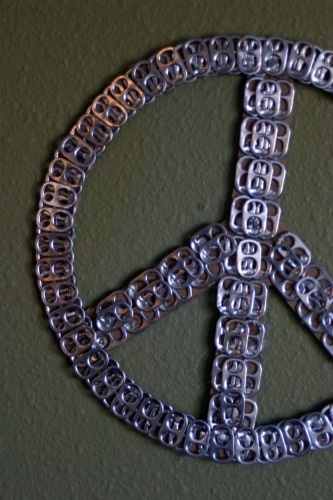
I love it’s shiny qualities and that we didn’t buy a plastic or paper one from the store. Plus, if peace signs aren’t your thing, you could make other fun shapes as well.


I LOVE this peace sign that you have made using soda tabs! I hope that it’s okay, I just finished a soda can crafts round-up and I hope that it is okay, I just could not resist featuring your peace sign! You can see it here:
http://jamiebrock.hubpages.com/hub/aluminum-can-crafts-round-up
Thank you so much for sharing 🙂
I love this idea!!! I want to make it for my classroom. Thank you for sharing. I will start collecting pop tabs with my first grade students!!
Andrea
about how many pop tops did you use for this project?
The for sharing this Im going to make it for my friend that just loves peace sings for her birthday gift or X-mas. 🙂
Pingback: 30 Plus Recycled Crafts - * THE COUNTRY CHIC COTTAGE (DIY, Home Decor, Crafts, Farmhouse)
Pingback: 20 Genius Ways to Recycle Soda Cans into Amazing DIY Projects - DIY & Crafts
Pingback: 20 Genius Ways to Recycle Soda Cans into Amazing DIY Projects | Diy Everyday
This is awesome. I am going to make one myself. I think that spray painting the cardboard with a metallic silver paint will take care of being able to see it. Luckily I have some left from a previous project. Thank you so much for sharing this! My dad saved can tabs for years so I am looking for original, creative ways to use them and this peace sign is perfect. Thanks again!
Pingback: 5 Aluminum Can Crafts to Make This Fall • Scrap Mart Metals Recycling
I love it I am disabled and do stuff just to have some thing to do I try and do some thing all the time ty for this piece I was born in the 60 and this bring back to my child hood