 So, now that you’ve made a nice kid a nice sweater skirt or a couple of nice diaper covers out of that nice (but ill-fitting) old sweater that you’ve been hanging on to, you still have some of that sweater left.
You have the sleeves, for one thing, and the shoulder and neckline that connects those sleeves.
And that, my friends, is exactly what you need to make that nice kid a nice pair of matching leggings to go with her skirt or her diaper covers.
This tutorial utilizes the crotch curve line from a pair of your kid’s own well-fitting pants–using that curve, and applying your kid’s waist and length measurements, you can create a warm, comfy, nicely-fitting pair of leggings that would go well layered with anything else in your winter wardrobe.
Here’s how:
You will need:
- adult-sized sweater, at least the sleeves and shoulder/neck area
- length of half-inch wide elastic
- pair of child’s well-fitting soft pants
- self-healing cutting mat, clear ruler, and fabric scissors
- sewing machine with zig-zag or overcast/blanket stitch and matching thread
1. Measure your child at the waist and inseam, and then measure your sweater. The length of the sweater sleeve from wrist to armpit should not be shorter than the child’s inseam measurement. The width of the sweater’s sleeve at the shoulder should not be shorter than one-quarter your child’s waist measurement (you can do some fudging to cut out leggings at the right size even if that measurement is shorter, but it’s futzier).
2. Lay out your sweater, sleeve towards you, on your cutting mat. Make sure it’s unwrinkled and that all seams are aligned.
3. Figure out where you’d like the crotch of the leggings to be. Leggings are easily cuffed, so it’s quite workable to measure them out long.
4. Take a pair of your child’s well-fitting soft pants, and fold them in half so that the crotch curve of those pants is easily visible. Align that to the point on your sweater sleeve where you want your crotch to be, and cut the sleeve to this curve. Cut all the way up to the top of the waistband of the pants. Your cut will extend up onto the shoulder of the sweater.
NOTE: If you need to add extra width to the waist, angle your crotch curve outward.
5. Add an extra three-quarter inch to the top of your cut for the waistband casing, and then cut along the waistband line to finish.
6. Lay the sleeve that you’re already cut out on top of the uncut sleeve, and use it as a template to cut out the other sleeve.
7. Turn one sleeve inside out. Put the sleeve that’s still right-side-out inside this sleeve, and line them up, right sides together, at the cut edges of the crotch curve.
 8. Using a zig-zag or overcast/blanket stitch to partially encase the seam as you sew, sew the two legs together along the crotch curve line.
9. Straighten out the leggings so that they’re neat but inside-out, and sew down the waistband to make about a three-quarter-inch casing for the elastic (I always eyeball this).
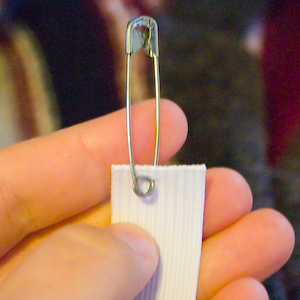
10. Cut a length of elastic to your child’s waist size plus about a half-inch. Insert the elastic through the casing using a safety pin to feed it through, stitch the ends together, and finish sewing your casing closed.
You’re finished!
And seriously, that took longer to write than it will take to make.


as we can all see – kids are realy useful these days…
I am kidding of course, your ideas are wonderful! please keep up the good work
Pingback: What’s Going On
Any idea how I could transform old hockey socks into christmas stockings?
If they need mending, or even if not (since it might be cute), you could hand stitch patches to certain areas. Also, you could sew a cuff & loop to the top to hang it from, and sew or embroider on other designs, and also the name of the person.
Pingback: 5 Fun Holiday Craft Ideas - Earth911.com
Pingback: Sweater Girl Leggings | snugglebugblog.com
could you show pics for the steps? i’m a little confused.
a couple of pictures would have really helped.
A picture of the crotch cutting steps would be most helpful to understand the positioning, especially when using a sweater that has already been cut up for the skirt. This just might be so simple that I’m over-thining it…
It’s really not so bad, so I’m betting you can figure it out when you’ve got that sweater sleeve in front of you.
You’re going to measure up from the wrist of the sweater, until you have the right length for your pants. Then you’re going to use a pair of your own kid’s well-fitting pants as a pattern for the crotch, so fold that pair in half–see how the crotch seam curves out to make room for your kid’s butt? Lay it over the sweater sleeve at the top of the length that you marked, with the bottom corner of the crotch curve on the inner-arm side of the sweater sleeve, and the waistband on the shoulder side.
Since knit material is so forgiving, if the sweater sleeve isn’t long enough to allow you to fit your whole kid’s pants pattern on it all the way up to the waistband, then you can rotate your kid’s pants pattern up onto the uncut shoulder of the sweater quite a bit, keeping that bottom crotch corner in the same spot, allowing you to sneak in a wider waist for the pants.
The other fun thing about these pants is that, since you didn’t cut out a front half and a back half for the pants, they’re reversible! Kids can put them on independently without worrying about getting them backwards. Good thing that kids are such straight little noodles, because that would never work for me!
Thanks so much, these were a big hit. Our 5 year old granddaughter loves her new leggings. This pair turned out great. We are going to hit the Thrift Store and find some really wildly patterned/coloured sweaters to make a few more. Then she wants me to make some for her best friend.
You are a genius!!! Thanks a lot for sharing your projects!!
Pingback: T-Shirt to Skirt Tutorial