Want to do some off-the-grid cooking without buying a camping stove, propane burner… or any new gear at all?
You can DIY cooking equipment every bit as good from two tin cans, a cardboard box, and candlewax.
This tin can stove absolutely free AND made from resources that would otherwise enter the waste stream. It’s also ultralight and super sturdy, making it a great option for backpacking.
The tin can stove has been a standard Girl Scout hack for generations (there’s a reference to it in my 1950 Girl Scout Handbook!). It’s something that most Girl Scouts probably remember making at their first camporee or troop camping trip. But if you’re not lucky enough to be a Girl Scout, here’s how you can make your own. Soon, you’ll be cooking up your own breakfast in a bag and walking tacos like you earned a badge for it!
Supplies
To make your tin can stove, you will need:
- #10 can. These are the big ones. They often hold something like 6-7 pounds of canned fruits/veggies, or 3 pounds of ground coffee.
- flat can. These are generally tuna or cat food cans. Get the wider ones for greedy cats, not the mini cans for little kitties.
- tin snips.
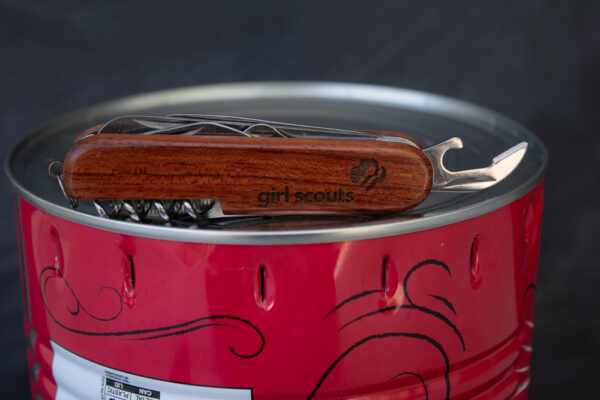
- Church key or manual can opener. A church key is a little harder to find these days, but a lot of pocket knives have a manual can opener tool.
- corrugated cardboard.
- wax. It’s better to scavenge the wax from old candles for this than buy new wax. Here’s how to reclaim the wax from a jar candle, and, of course, taper candles can be melted without any further to-do.
- old crock pot or double boiler.
Step 1
Use the church key or manual can opener to put a few holes around the base of the can. This allows smoke to escape, so your fire won’t smother.
Step 2
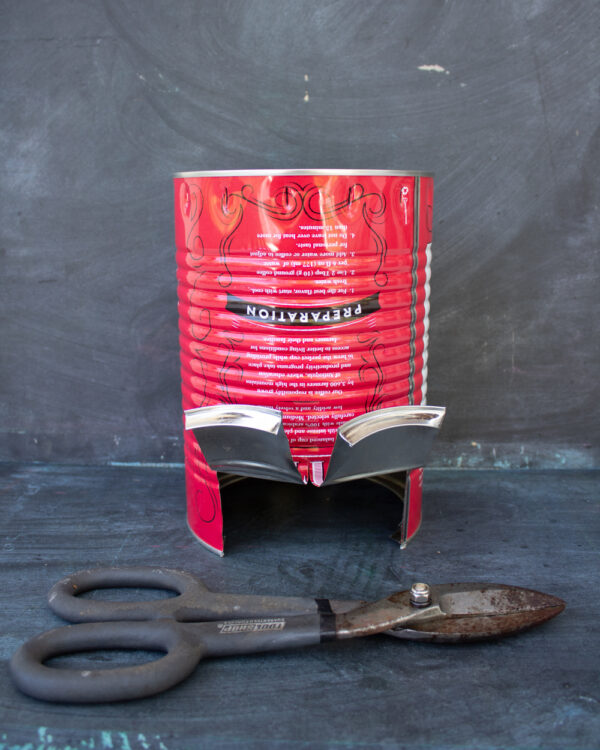
At the open end of the can, use the tin snips to cut a flap into the wall of the can. The flap should be at least a little bigger than the flat can you’ll be using.
You can deal with the flap a few different ways. If you’re a child, bend the flap inside the can and out of the way of your fingers. We don’t want our tin can dinner served with blood sauce! If you’re an adult, you can either cut the flap all the way off (although that edge you’ll leave makes it more likely that you’ll be eating YOUR dinner served with blood sauce!), or fold it up the way I’ve done in these pictures. Note that I had to cut the flap in half to make it fold against the curve of the can. I like having the flap like this because I can fold it down when I’m cooking to keep a little more of the heat inside the can, but it is a little more trouble to pack that way.
And that’s your tin can stove all finished! You can use it as-is with a small fire or some coals, but to make your own buddy burner, i.e. DIY fire source designed specifically to work with this tin can stove, read on.
Step 3
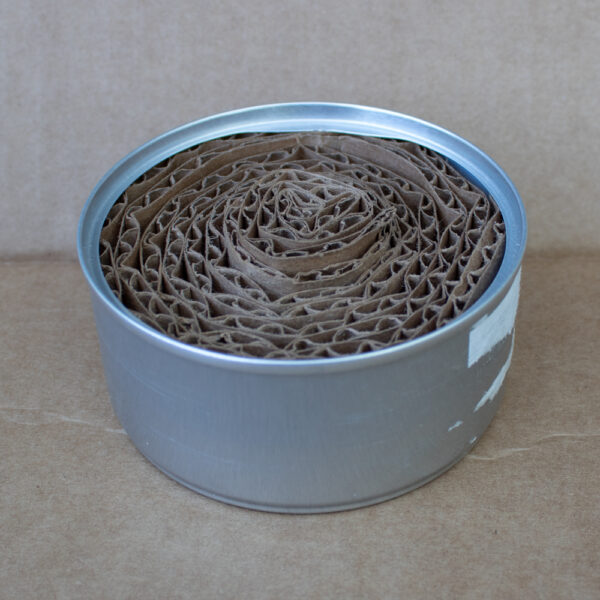
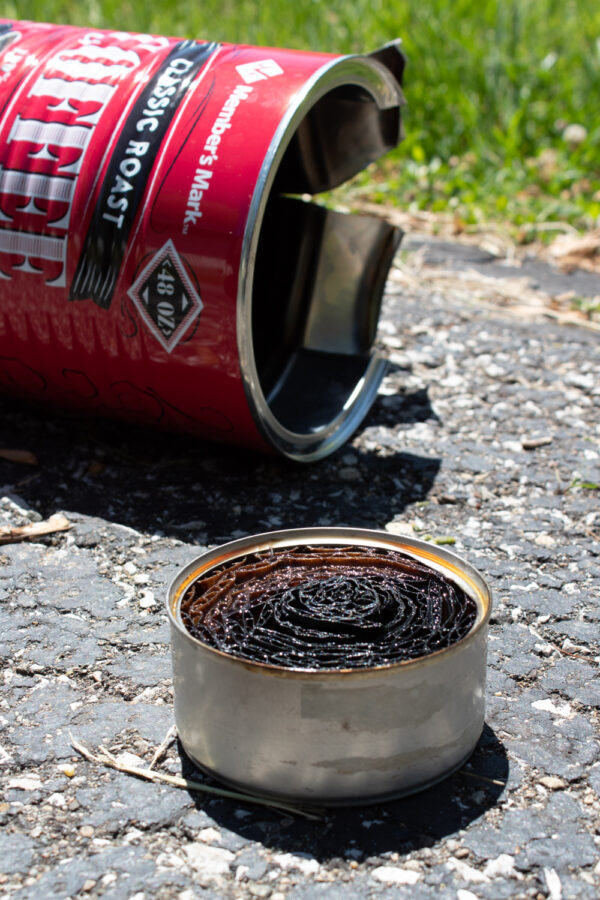
Cut an unholy amount of corrugated cardboard that’s about the same width as the height of your flat can, and as long as it takes to roll it up super tightly inside that can. For this buddy burner and this standard cat food can, I’m guessing it was about five feet.
Notice that the cardboard is cut across the bumps in a cross-section. You want that because those spaces are what you’ll fill with melted wax to make a thousand tiny candles that unite in a single cooking flame. It’s teamwork, y’all!
Step 4
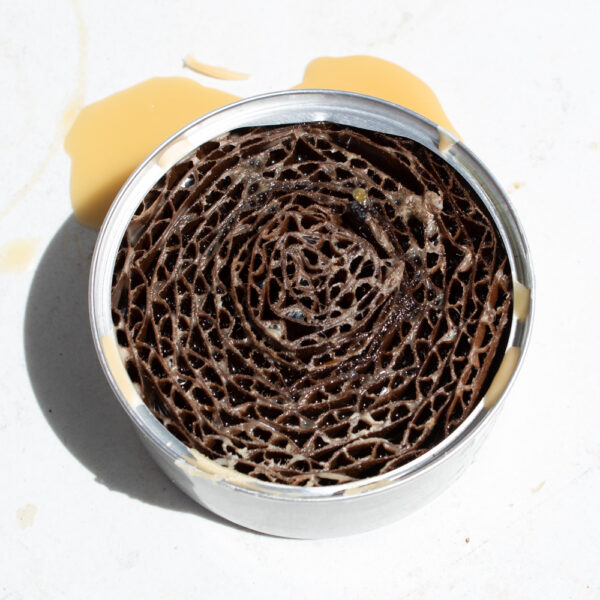
Melt wax in the crock pot or double boiler, and pour into the can until it’s filled almost to the top of the cardboard. I messed up this specific buddy burner by not filling it high enough (above). Then I overfilled it (below), because that’s how I overcompensate for mistakes:
See how the wax in the above photo covers all of the cardboard? Yeah, that’s not going to work. Fortunately, the solution is easy: use the flame from a lighter or candle to melt some of the wax off of the top of the cardboard, like this:
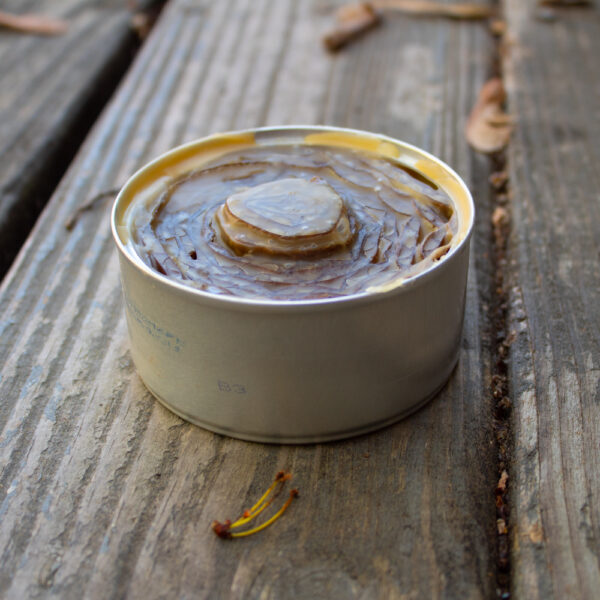
It may no longer look cute, but at least now it works.
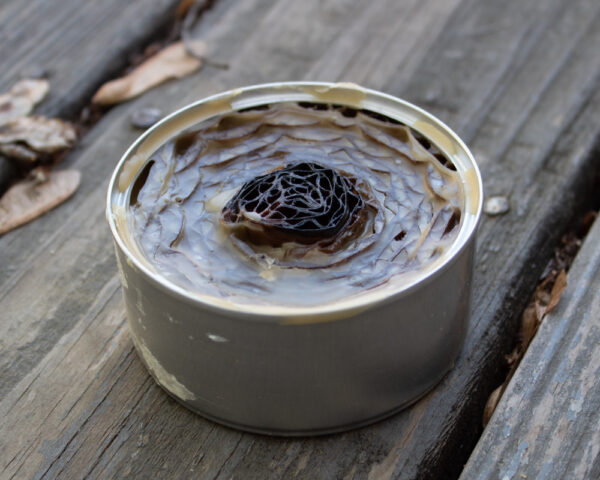
And here’s the proof!
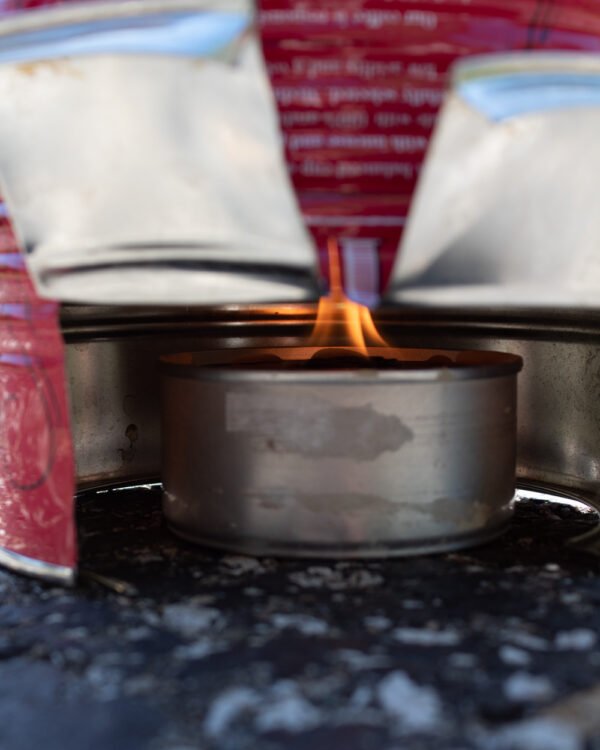
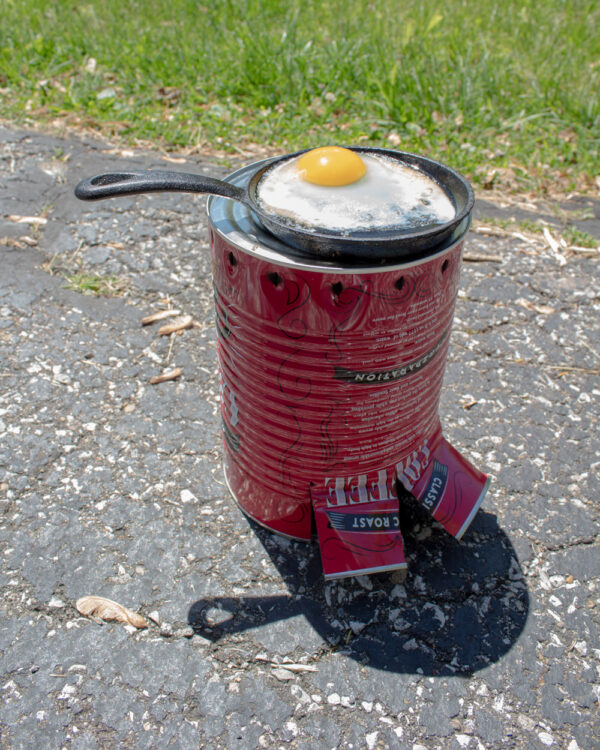
Set up your tin can stove in a fire-safe area. Bare dirt is fine, as are gravel and concrete surfaces. Light the cardboard on the buddy burner, then slide it through the panel and into the tin can stove. Be careful, because the stove will very quickly get as hot as–well, a stove!
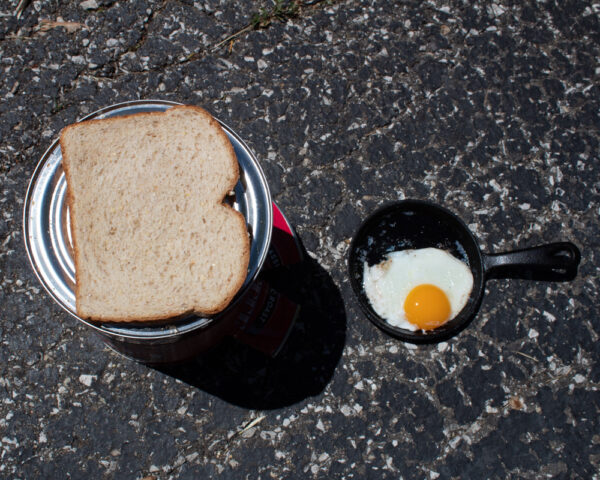
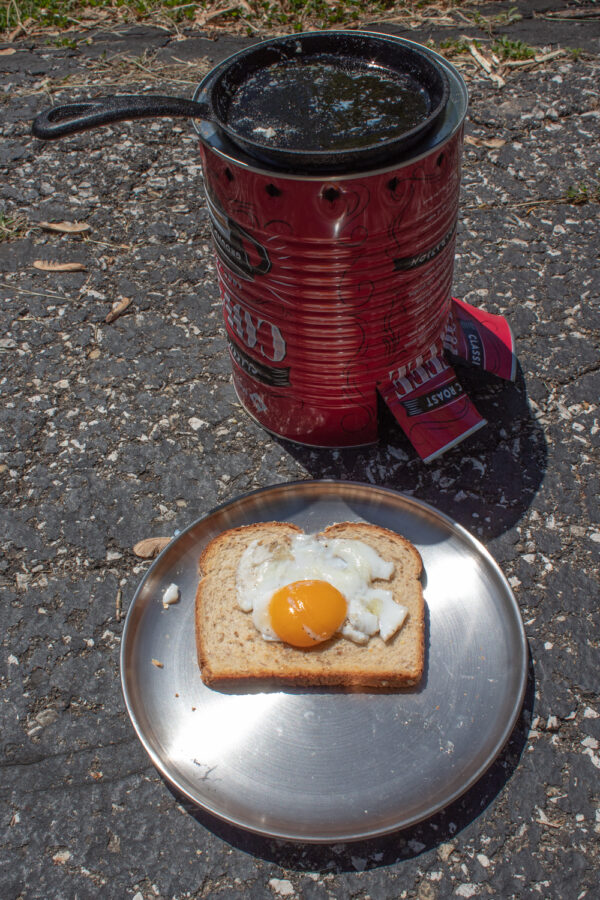
You can cook directly on the tin can stove. If you happen to have a teeny cast-iron skillet, then you’ve got even more options for cooking. Pancakes, eggs, toast, and bacon all work great, and if you add a small pot to your supplies, you can add oatmeal and all the other backpacking meal standards to your rotation. You can also use that same manual can opener to open up a can and heat the contents over the stove; I especially recommend heating up a can of chili for walking tacos!
When you’re finished cooking, tip over the tin can stove, then use a pot holder or tongs to set it upside-down on the buddy burner. This will smother the flame. The wax remaining in the buddy burner will take a little while to harden back up, so take a post-lunch nap before you get back on the trail.
To maintain the buddy burner, refill it with wax after every camping trip, as the wax will burn off a lot faster than the cardboard. When the cardboard burns down, that’s easy to replace, too.
Your tin can stove, however, requires zero maintenance, and is 100% happy to hang out in your garage between trips.


