If your kid’s pants aren’t too long, then they’re too short. I swear that my kids spend maybe a week, tops, in that sweet spot where their pants fit them perfectly, and even that sweet spot inevitably falls in the hottest week of summer, when they’re only wearing shorts.
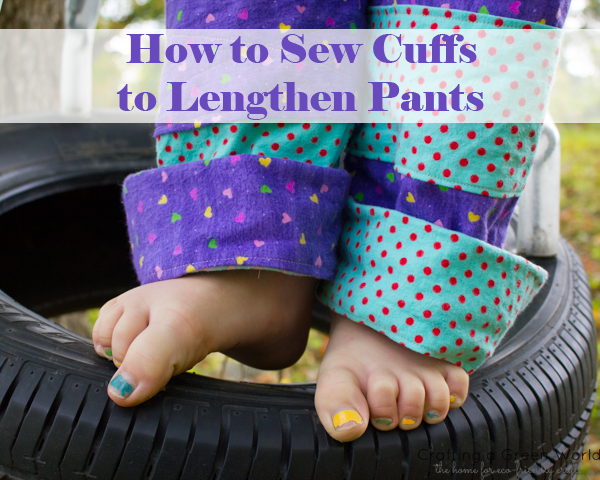
Fortunately, this method that I’m going to show you is a way to both lengthen pants and, if not to actually shorten them, then at least to make the ubiquitous cuffs look intentional. It’ll make your kids’ clothes last much longer, which is way better for the environment–and your wallet!
You’ll need:
- contrasting piece of scrap fabric (two layers, if you’re lengthening pants)
- scratch paper, ruler, and gridded cutting mat for creating a pattern
- all your sewing supplies
1. Lay your pants or pants pattern flat. You can start with either an existing pair of pants, or a pattern for a new pair of pants. I’m starting with a pattern for pants that I know are going to be way too long for my kid, but they’re elastic-waisted, so why lose all that potential for growth?
 2. Trace a new cuff pattern. You’re going to do this one of two ways. If your pants are too short (cut off or unpick the bottom hem if you’re starting with an existing pair of pants), then use a ruler and a gridded cutting mat to extend the line of the pants leg to TWICE the extra length that you’d like (otherwise the cuff will look weird); add seam allowances on all sides.
If your pants are too long (again, cut off or unpick the bottom hem if you’re starting with an existign pair of pants), trace the line of the pants leg up to the length that you want to cuff; add seam allowances on all sides.
NOTE: If you’re starting with a pants pattern, you may need to make a pattern piece for both a cuff front and a cuff back.
3. Cut out and sew the new cuff. Trace and cut out the new cuff pieces; if you’re shortening your pants, then cut one cuff for each pants leg, and if you’re lengthening your pants, then cut two.
Sew the front and back piece of each cuff together at the side seams.
If you’re shortening your pants, fold the top edge of the cuff down 1/4″ to the wrong side and iron flat. Turn the pants leg right side out, then insert the cuff around the pants leg so that the right side of the cuff faces the right side of the pants leg. Sew the two together around the bottom edge.
Turn the pants leg to the inside, then fold up the cuff so that it’s smooth and lining the inside of the pants leg. Iron the bottom edge flat, then edge stitch. Pin and edge stitch the top of the cuff, as well, using bobbin thread that will match the front of the pants.
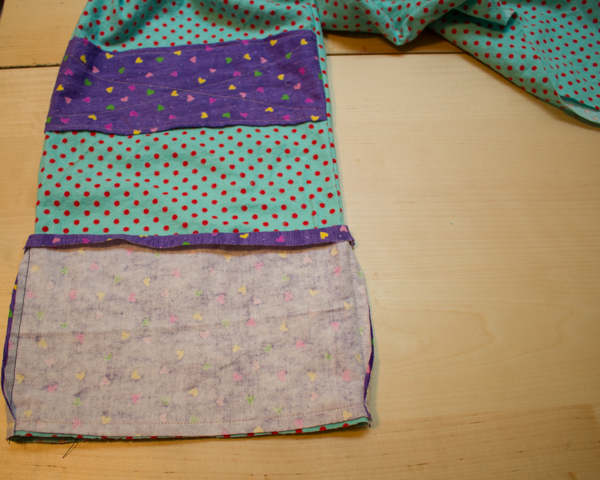
If you’re lengthening your pants, place your two cuffs right sides together, sew them together across the top edge, then turn, iron flat and edge stitch.
Turn both layers of the cuff to the inside by 1/4″ at the remaining raw edge, and iron flat.
Turn the pants leg right side out, then encase the bottom raw edge of the pants leg into the new cuff, sandwiched between the two folded-down edges of the cuff. Pin and sew.
4. Tack the cuff down. Try the pants on the kid, and fold up the cuffs to your liking. Remove the pants from the kid, then tack the cuffs down with just a couple of stitches in a couple of places so that they won’t come uncuffed.
You can revisit the pants seasonally as your kid grows, untacking the cuffs, folding them again so that the pants are the correct length, and then tacking them down again.