
As I’ve gotten older, I’ve gotten a lot more precious about the conditions under which I can sleep. Long gone are the days when I could (and did!) happily fall asleep with a backpack as a pillow on the front lawn of the British National Gallery because the hostel was overbooked. These days, I’m more likely to toss and turn all night in a sleeping bag on the floor of the Newport Aquarium, surrounded by snoozing Girl Scouts, as I contemplate all the ways in which the aquarium lighting is slightly too bright, and the kids are breathing slightly too loudly, and I’m maybe slightly too cold.
Heck, forget the Girl Scout Overnights–I go through the exact same scenario five nights out of seven here at home!
So whether you, too, are a precious sleeper like I am, or you just need a little help occasionally, you might find that a sleep mask is just the ticket. A soft and comfy sleep mask will block any ambient light that comes your way, letting you drowse in complete darkness.
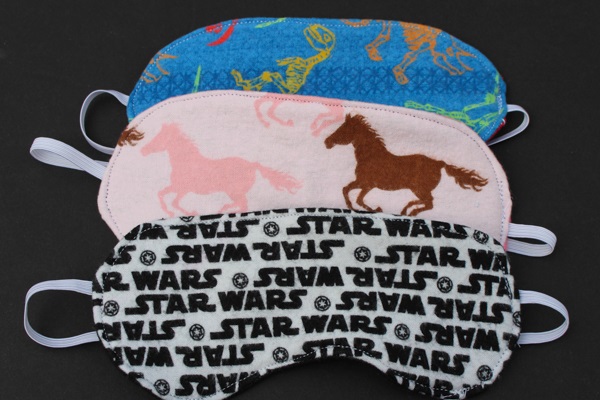
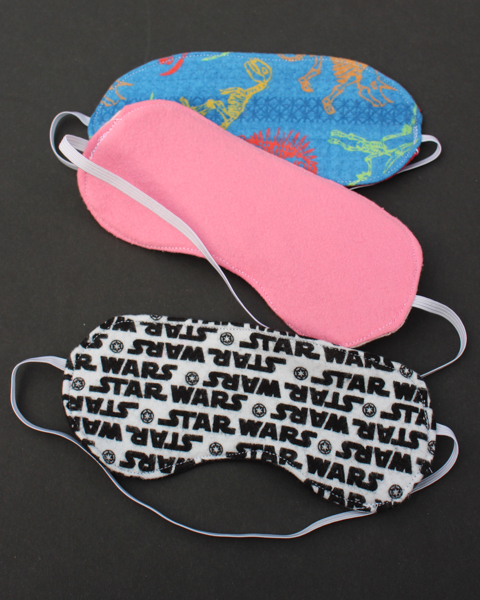
And sure, a store-bought sleep mask doesn’t break the bank, but if you’ve seen the way those things are thrown together, and out of what materials, then you’ll understand why I think it’s nice to make your own. You can use organic flannel fabric to make your sleep mask, and if it just happens to have dinosaurs or your favorite Star Wars character on it, well, so much the better!
Supplies & Tools
To make your own sleep mask, you will need:
- Flannel fabric. Organic flannel is the most eco-friendly choice, and leftover flannel scraps are the most budget-friendly choice.
- Fabric for the center of the mask. I use scrap pieces of black fleece to make my sleep masks nice and cozy and to block all light. Fleece isn’t a natural fabric, though (did you know that you can buy eco-friendly fleece that’s actually made from recycled plastic?!?), so organic options would consist of more organic flannel, felted wool or wool felt, or layers of any other organic fabrics that you have on hand.
- Elastic. I like a super-thin 1/4″ elastic so that it doesn’t feel constricting. I cut lengths of 14″ for adults and 13″ for kids.
- Pattern. You can make your own sleep mask pattern by tracing the front of your favorite sunglasses, enlarging it, and adding a seam allowance, but I like to do a Google search (search “sleep mask filetype:pdf” to find a pattern that’s already the correct size) for a pattern that appeals to me. Whatever pattern you choose, these directions will work!
Directions
1. Cut the pieces and layer them for sewing.
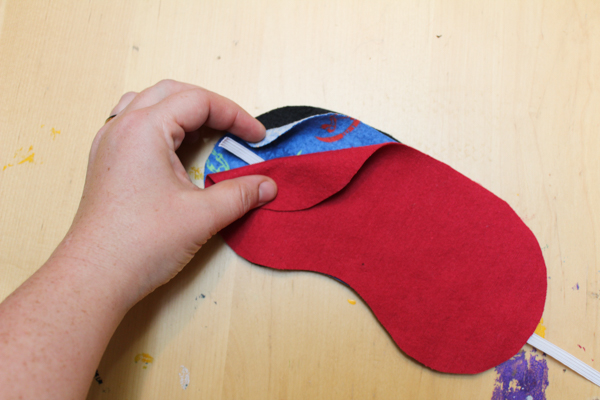
You will need to cut one sleep mask front, one sleep mask middle, one sleep mask back, and one length of elastic. Since you’ll be sewing and turning this mask, AND there’s a middle layer involved, the layout is a little tricky, so read carefully:
- The sleep mask middle layer goes on the table.
- The sleep mask front goes on top of it, RIGHT SIDE UP.
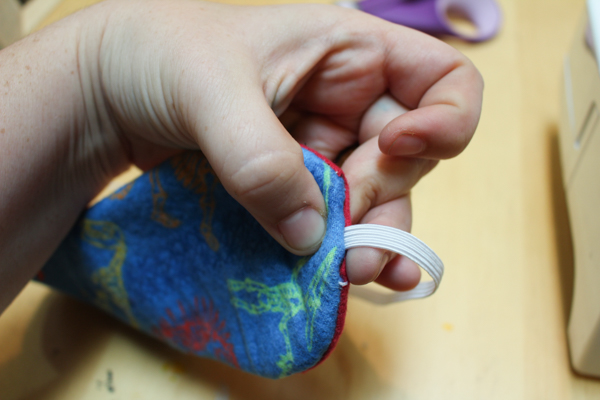
- Line up one end of the elastic with the left side of the sleep mask front, and let the rest of the elastic rest across the mask and off the other end–see the image above for how that should look.
- The sleep mask back goes on the very top, RIGHT SIDE DOWN.
Pin all the layers in place where you’ve lined up the elastic at the edge of the mask. You’ll be sewing across this elastic to hold it to the mask. The other end of the elastic will come out the part that you leave unsewn so that you can turn the sleep mask right-side out.
2. Sew the pieces of the sleep mask together.
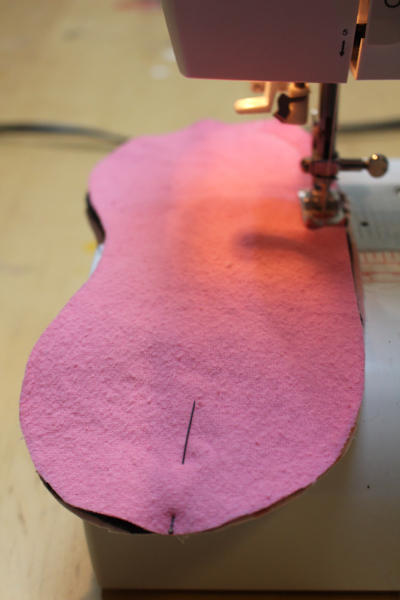
Sew around the sleep mask, starting in front of the free end of the elastic and ending behind it, so that you leave an opening for turning the mask right-side out. When you reach the pin that’s holding the other end of the elastic, remove the pin and then sew a couple of times over the elastic to secure it.
3. Trim the middle layer (optional).
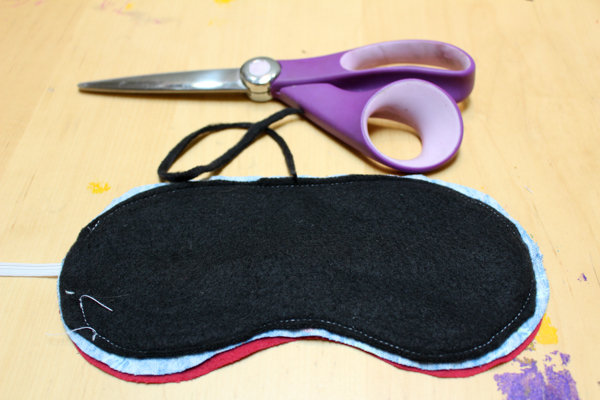
I like to trim that bulky middle layer before I turn the mask right-side out, but every now and then I forget, and my mask still looks fine. Regardless, it saves some wear and tear on your machine to not make it sew through bulky seams.
4. Turn the mask right-side out and place the elastic.
Turn the mask right-side out, and use a blunt tool (I use a dull colored pencil) inside the mask to press all the seams out.
Iron the mask flat, straightening the seams as you do so and ironing the raw edges of the mask’s open end to the inside.
Make sure the elastic isn’t twisted, then insert the free end into the opening of the sleep mask. Either pin it in place or keep hold of it until you sew it.
5. Edge stitch the sleep mask and secure the elastic.
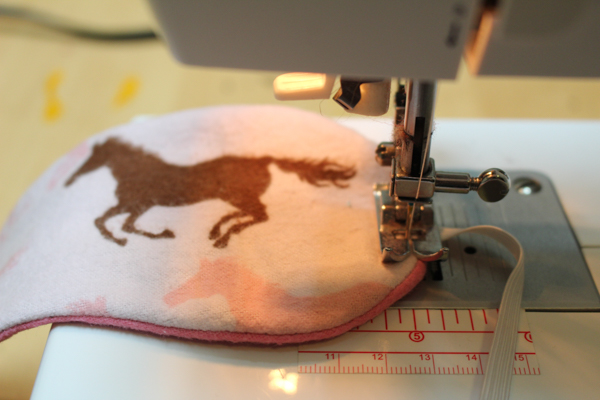
Edge stitch around the sleep mask, beginning with the elastic that you inserted into the opening. Sew over the elastic a couple of times to secure it, then continue edge stitching all the way around the mask.
These masks are so cute that people don’t realize how easy they are to sew, meaning that they make great gifts. A sleep mask would be a lovely part of a homemade spa gift, perhaps with a homemade bath bomb, some bath salts, and a crocheted washcloth.
P.S. Skip the elastic, and after you’ve turned the sleep mask but before you’ve closed the end, fill it will flax seeds. Refrigerate, and you have yourself a weighted, cooling, restful eye pillow!


The problem with ALL polyester is that it is the lowest frequency fabric there is. Everything has a frequency, linen having the highest of the fabrics. So ANYTHING cotton will be better than ANYTHING polyester, hands down, as far as human health is concerned. I for one am tired of the lack of choices anymore. Why does spandex have to be in EVERYTHING? Ribbed tank tops? Really? Like they don’t stretch enough!. I used to be able to compost my clothes when I wore them out.