

 Even back before I was a crafty lady, I nevertheless was able to make myself a rice pillow. It consisted of…ahem…a tube sock filled with rice and tied off at the top, and bless its heart for being so ugly, but it worked great. I heated it up or chilled it down and used it for all kinds of aches and pains, including the birth of my older daughter, and I only got rid of it by passing it on to a dear cousin who was pregnant, so that she could make use of its good labor mojo.
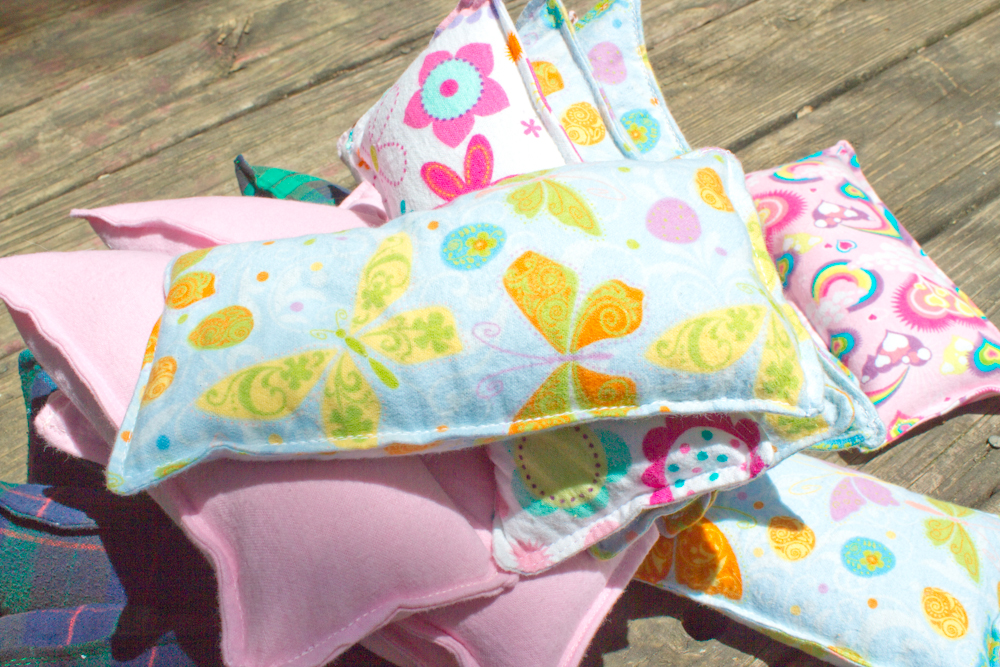
And then I turned into a crafty lady, and I made our family a much larger set of much cuter rice pillows.
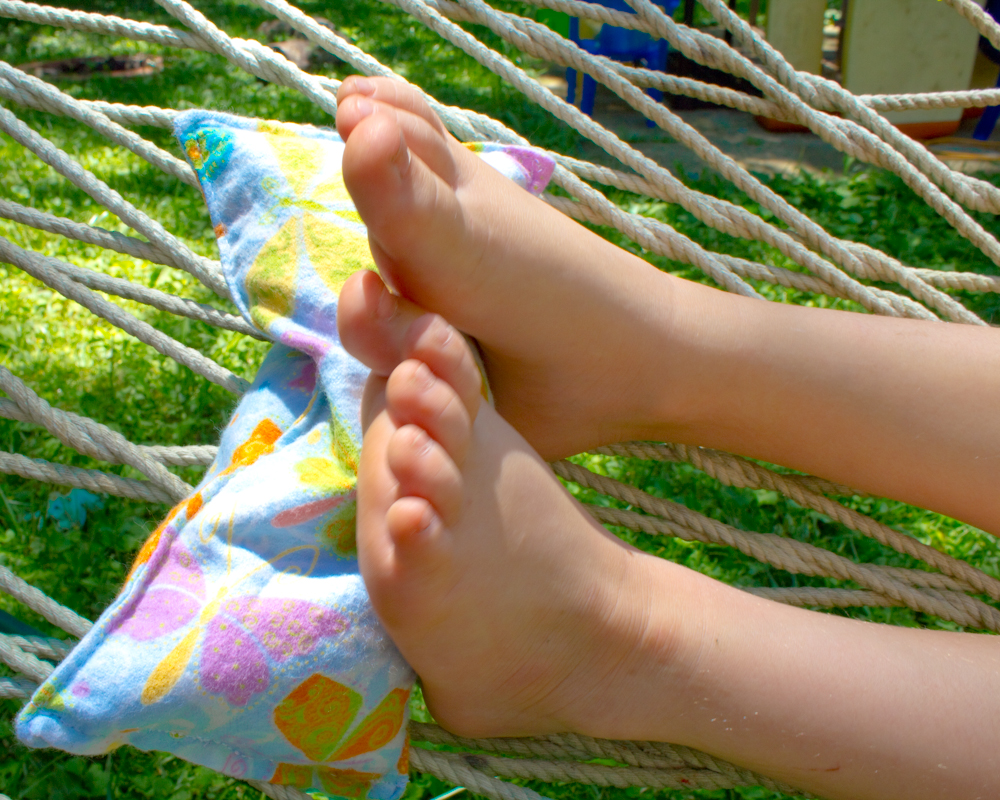
Rice pillows are a mainstay in our family’s natural first aid kit. Microwaved for a minute, they turn into a heating pad perfect for anything from menstrual cramps to chilly footsies on a cold winter night. Frozen for an hour, they’re cold packs, great for everything from sore muscles to feverish foreheads. They’re weightier than either store-bought heating pads or cold packs, which allows the temperature to penetrate, and they’re made of comfy, soft, snuggly flannel. Add in a cutesy print or two, and you have the perfect comfort tool for a myriad of remedies.
Read on for the step-by-step instructions for making your very own rice pillow in your own cutesy print:
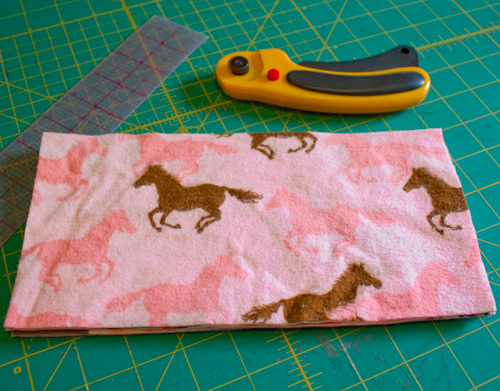 One of the nice things about making your own rice pillow is that you can make it any size that you like. You want to make it larger than a bean bag, so that it has some heft to it, but otherwise it’s up to you.
I typically make my rice pillows about 4″ x 8″ to serve my own family of people both little and big. When I make these for my pregnant friends to use in their labors, I usually make them about twice as long in order to fit around a big ole’ pregnant belly.
After you’ve picked a good size, cut your fabric to that width plus 1/2″ (assuming 1/4″ inch seams), and that length plus 1″.
Next >> Sew Three Sides
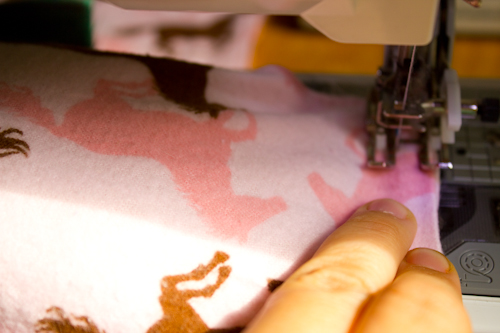 With right sides together, sew around three sides of your rice pillow, leaving one short end unsewn. Clip the corners and turn your pillow right side out.
Top-stitch around the three sewn edges of the rice pillow–when you reach the end of the third side, lift your presser foot, turn the pillow around, and sew your way back to the beginning before back-stitching and clipping your threads. You want your seams to be nice and sturdy!
Next >> Fill with Rice
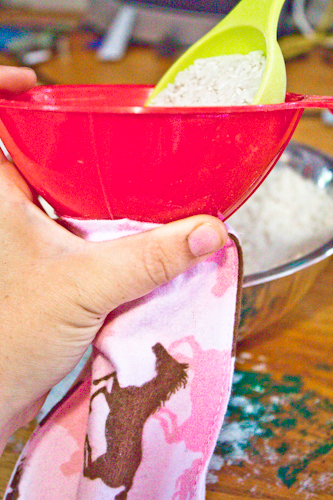 Fill your rice pillow about 3/4 full of dried rice. Use either the wide-mouthed funnel that you use when canning or a large spoon or ladle, because it’s annoying to pick dried rice off of the outside of your fabric when you’re finished.
Feel free to customize your rice pillow at this point. You can use organic dried rice, for instance, or you can add dried herbs, such as lavender or eucalyptus. These herbs will scent your pillow when heated for its first several uses, but be warned that their scent will eventually fade.
Next >> Turn and Pin
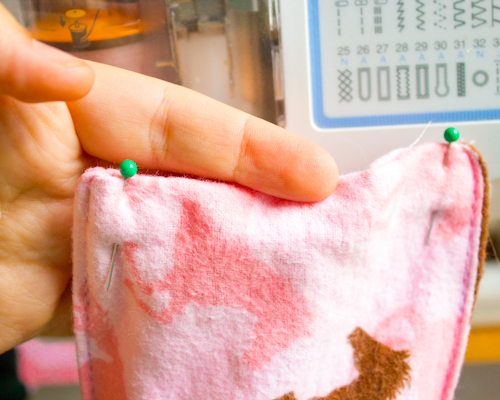 You’ve left yourself a wider seam allowance for this last seam, because this will make it much easier to sew while you’re also dealing with the dried rice. Turn the final seam of the open end of the rice pillow about 3/4″ to the inside, and pin it in place.
Next >> Top-Stitch
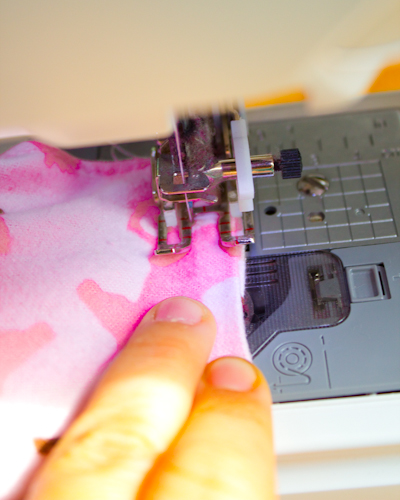 Top-stitch this last seam into place three times, lifting the presser foot at each end and turning the fabric to top-stitch back the other way. This will ensure that each seam in your pillow is triple-stitched. That dried rice isn’t going anywhere!
Next >> Uses and Variations
To use the rice pillow, store it wherever you keep your first-aid supplies. To make the rice pillow into a heating pad, microwave it for one minute, then check its temperature. If you want it hotter, microwave it for additional time in 30-second increments, checking the temperature each time. The rice pillow will hold its heat for up to an hour.
To use the rice pillow as a cold pack, put it inside an airtight storage container, so that it doesn’t pick up condensation, and freeze it for one hour. Again, the rice pillow will hold its temperature for quite a long time.
You can customize this rice pillow in lots of ways. If you’d like to make a removable, washable cover, then simply sew it slightly larger than the original rice pillow, and use whatever button, snap, or Velcro closure that you prefer. You can sew a pocket onto your pillow to accommodate a changing assortment of dried herb sachets. You can sew each member of the family their own personal rice pillow, in their own favorite fabric–as I clearly did!


Thanks for this post on how to convert a rice pillow into a heating pad or cold pack. What a great idea!