
Alas, for the button has just popped off your pants! If you’re lucky, it has simply fallen to the floor at your feet, ideally while you’re getting dressed alone in your room surrounded by plenty of other suitable pants options.
Of course, the way this year has been going, it’s much more likely that your button has pinged off explosively in the middle of a crowded room, probably while you, yourself, are at the center of attention, and it has first smacked someone important in the eye and then fallen… somewhere, probably deep in a crack between the floorboards.
And that was your only pair of nice pants.
Fortunately, sewing a button back on your pants is a super easy and low-fuss skill that requires only a basic amount of hand-eye coordination. Anyone can do it!
Tools Needed
You will need:
Replacement Button
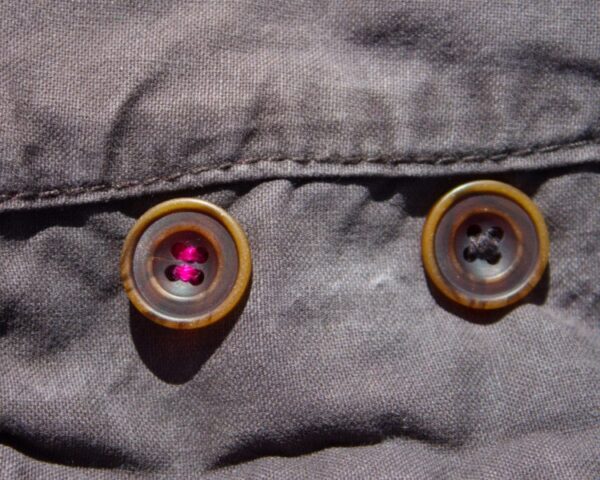
Look all over the inside of your pants and it’s very likely that you’ll find a couple of spare buttons sewn into a seam somewhere. Even this pair of fast-fashion H&M cargo shorts come with two replacement buttons!
If your pants didn’t come with any spare buttons, however, you can use any same-sized button. Take a spare one from another pair of pants, perhaps, or ask around your local buy-nothing group.
Needle, Thread, Scissors, Seam ripper
Dig through your junk drawer until you find that travel sewing kit you got somewhere, or ask the hostess or concierge if you’re somewhere public. If you do need to buy your supplies new, however, a small travel sewing kit is an inexpensive and practical purchase; look for one that has a seam ripper, a choice of pins and sewing needles, and a small selection of threads in basic colors.
Directions
As a quick note, in most cases, people want to mend their possessions to look as similar to new as possible, and that’s okay! Don’t be afraid, though, to have a little fun with your repair. With these shorts, I did use the spare button that came with them, primarily because it’s a boring brown button.
If I used a cute button from my stash then I’d just have one more boring brown button in my stash, instead, and I already have plenty of boring brown buttons, thank you very much.
BUT, instead of boring brown thread, I used awesome fuchsia embroidery floss, because when I mend something I like to make it fun. Bonus: embroidery floss is very sturdy!
1. Pick Away Loose Threads
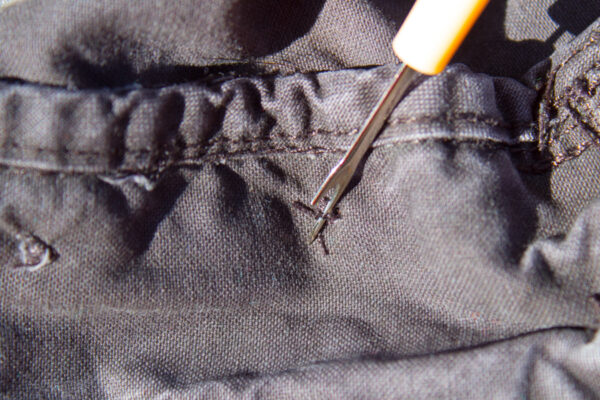
Your button likely left a mess of thread behind when it fell off. Use the seam ripper to pick all of that out, being careful not to pierce the fabric of your pants with its pointy end.
2. Stitch An X To Start
When the loose threads are gone, you’ll likely see evidence on the fabric of where the button stitching was. If you’re lucky, you’ll even see holes in the fabric from the stitching.
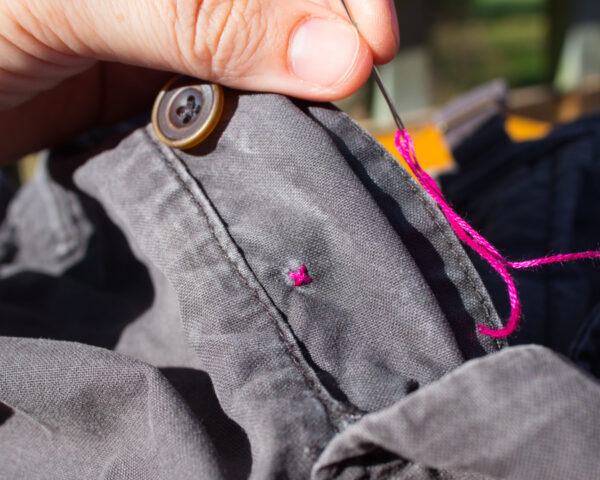
That’s great because you want to sew your button back on exactly where it was before. Thread your needle, and using those holes if you have them, stitch a small x exactly where you want the center of your button to be. Buttons have to undergo a lot of pressure, and this x reinforces the button and your sewing.
3. Sew The Button To Your Pants
This part is a little tricky, so stay with me here: you can’t simply sew the button directly to your pants. It feels obvious that you should be able to, but if you did, you wouldn’t actually be able to button them, because there wouldn’t be any room behind the button for the buttonhole fabric.
Instead, when you sew the button to your pants, you have to leave a gap between the button and the pants. You’re going to do that by holding something narrow–a pin from your sewing kit, perhaps, or the stabby bit of the seam ripper–against the top of the button as you sew it. Here’s what it looks like:
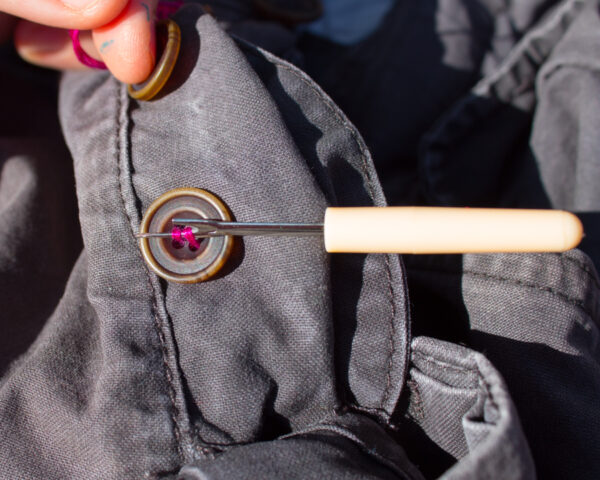
In the above photo, I’m stitching up from the back of the fabric, using the same hole that I made stitching my starting x, pushing my needle up through one of the holes in the button, and pushing it down through another hole in the button and into the fabric, using another one of the holes that I made stitching my starting x. Before I pull the thread tight, I’m placing my seam ripper on top of the button, essentially sewing the seam ripper to the top of the button.
This is the fiddliest part of the process, because you’ll feel like you need one hand to hold the fabric, one hand to hold the needle, one hand to hold the button, and one hand to hold the seam ripper in place. Just try not to throw the whole thing across the room and after you’ve done a couple of passes, the seam ripper will stay put on its own.
How many times you sew through the holes in your button is going to depend entirely on the width and quality of your thread. If you’re using the thread that came with your travel sewing kit, it’s probably on the flimsier side, and so you may need to sew through those holes eight or so times. With my embroidery floss, I only had to sew through each hole twice. With standard store-bought thread, a good number is around six.
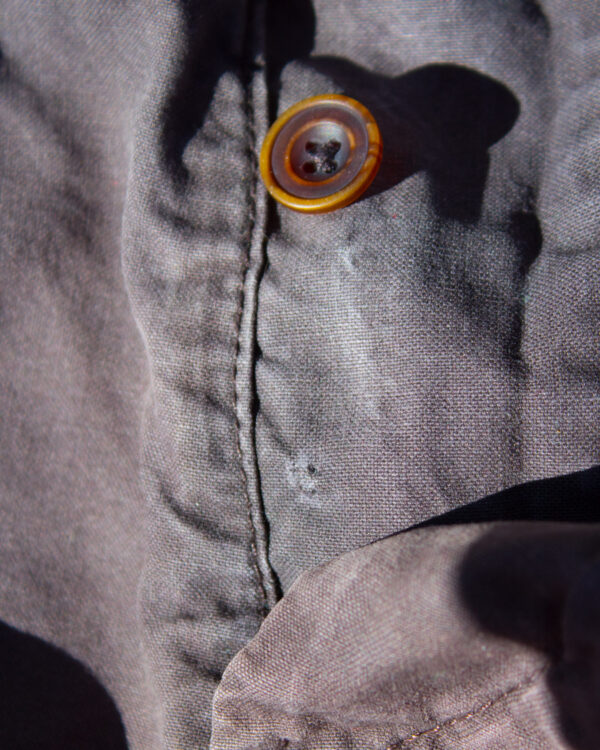
4. Make The Button’s Shank
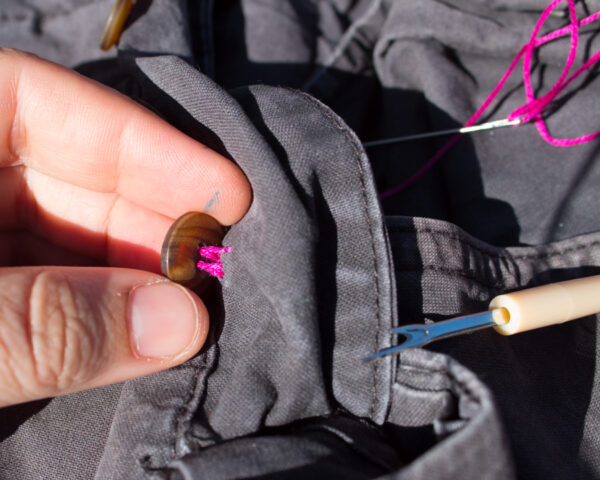
This is my favorite part! When you’re satisfied that the button is secure, make sure your needle is at the back of the fabric, then remove the seam ripper and pull the button away from the fabric. Now you’ve got plenty of room for your pants to button!
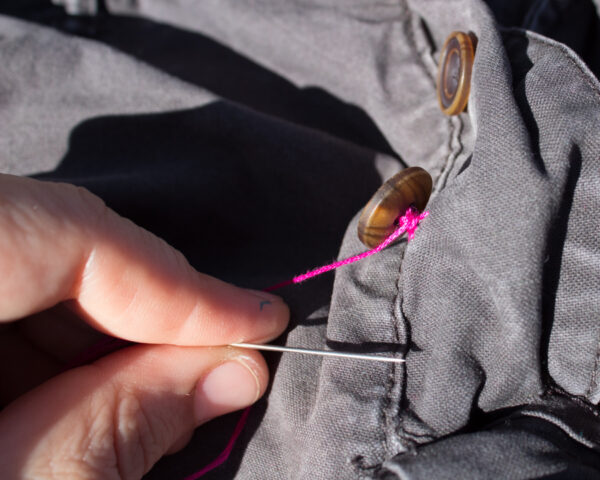
Push your needle back through the fabric, then wrap it around the thread between the button and the fabric 6-8 times, forming the button’s shank. When the shank looks nice and tidy and is completely covered by wrapped thread, stop wrapping so your shank doesn’t get too bulky and push your needle back through the fabric.
5. Knot The Thread
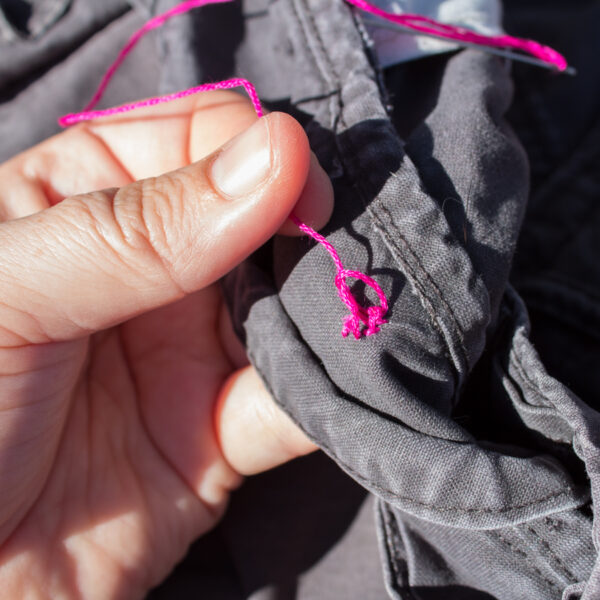
Sew a stitch through your cross-stitch x, pull it snug, and knot it against the fabric. Cut away the excess thread.
Although I used pants for my demo, this method works exactly the same, of course, for any button, whether it’s on a shirt or a bag or a skirt. Shank buttons work differently, but you’re not going to find those on a pair of pants.


Thanks, presh you for the quick refresher on button replacement. Lol I forgot the spacer the first time, ty for your instructions.