

The one major problem with homemade greeting cards is homemade envelopes. Either you can’t find an envelope that perfectly fits your custom-sized greeting card, or the envelope fits but doesn’t match your beautiful card.
This problem is easy to solve: simply make custom homemade envelopes to go with your homemade cards!
Here’s how to draft a template that is exactly right for every card, and how to assemble it so that it keeps your card safe in the mail.
You will need:
ruler and French curve. The ruler is easy–I know you’ve got one! The French curve might seem trickier to obtain, but since it’s often required for many upper-level high school and college art and design and engineering classes, it’s actually pretty possible to pick up one second-hand, often even dirt-cheap at a garage sale, if you know what you’re looking for. I think a French curve is well worth owning, but if you’d rather not have one more crafting accessory, then substitute a large plate or something else with a gentle curve.
large-format paper. You can make an envelope for a 5″x7″ greeting card from one piece of 12″ paper. Suitable papers include anything that you can think of–scrapbook paper, wrapping paper, grocery bags, even cereal boxes, although you’ll have to pay extra for mailing those envelopes since they’ll be non-machinable.
glue stick. It is amply sticky to assemble and seal your envelope.
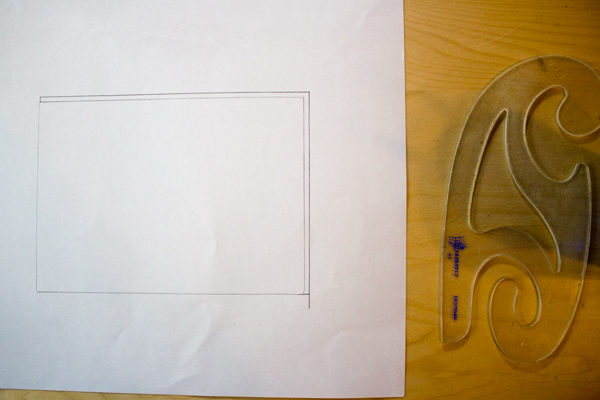
1. Make your envelope template. Trace your card onto a piece of large paper, then add about 2 cm to both the length and width of the tracing.
Draw a line through the exact center of the tracing for both length and width, and extend the lines several inches past the tracing on each side.
Your top and bottom envelope flaps will need to overlap, and your side flaps should come close to center, so make sure that you have room on your template to draw top and bottom flaps that are longer than one-half the distance across the template, and side flaps that are close to one-half the distance. If you’re not sure, go ahead and continue making your template and then test it when you’re done. It’s not a big deal to have to make a second draft, if you need to.
Use the French curve to help you draw a curved envelope flap from each edge of the envelope. The top of the curve should meet the center mark, and then curve back down again to the other edge of the envelope:
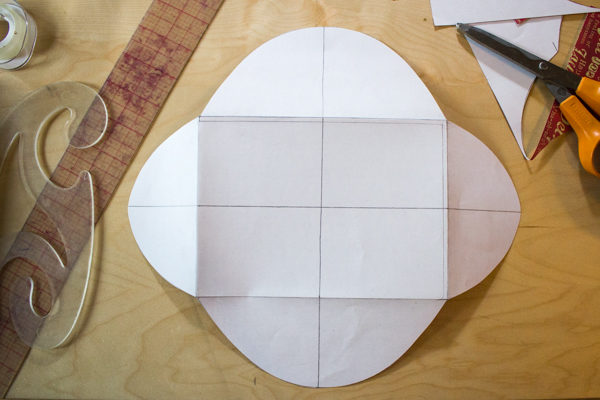
Fold it when you’ve gotten the template drawn and cut out and see if there’s enough overlap to be able to assemble and glue it. If not, Trace the template again as your starting point on a new piece of paper, and make the flaps larger. Otherwise, use your template to start making envelopes!
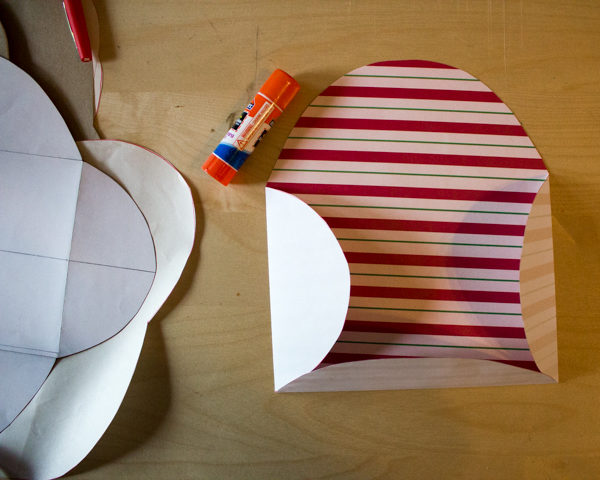
2. Assemble the envelope. Before you fold your envelope, consider whether you want the patterns on your paper to show on the outside or the inside. If you have plain brown or white address labels that you can stick on the outside of the envelope, then your pattern can be on the outside, but if you need to handwrite the address directly onto the envelope, then you will probably need to keep your pattern to the inside of the envelope. It will be a nice surprise for the recipient!
Before you put a card in the envelope, fold all of the flaps to crease them. Fold up the bottom flap first, then fold the side flaps and glue them where they overlap the bottom flap. Let dry.
After you’ve stuffed the envelope, fold over the top flap to close the envelope, and glue it where it overlaps the bottom and sides. Let dry.
If you like your cards and envelopes to match perfectly, look for cardstock and scrapbook paper at a crafts store–you can often find scrapbook paper with several choices of nice designs that perfectly complement your cardstock.
If you want your envelopes to be festive, upcycle last year’s leftover wrapping paper.
If you want to be able to decorate your envelope yourself, upcycle a brown paper grocery bag or paper packing material, embellishing the plain surfaces with markers or stickers.
Whatever you use, your envelope will fit better and look cuter than any store-bought one!


These are so cute! I remember making little envelopes for the notes I would pass in class when I was in elementary school! Memory lane!