
Slime is a wonderful sensory experience, and I’m thrilled that so many young people are embracing the joy of exploring interesting textures (there are no interesting textures on their phones!). Making slime is also a terrifically educational activity, with problem-solving and reading and following instructions combined with quite a lot of chemistry and not a little bit of physics, as well.
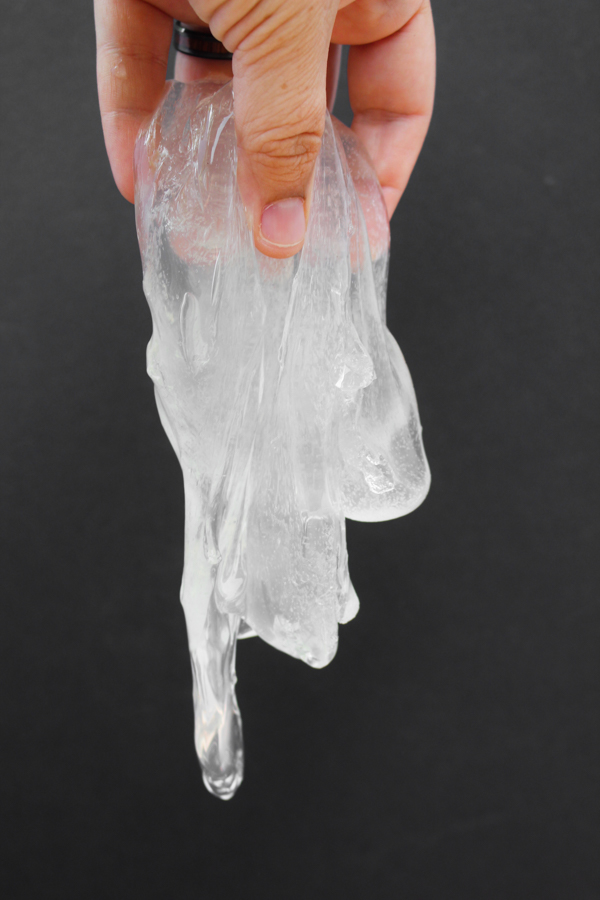
To make clear slime, I consulted my own resident slime-making expert. She’s put in hundreds of hours making slime, and is here with us today to teach you how to make clear slime, the Holy Grail of slimes. Syd’s clear slime isn’t your ordinary, everyday “clear” slime that’s actually milky or white, she tells me. When she says that her slime is clear, she means it is CLEAR.
As in crystal!
So read along as the world’s slimiest kid takes the task of making clear slime and breaks it down so simply that even the average non-slimer adult can follow it.
To make clear slime, you will need:
- Clear Elmer’s glue. I used to be able to buy this by the gallon, but lately, I’ve only found smaller containers for sale. I sure hope the gallon size comes back soon!
- Hot water. The water should be hot, but still, a comfortable temperature for a kid to touch. For mobile slime-making (yes, this is something that she does…), Syd boils a kettle of water, then pours it into a thermos for transport.
- Contact lens solution. Buy the cheapest on the market for this project, making sure that it contains boric acid.
- Baking soda.
- Two mixing bowls, a spoon, and a resealable container for storage.
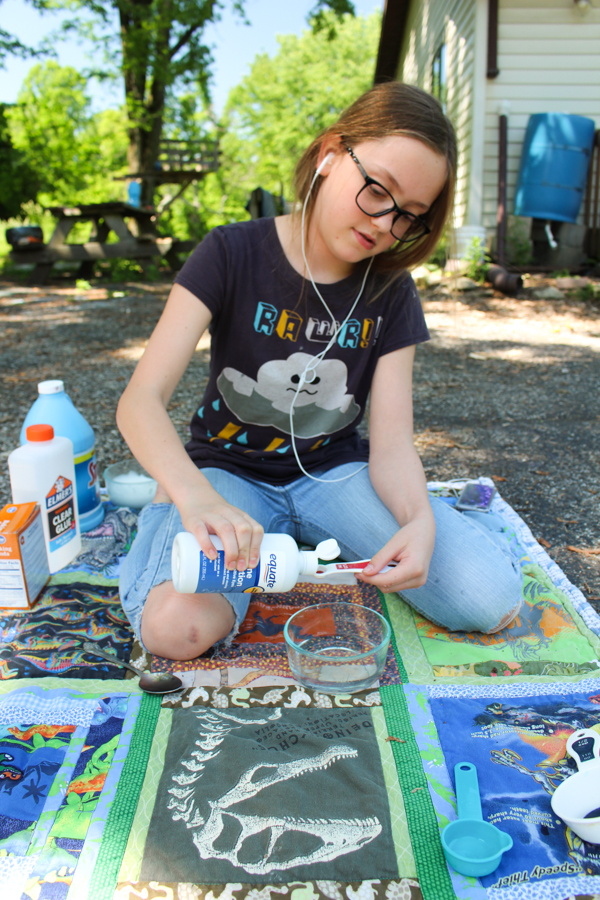
1. Pour 1/2 cup of clear glue into a bowl. Remember that kids do this, so don’t worry about trying to make your measurements too fussy. The important thing is that you’re using CLEAR glue, not white. You can use white glue for other slimes, but then your slime won’t be clear!
2. Mix in 1 tbsp of saline solution. This is also known as contact lens solution.
So here’s a thing that I want to tell you about: we’re going to talk about borax. When slime-making first got big, there was an actual backlash as people started FREAKING OUT that their kids were touching borax. As alternatives, people started posting slime recipes that don’t use borax. Some of those recipes are great, some are not, and lots of them use contact lens solution as their substitute for borax.
Y’all, contact lens solution and borax both come from boron! They’re pretty much the same, just that one is in powder form and the other is dissolved into a solution.
Not that I think that you should even force your kids to avoid borax, because I don’t think that at all. Heck, my kids were making laundry soap from borax with their bare hands at the age of eight (they probably should have been wearing gloves, but still). Borax is FINE, Friends. Sure, if they bathe in it every day for a month it’ll irritate their skin, but so will pool water.
3. In a separate container, dissolve 1/2 tsp of baking soda into 1/2 cup of hot water. Stir it well and make sure that it dissolves completely.
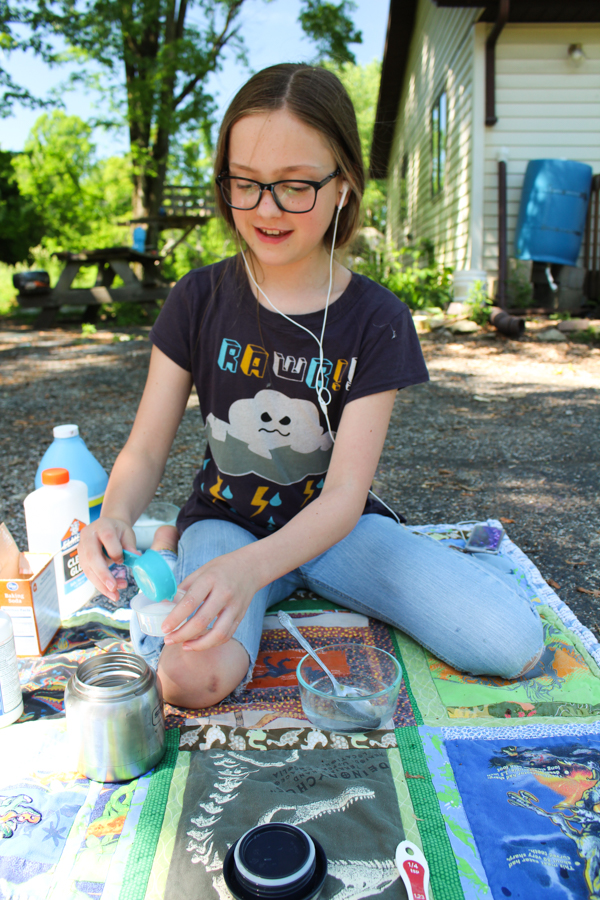
4. Once the baking soda is completely dissolved, pour it into the glue mixture. Try to pour it over the entire surface of the glue mixture.

5. Wait approximately a minute, then stir. Knead if necessary. At first, the mixture will be a goopy mess but continue stirring and you’ll be able to see when the slime activates because it will start to ball up. It will still be sticky when you start to knead it but keep working it and it will become ever more elastic and non-Newtonian until it’s the perfect slime.
You will have some of your baking soda and water solution left in the bowl, and that’s perfectly fine and normal.
One thing that your slime will not start out as is perfectly clear, for the simple fact that you just kneaded a ton of bubbles into it. If you really want perfectly clear slime, then pop it into an airtight container and let it sit for a day. The next day, it will be clear!
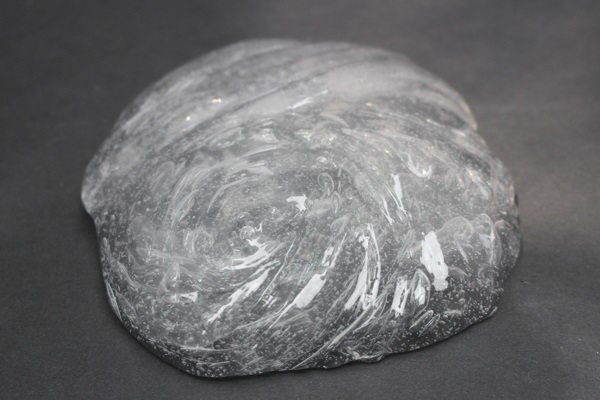
Note that as soon as you start playing with it, though, you’ll start kneading bubbles back into it. This picture is of the clear slime that Syd has played with for a while, and you can see the bubbles:
Pro Tip: Syd stores her slime in small plastic deli containers to keep it fresh–and off of my carpet! She tells me that this particular slime will lose its bounce after several days, but it’s easy to reactivate it. To reactive this clear slime, dissolve 1/2 tsp baking soda in 1/2 cup hot water. Pour the older slime mixture into this solution, stir, and then knead it when it becomes firmer. Keep the reactivated slime and discard the excess water.


