
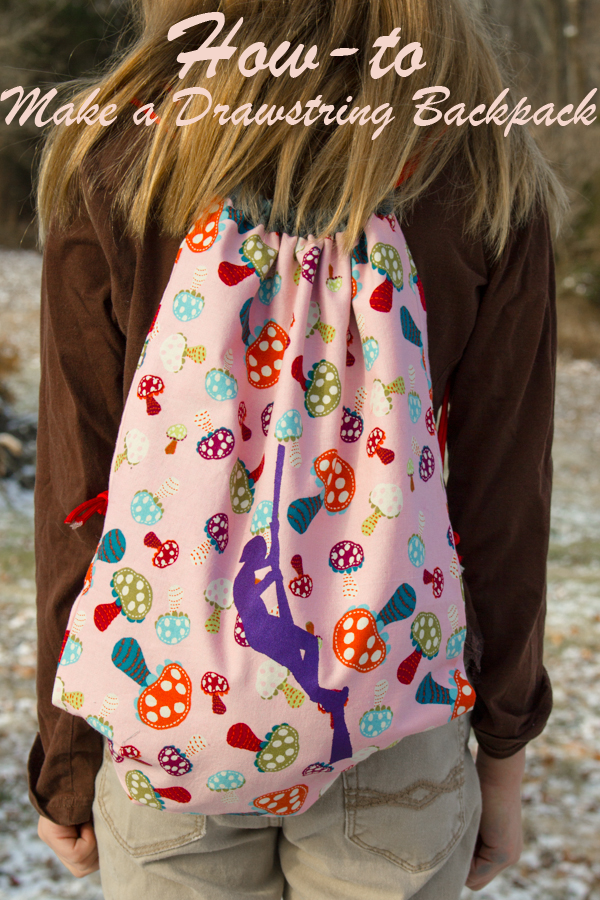
A drawstring backpack is a quick and easy solution to the kind of grab-and-go storage needs that a person has when she has lots of extracurriculars. Say you’ve got aerial silks on Mondays, horseback riding on Tuesdays, ice skating on Fridays, and ballet on Saturdays.
If you DO have all that, by the way, then your mother is a saint. Just saying.
Anyway, when you’ve got stuff that you just need to grab so that you can get going, then a drawstring backpack serves as a convenient vessel for both carrying and storage.
Time for ballet? Grab your ballet backpack!
Need your aerial silks uniform? It had better be in its backpack, Young Lady!
See? That kind of thing.
Because these drawstring backpacks are so quick and easy to make, and because they take so few materials (you probably have all of it in your stash right now), it’s simple to make one for each activity that you or your enthusiastic young one likes to do.
You will need:
1. fabric. Choose a main fabric and a contrasting fabric for the loops and bias tape. I also fully line my drawstring backpacks, so I use the contrasting fabric as the inside lining fabric, as well.
2. paracord, webbing, or other drawstring material. You want something that will easily draw the backpack closed, but also that won’t cut into shoulders or get tangled. Paracord is kind of the perfect material for this, but it’s also not especially eco-friendly (it’s nylon), so if you require only natural materials, keep looking. Hemp rope or webbing, perhaps?
3. measuring, cutting, and sewing supplies. You’ll be carefully measuring, cutting to size, and machine sewing here. Gather up all your favorite playthings, and let’s go!
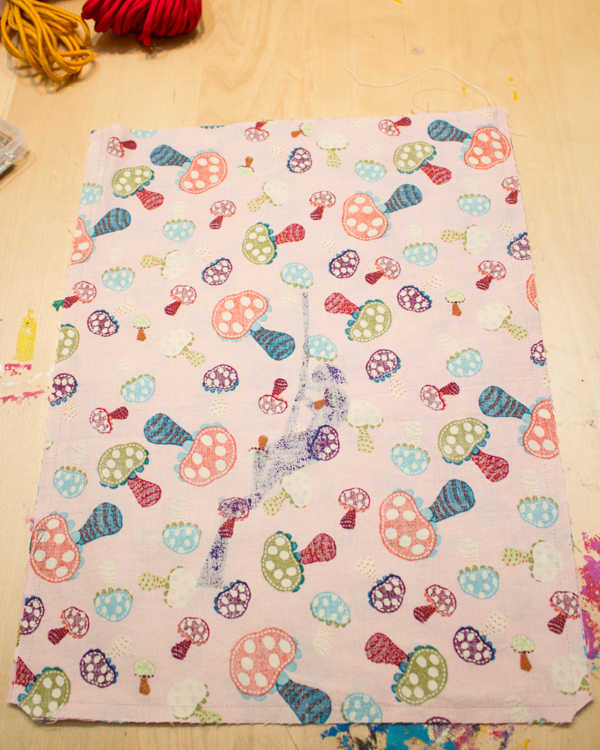
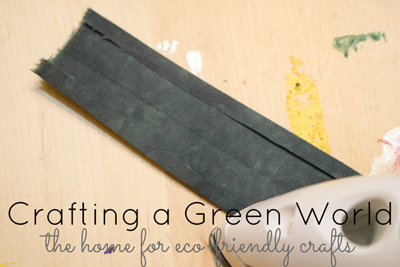
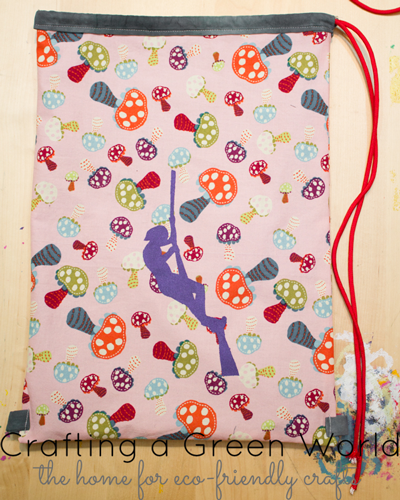
1. Cut fabric to size. My kids are eight and ten, and these drawstring backpacks are sized to them. To make yours the same size, cut two pieces of exterior fabric and two pieces of inside lining fabric 12″x16″. Cut two pieces of fabric on the bias at 2″x13″, and two pieces at 2″x3″.
If you’d like to stencil or applique your exterior fabric, do it now. I used freezer paper stenciling to embellish some of my kids’ backpacks with the activity that I want it used for.
2. Make the bias tape and backpack loops. You’ll be lining the top of the backpack with bias tape, so fold and iron it like so:
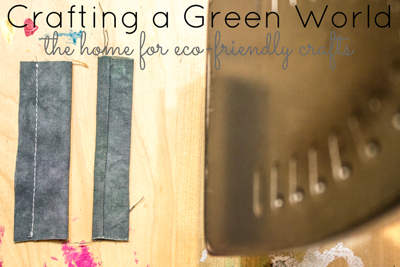
For the backpack loops, sew each 2″x3″ strip into a loop, long sides together, then use a safety pin to help you turn the loop right side out and iron flat.
3. Sew the exterior and interior of the backpack. For the backpack’s exterior side, pin the two pieces of fabric right sides together. Fold the two loops in half, then pin them sandwiched between the two layers. The loops should both be pointed towards the center of the backpack, NOT sticking out from it–that way, when you turn the backpack right side out in a minute, the loops will exactly where they’re supposed to be!
Sew down one side, across the bottom, and up the other side, backstitching across each loop as you come to it. Do NOT sew across the top!
Repeat for the interior lining of the backpack, only omitting the instructions for the loops.

4. Sew the bias tape to the backpack. Turn the exterior backpack fabric right side out–don’t those loops look just perfect?–and then put the interior fabric inside it and futz it around until everything is nicely lined up. Your backpack should look correct now, only with raw edges at the top. Baste all the way around the top of the backpack so that the raw edges of the interior and exterior will stay lined up.
Fold down one end of the bias tape by about 1/4″, iron it flat, and then line up the end of that bias tape with one of the side seams of the backpack. Pin the bias tape all the way to the next side seam, taking care to sandwich the raw edges of the backpack fabric well inside. Fold down the other end of the bias tape so that it’s even with the side seam on the other side.
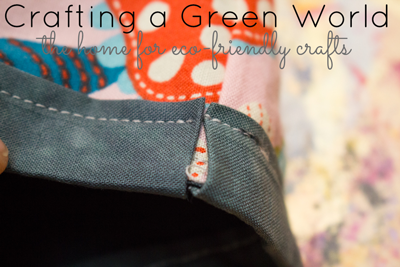
Sew the bias tape down with an edge stitch, making sure to catch the tape on both the exterior and interior sides.
Repeat for the second piece of bias tape.
5. Thread the backpack straps. There’s a method for threading these straps to give the backpack its drawstring functionality. Measure out a length of cord that’s approximately two backpack lengths plus two backpack widths plus a couple more inches. Use that cord as the template to measure and cut a second piece that’s the exact same size.
Thread a safety pin through one end of the cord, then thread the safety pinned cord through the bias tape at one side seam, all the way through the bias tape a full 360 degrees, and back out the same side that you came in. It will look like this:
 Repeat with the second piece of cord, threading it through beginning and ending at the opposite side seam.
6. Knot the cord. Thread one end of the cord through the loop at the bottom of the backpack, then tie the two cords together using a double overhand knot (use this double overhand stopper knot tutorial, and hold both cords together as you tie it).
Repeat with the second cord.
This backpack size should work for people of most heights, and since the cords are not sewn to the backpack, you can simply untie them and replace them if you need a different length.


Pingback: Tutorial: Easy drawstring backpack – Sewing
Pingback: From Our Friends: January 9, 2015 - Organic Authority
Having a bag for each activity is a great idea! This month I signed Emma back up for swim lessons and she decided to try gymnastics. We have also decided to try running, so we are following a Couch-to-5k progam. That means, we need a swim bag, a gymnastics bag and a running bag. My stash is pretty depleted, but I think I should have enough to throw together at least one bag!
Oh, and I LOVE the freezer stencil for the aerial silks. Did you make that from a photo of the girls?
I copied a silhouette that I found online–tedious, but it’s a good way to make a stencil of something that a million people haven’t already wanted a stencil of.
Emma is doing a BUNCH of activities now! Where did that little girl go who liked horses and only horses? Also, I love Couch to 5K! I seriously couldn’t jog for 30 seconds when I first started it. Now I’m trying to increase the speed at which I can run a mile.
I once made a silhouette freezer paper stencil once of Emma on horseback and applied it to the back of a jean jacket. It was AWESOME and is now on one of the blankets I need to finish for her.
This last year has seen a huge increase in Emma’s self-confidence. That and the lack of horse lessons has left the poor kiddo desperate for something to do. Although the gymnastics came about because she read an article about people who do acrobatics on horses. So, the horse obsession is still there :0)
I’m super jealous that you can always take such good photos of Emma on horseback. I’m not actually allowed into the arena with the children, so my best work would be grainy and with a zoom lens. I usually only bother during the Fun Show.
I’m pretty sure I’d never survive there. I LOVE being all up in the thick of things, learning vicariously through Emma.
Could you ask for a photo shoot session before or after one of her lessons? Indoor arenas are awesome, except when you are trying to take photos. All our best shots are from when she is riding outside.
Still seriously bugged about the fact that we can’t get riding lessons in the wild west in the winter. To be fair, our current trainer is working to find an indoor arena that she could haul her horses to for lessons. I really hope the next place offers year round riding.
Pingback: Weekend Sewing? See The Friday Tutorial Round Up | Plush Addict
Pingback: Crafting a Green World | The home for green crafts and tutorials!