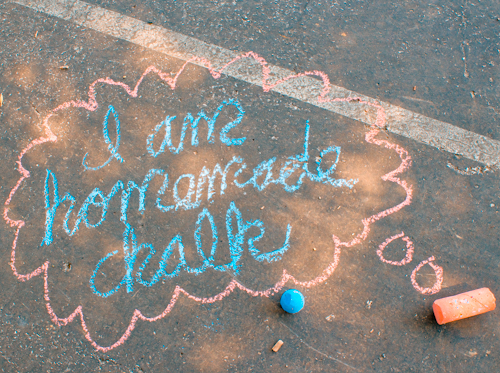
 I admit free and clear that store-bought sidewalk chalk is certainly no big expense. You can buy it in any big-box store for what, a buck?
Of course, you don’t exactly know all that’s in that one-buck sidewalk chalk, nor do you know the conditions of the workers who manufactured it. That aside, however, there’s also just something to be said for fostering the D.I.Y. ethic in your life. When you make homemade sidewalk chalk, you can make it any color you want, using your own pigment that you’re comfortable with. You can make it practically any shape you want, using anything from muffin tins to toilet paper rolls. And if you’re making your chalk for a kiddo, well, then that kiddo can actually practically make this chalk recipe all by herself, and then that kiddo will grow up knowing one more thing she can make for herself instead of having to buy.
So gather up your toilet paper rolls and your muffin tins, because this sidewalk chalk recipe is easy. It’s cheap. And you’re going to love it:
 To make homemade sidewalk chalk, you’ll need plaster of Paris, molds for the chalk, soon-to-be disposable mixing containers (I use stuff that we’re about to throw away or recycle, anyway), and pigment. For pigment, you can use whatever you have on hand–some ideas are food coloring, liquid watercolors, or powdered tempera, which is what I usually use.
Follow the recipe on the package of plaster of Paris to mix up perhaps two cups’ worth, then add your pigment. If you, too, are using powdered tempera, start with one tablespoon, and gradually add more until you’re satisfied. Whatever pigment you use, liquid or powder, you’ll slightly throw off the proportions in your plaster of Paris mixture. This is actually a good thing, because then the plaster will set a little softer, making a better chalk. If the mixture becomes too thick to pour because of dried pigment, or too watery because of liquid pigment, simply stir in more dry plaster or water until you have that pancake batter consistency back.
Next >> Step 2



This is a great tutorial. I would never have thought to use tp rolls for the mold. Does it wash off the sidewalk easily?
Oh, yeah, it washes right off. One of my girls’ daily chores is to hose down our front porch and sidewalk every morning, because they’re the ones who’ve drawn on it and had picnics on it and let their dump trucks pour dirt all over it all the previous day, and the sidewalk chalk always comes off with the hose. We also draw a lot on the basketball court in the park by our house, and if those drawings haven’t worn off by the next rain, they’ll be gone afterwards.
i love your website…it’s been a long time since i have had a child in school…but now we have two young grandsons’ ages 4 and 2. They are busy little farmers, hunters and gatherer too. they enjoy going out for a drive to see if they canspotany animals moving. I love your site, i truly do. how wonderful this would be for my children.
we are Grammie and Pops
This is awesome. I have tons of tempera paint that I’m going to recycle into this project, which I hope works as well as the powdered. Thanks for sharing!
Pingback: Crafting a Green World | Snow that Won’t Melt: DIY Snowflakes Crafted from Eco-Friendly Materials | Page: 1 | Crafting a Green World
This post is perfect for the Monday Kid Corner Weekly Linky Party. The next party goes live Sunday morning and this week’s theme is SIDEWALK CHALK. Be sure to brush off those archives as well and link them up at http://thejennyevolution.com/category/linky-parties/monday-kid-corner/ See you there! Jennifer
Thinking of making some chalk, but also thinking that with the limited amount of time I have, I might as well just buy some. Grr, I can’t wait for my college classes to be done! One more year. One. More. Year.
But what if I reminded you that sidewalk chalk uses up toilet paper tubes? There goes the rest of your toilet paper tube hoard!
The rest of it? I plan to just send it all to you :0)