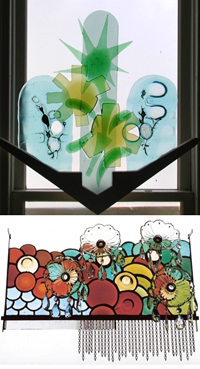
When I was a kid, we had a couple of pieces of string art, made by an aunt, framed and hung in our house.
I mean, it WAS the 1970s, the heyday of string art.
But whereas the 1970s craze was all about making a string art owl from a kit (which we had), or a string art sailing ship, also from a kit (which we had), you can now do quite a bit better.
A lot of the imagination that you can bring to string art now comes from how simple technology is to use. Can you imagine what my aunt could have created if she’d had access to clip art and a printer? Google Image? A Cricut?!?
Because I promise you that designing your piece is by far the hardest part of making string art, and even that isn’t hard. I know you’ve got access to Google Images and a printer, after all!
So no more kits for you! I’m going to show you how to make string art the completely DIY way–from scratch, by hand. It’s going to be awesome. Here’s what you need:
Tools and Supplies
- Wood, cut to size. I can always find some scrap boards to cut down over in my Garage of Mystery, but other good sources of wood are Craigslist, Freecycle, or your local Restore. Maybe you’ll be lucky enough to score a finished plaque!
- Nails. For this particular project, I’m using 1 1/4″ ring shank underlayment nails. They’re a little thicker than you need, but I’m doing this project with kids, and that extra width helps them keep their grip. Feel free to use whatever nails you like and have on hand.
- Embroidery floss. This is another supply that you might just find that someone you know would LOVE to give you. There are a surprising number of people in this world who’ve given up cross-stitch!
Directions
1. Prepare your wood. This step can take a lot of different forms, depending on what wood you choose and the tools you have available. You can use everything from a pre-finished plaque to a pallet board, but whereas that pre-finished plaque is ready to go, but also pricey and unsustainably sourced, something like pallet boards or scrap wood might need to be cut to size and sanded down, but they’re free and keep more resources out of the waste stream.
If you’re preparing your own wood, don’t skip sanding it–if this is one of your first woodworking projects, you’ll be surprised at how much nicer your wood looks after it’s sanded. My secret trick is to round the edges of the wood piece while I’m sanding it. It won’t replace the services of a router, but just sanding all the edges makes the finished piece look more professional.
Staining and sealing the wood is optional, but if you choose to do so, remember to use water-based stain and sealant.
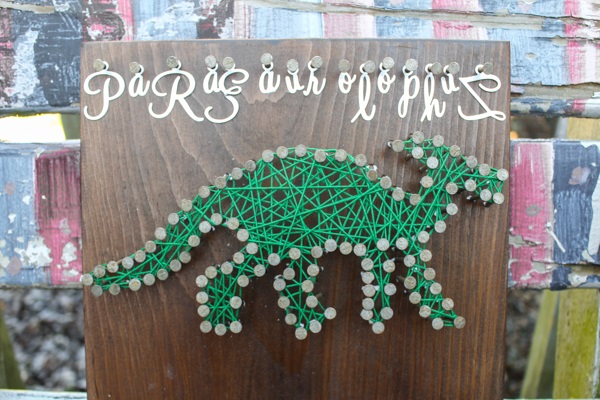
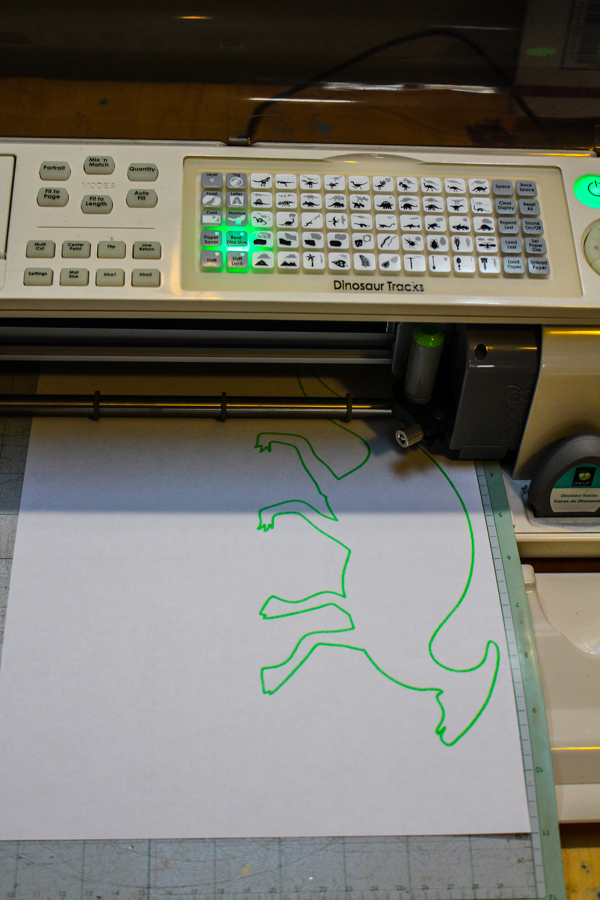
2. Create your template. Create a template for your string art on typing or notebook paper. You can draw freehand, of course, but Google Image is also your friend, and I love using my old-school Cricut. I mean, it can draw me a parasaurolophus at the size of my choosing! How AWESOME is that?!?
3. Nail directly onto the template. Place the template onto the plaque, and then begin to hammer nails right through the paper, following the lines of the template.
Try to keep your spacing and the nail heights even, but don’t stress out too much. The one thing that you DON’T want to do is pull a nail out and leave an empty hole. Just work with where you’re going!
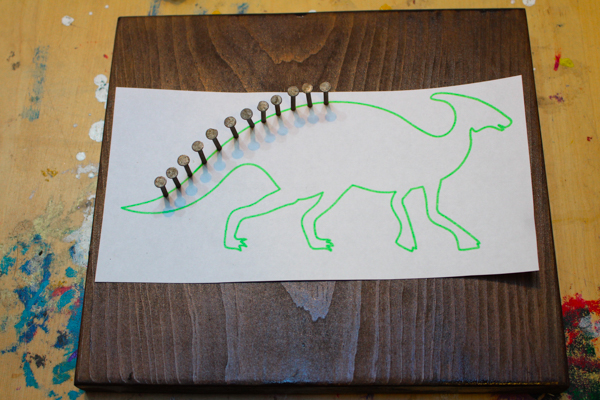
Watch, as well, for narrow spacing. You can see below how I modified my parasaurolophus, as I noticed while I was hammering nails that some of my spacing–the tail, for instance, and certainly the legs–was going to be too narrow to look nice when wrapped with string:
Try to remember, though, that nobody is going to be looking at your project as closely and critically as YOU are, so roll with any imperfections that come along.
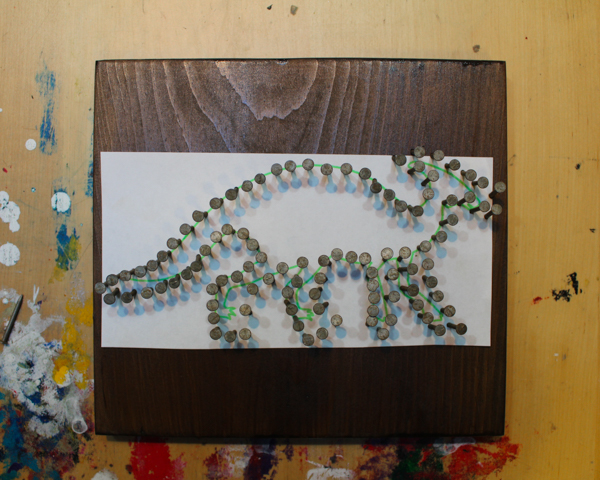
Once you’ve hammered in all the nails, tear the paper away. I had to get into a few little nooks with a pair of tweezers, but it wasn’t difficult.
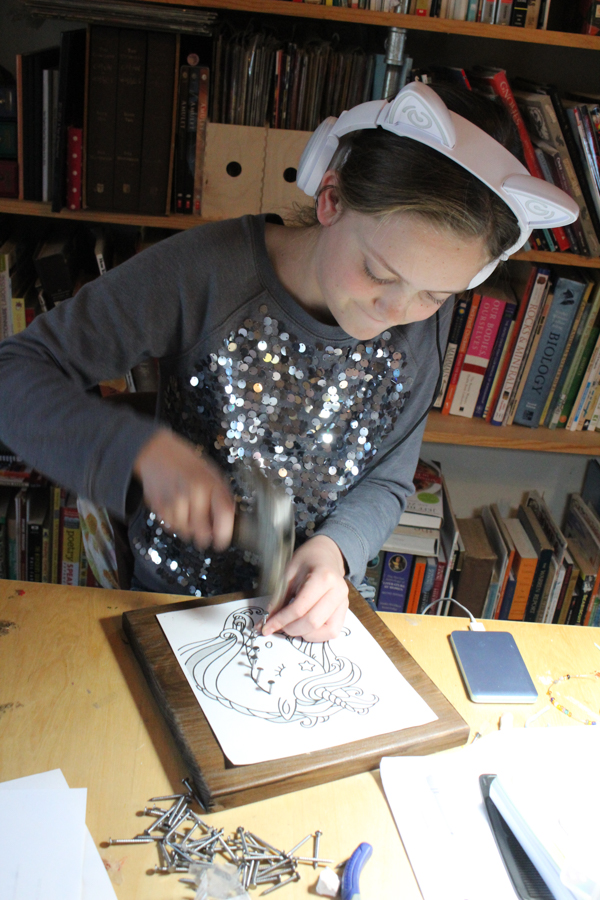
4. Wrap with embroidery floss. Now for the fun part! Wrapping the nail art with embroidery floss is the MOST fun, and you’ll find that even kids who are too young to hammer nails (although don’t dismiss their abilities without really thinking about it–you’d be surprised at how young a kid can handle a hammer!) can have a ball wrapping nails with yarn or embroidery floss.
Tie a knot around one nail (secure it with a little white glue to be safe), then wrap the floss around the perimeter of your piece to outline it. Weave in and out of the nails, wrap it completely around some nails, take a break to go back and forth across your piece–feel free to have fun!
Once the perimeter is wrapped, go back and forth across your piece at every angle, with no discernible pattern, to cover the surface area with embroidery floss. After a bit, you’ll be able to notice spots that have gaps and you can easily cover those. This takes a LOT of embroidery floss, so be prepared to use at least an entire skein, and possibly more, depending on the size of your piece. Tie the floss off around a nail, and again, dot the knot with a little white glue to make sure it holds.
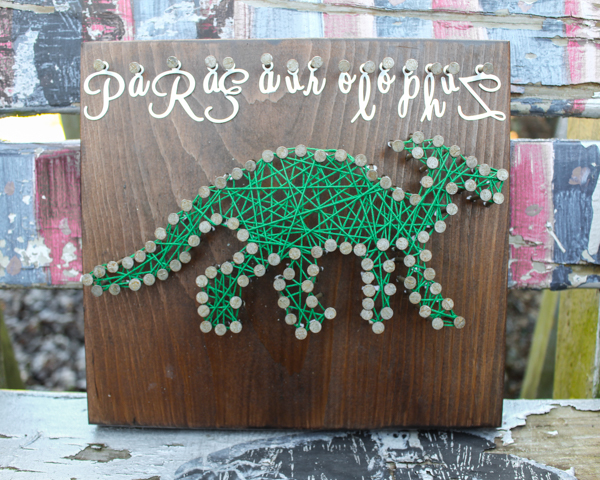
When you’re finished, you can continue to embellish your piece (not everyone I know is as science literate as I am, so I made a label for my string art parasaurolophus), and mount a picture hanger on the back so that you can hang your new masterpiece in a place of honor.
And now you can make another one as a gift for someone else!