
Wooden building blocks are an heirloom-quality toy… IF you treat them correctly.
Which my children did not do!
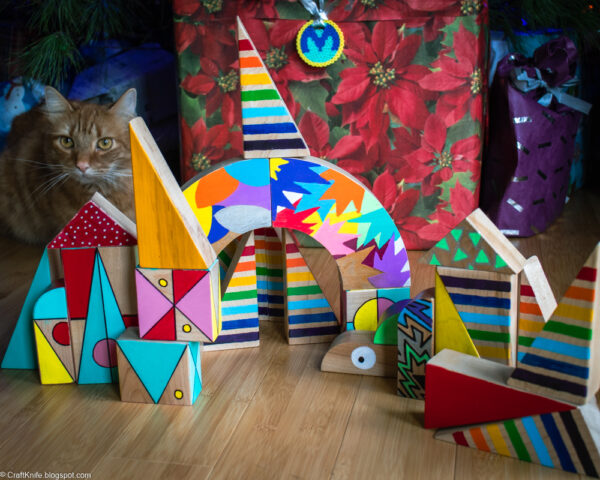
For at least a full decade, I collected–and created!–wooden building blocks for my two children. For that same amount of time, my kids played HARD with their blocks. These kids built with them inside and outside, in the sand and snow and mud. They painted them and printed with them, mixed them into potions and put them into slime. They forgot them outside, spilled juice on them, and absolutely loved them dearly.
And it shows!
One of my teenagers is weeks from moving off to college. I’m helping the other prep their long-disused playroom into a new bedroom that she won’t have to share with her sister during college breaks. This means that I’ve had to finally start confronting all of these childhood toys that are no longer played with. It’s time to decide what the kids want to keep for posterity, what they want to donate, and what we might want to upcycle.
Regardless of what choices we make for my kids’ HUGE stash of old wooden building blocks, they all still have to be cleaned and refurbished first. One can’t simply toss blocks sticky with old slime into storage, or donate muddy blocks, or upcycle blocks stained with who-knows-what-please-don’t-tell-me.
Perhaps you, too, have some old blocks that you’d like to make look new again. Perhaps you’ve obtained some blocks of uncertain provenance, and you want to make sure they’re clean and safe to play with. Or perhaps you’ve bought some scraps or seconds that you want to ready for play. Whichever it is, here’s how to deep clean wooden building blocks and simple wooden toys. Here’s how to refurbish them, and even how to polish them up so they look beautiful and fancy and like the high-quality heirlooms that they are.
To completely deep-clean and refurbish most wooden building blocks and toys, here’s what you’ll need:
- cleaning solution. I hate that I love Go Clean Co.’s homemade all-purpose cleaner so much. I used to be a straight up vinegar-and-water gal. That first wave of the pandemic got me panic-cleaning with a lot of less-natural cleaners, and I haven’t yet entirely weaned myself off of them. In particular, that Tide+water+bleach combo is SUCH a dang good degreaser and stain remover–ugh! For a much more natural cleaning solution, sub your favorite natural laundry detergent for the Tide, especially if you think it does a good job fighting stains without a lot of extra spot treatment. That’s why my frenemy Tide is such a solid all-purpose cleaner! Unless your building blocks have been through some shocking scenarios quite recently, they shouldn’t need the addition of a disinfectant.
- large storage bin.
- large blanket.
- sandpaper. Moving through the different levels of sandpaper annoys me. Fortunately, 150-grit sandpaper is rough enough to remove most stains and marks with not too much elbow grease, while leaving the surface smooth enough for play.
- wood polish (optional). This isn’t necessary to refurbish your building blocks, but it does make them look even more high-quality and feel that much more luxurious.
Here’s how to clean up and refurbish the dingiest of building blocks!
Step 1: Sort the winners from the losers.
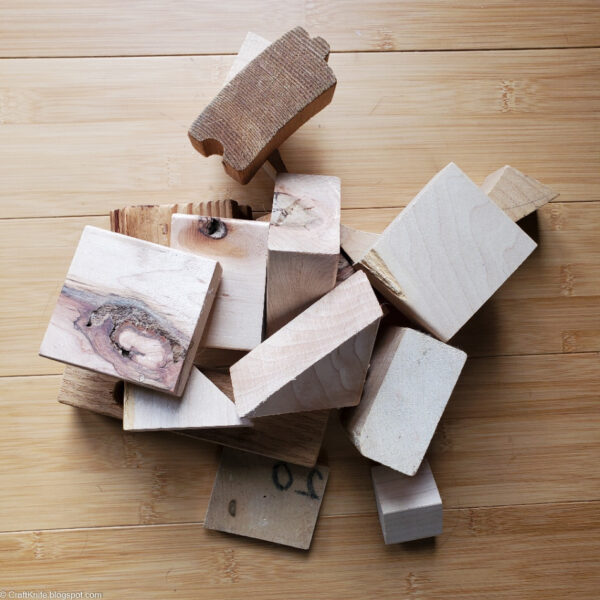
If your building blocks are well-loved, and/or consist of hand-me-downs, thrifted finds, and scraps or seconds, first sort through them and see what blocks actually deserve the spa treatment, and what blocks may just want to move on with their lives.
My own losers’ pile consists of blocks that have large knots or other flaws, oddly-shaped seconds that look more like scrap wood than toys, and the occasional piece that’s clearly part of some other toy set, like wooden railroad tracks, that we didn’t keep or never owned. My kids loved and played with all these blocks just the same as they did with their “nice” blocks, but there’s no need to store them for future play. Instead, I’ll keep some for woodcarving or other craft projects, and we’ll roast s’mores over the rest.
All the rest of the blocks that you want to keep, upcycle, or donate should be cleaned. That’s the next step!
Step 2: Wash those filthy blocks.
As you can see, you can wash even blocks that have been painted. You can wash natural blocks like tree blocks, even ones with the bark still on. Vintage blocks are washable just like new blocks. You can even wash carved wooden toys, like peg dolls and stackers.
The only blocks that I do not put into the communal wash solution are the ones that we’ve already highly embellished. These consist of blocks that my children painted as “art blocks,” blocks that I’ve decoupaged with paper or fabric, and blocks that we’ve wood burned and stained. I hand wash each of those blocks individually with regular dish soap.
The cleaning solution is dead simple. All you need are a small amount of stain-fighting, degreasing laundry detergent, and lots and lots of hot water. Also remember that a little bit of laundry detergent goes a LONG way, especially when you don’t plan to rinse. Avoid oily additives like tea tree oil, because the goal is to get these blocks squeaky clean with no residues.
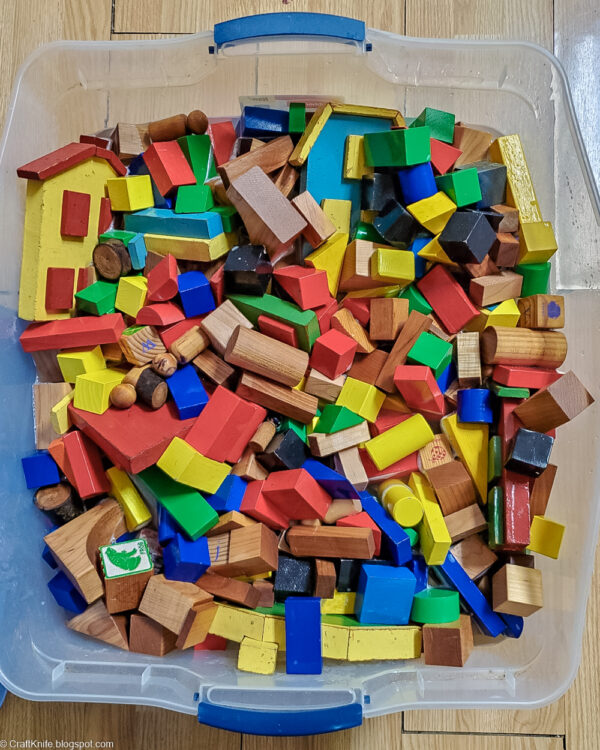
Soak the building blocks in the cleaning solution for a couple of hours. Stir them around every now and then to make sure all the blocks have their turn getting nice and clean. Do NOT soak your blocks for several hours, because water and wood aren’t actually friends.
An old plastic tub works great to hold everything. Although don’t do what I did and add so much water that you can’t lift it back up to the sink to drain it. SIGH!

Dump the clean blocks out on an old blanket (or vintage He-Man bedspread, ahem…) and let air dry.
Step 3: Sand stained or marked blocks.
To clean up blocks that have an old yellowed finish, or are stained or marked, sand them with 150-grit sandpaper. You can also sand the blocks to remove unwanted paint or varnish, although PLEASE use lead-safe practices for this! Use a palm sander to speed up the process.
When I’m sanding blocks to refurbish for more block play, I also round all corners and edges on each block. I don’t know why historical children got to play with so many pointy things. Today’s toddlers prefer to keep all their eyeballs intact, thank you!
Step 4 (optional): Polish with a natural wood polish.
When I’m refurbishing blocks for more block play, I often paint them and seal them. But there’s a lot to be said for providing children with simple, natural, unfinished wooden blocks as well as brightly painted ones! Kids don’t always need every single sense stimulated to the max, and wood is already so beautiful on its own.
If you leave your blocks unpainted and unvarnished, a nice way to shine them up and make them look marvelous is simply to polish them with a natural wood polish.
Your clean and dry blocks can now be stored as heirlooms, embellished and upcycled into fun, new playthings, or donated to someone who will love them all over again.


