
The only bummer part of upcycling a glass bottle into something awesome is the inevitability of producing additional waste. I’ve been on a kick of making glass bottle suncatchers, for instance, and they’re super cool and I love them and they’re a great way to upcycle old glass bottles… except for the glass bottle bottom that I cut off to make each suncatcher.
Glass is actually very recyclable, so I don’t usually feel much of a pang about tossing it in the recycling bin. But if I can give this part of the glass bottle a new life, as well, then why not?
These glass bottle bottom ring holders are quick and easy to make, and don’t require any additional supplies other than several grits of sandpaper. If, like me, you’ve been crafting up a storm and have lots of bottle bottoms to upcycle, you can make these assembly line-style with very little brainpower. I made several during a single episode of Call the Midwife, including the time it took for setting up and then cleaning up!
So get out all your sandpaper and cue up your favorite PBS show. We’re making glass bottle bottom ring holders!
For this project, you will need:
- upcycled glass bottles. My tutorial begins with the glass bottle bottom already cut off, but that’s because I’ve already written you a tutorial to teach you how to cut that glass bottle–here it is!
- sandpaper in a range of grits. The variety of sandpaper grits can feel overwhelming. The trick is to remember that the grits go in numerical order from rough to smooth. For this project, you want at least a couple of coarse grits and a couple of medium grits. I rarely fool around with fine or ultra-fine grits because I’m just not that fancy, but if you want the top edges of these ring holders to look as smooth as… well, glass!… then go for a couple of choices there, too.
- water. The secret to sanding glass is the same as the secret to cutting glass–keep it wet! Have a pitcher of water nearby as you work.
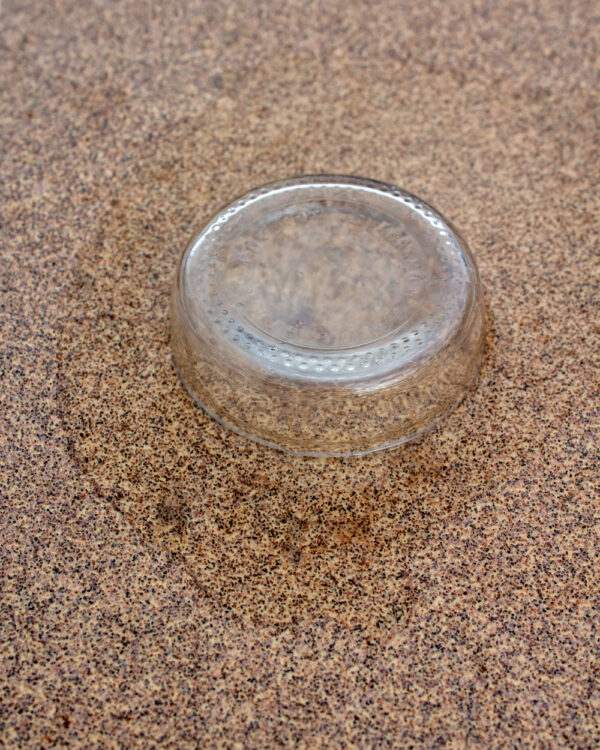
Step 1: Clean up your glass bottle bottoms.
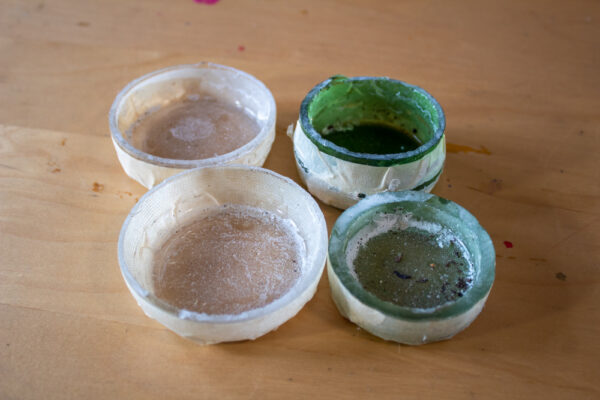
Your bottle bottoms will be quite dirty after you’ve cut them. Mine also have masking tape that I used as a cutting line. The first step, then, is to get them all clean as a whistle!
You can go straight from this step to the next without hand- or air-drying the glass. It’s meant to be wet, anyway!
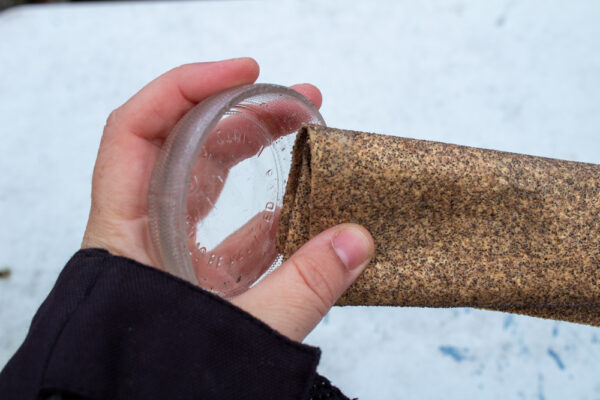
Step 2: Lay out your supplies.
Set up your work station either outside or somewhere that you can easily clean afterwards. Glass dust is no joke! You’ll want your sandpaper arranged from coarsest to finest, and your water supply ready to wet each piece as you need it.
And most importantly… don’t forget Call the Midwife!
Step 3: Sand until your arm gets tired, then keep sanding.
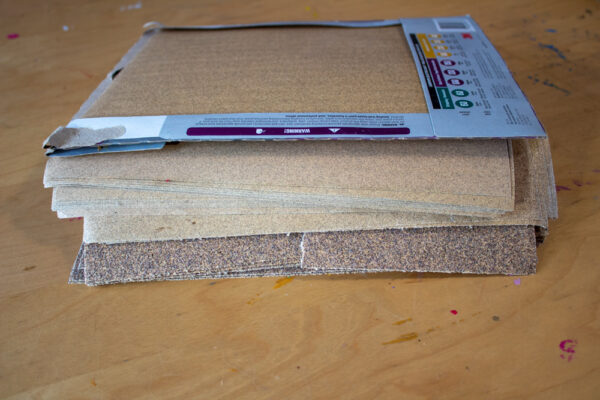
Start with your coarsest grit sandpaper. I’m actually starting with a #50 grit, because I’ve got a little jagged bit on one of my glass bottle bottoms that I want to sand off. If you did a better job cutting than I did, start with something more like a #60.
Lay the sandpaper flat on your work surface, grit side up, and pour a little water on it. Use a circular motion to sand the top edge of the glass bottle bottom, then the outside edge.
Lastly, sand the inside edge of the glass bottle bottom. This works best if you fold the sandpaper into a size that lets you work it around the inside of the bottle.

After you’ve sanded the top, outside, and inside edges with the coarsest grit sandpaper, repeat these steps while going up grit numbers until you’ve sanded the edges with your entire range of grits.
Step 4: Clean and embellish.
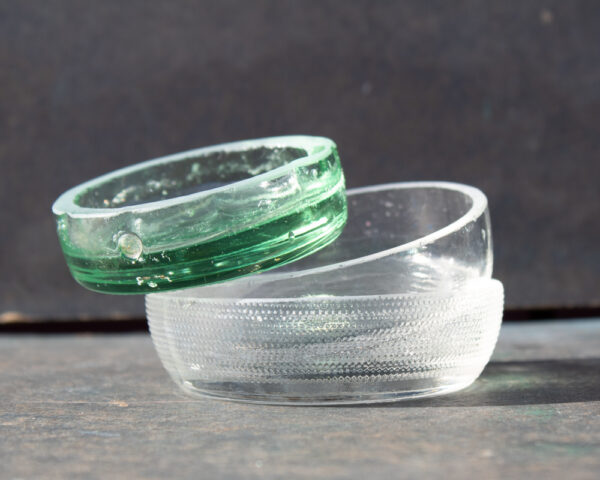
Wash up your new ring holders once more, and then feel free to use them as-is or embellish them further. E6000 or a similar epoxy glue is a good choice for adding decorative embellishments, as are glass markers. There are several ways to achieve a frosted glass look, and I also wouldn’t be opposed to trying out a bottle bottom or two in my rock tumbler (although I definitely would do that BEFORE I sanded it!).
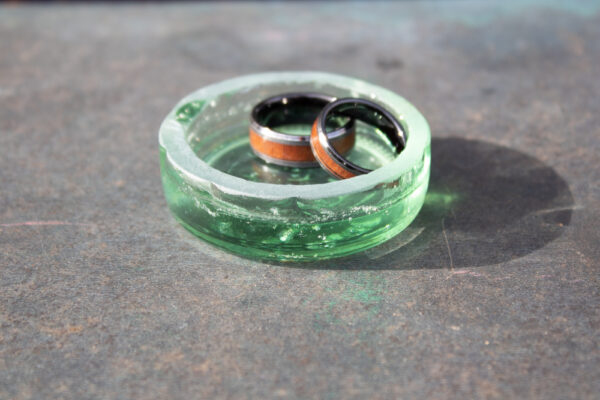
I put these little ring holders by all of my sinks and on the counter next to my front door–basically, anywhere that one of my quite absent-minded family members might need to take off a ring. They also come in handy to hold tiny little screws and washers when I’m attempting to repair a small appliance, or safety pins and bobbins when I’m sewing.
They’re surprisingly handy considering they were otherwise waste scraps from previous projects!


What an amazing result!