
My house is… well, let’s call it “well-loved.” Door hardware aside, the house as a whole is wonky and inconvenient, quirky in a way that modern houses just aren’t, and whatever its quirks, I generally either genuinely like them or politely ignore them.
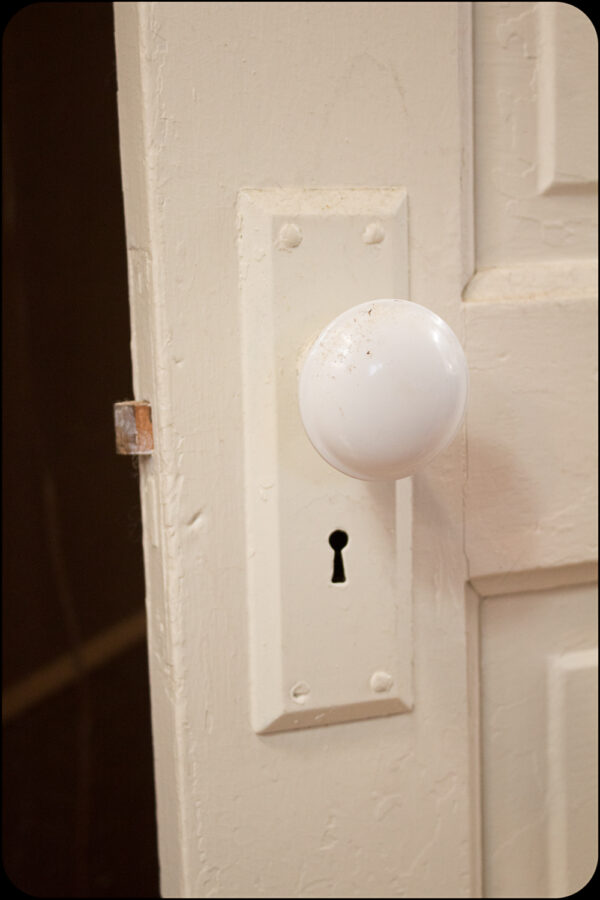
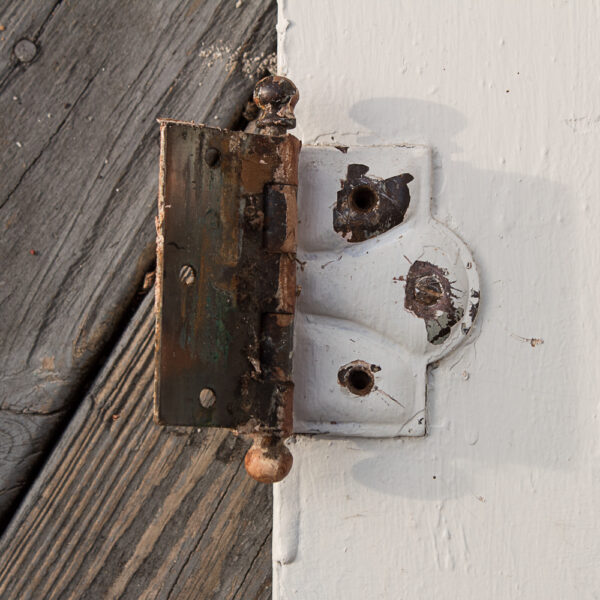
I do get curious about some things, though, and the four antique mortise locks on the four doors in the original part of my house are among those curiosity-inspiring objects. Although their keys are long gone, their keyholes are delightfully Victorian, but all the exposed pieces, plus the equally interesting door hinges, are covered in several thick layers of sloppily-applied paint. I don’t have any kind of yearning to restore my wonky old house to its original condition, but it would be pretty cool to clean and refurbish just those antique door fixtures, just to see what they actually look like…
So that’s what I did!
Step 1: Make sure you’re not going to get lead poisoning.
Lead poisoning is not worth playing with, so my first step before messing with ANYTHING old, from thrift store dishes to the awesome windows I found by the side of the road last fall, is to check it with a lead swab. These came out lead-free, although I tested again every time I uncovered a new layer of paint.
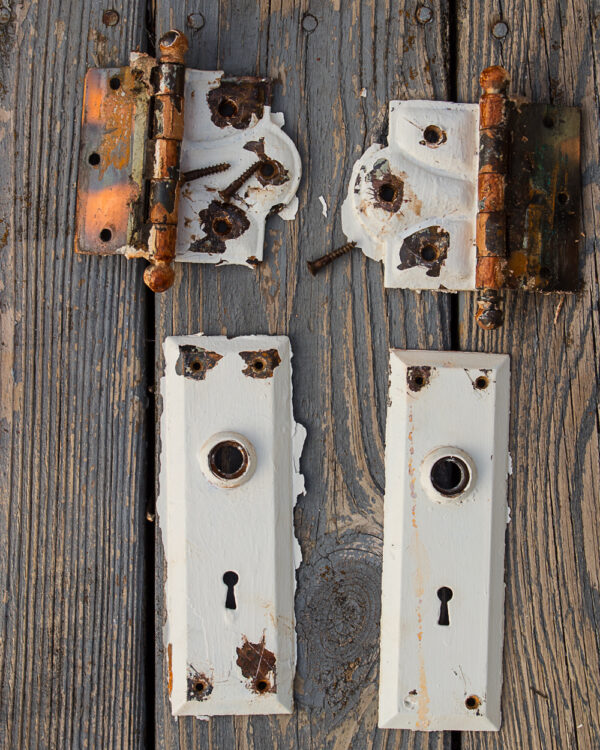
Step 1: Remove the fixtures from the door.
For me, this involved muscling through five layers of paint to even get to the screw heads, and then muscling against those layers of paint to unscrew each screw. WD-40 is not eco-friendly, so I try to use it sparingly (there IS an eco-friendly alternative to WD-40, but it’s too rich for my blood), but this was definitely a job for an industrial-grade lubricant. Fortunately, just a quick spray of WD-40 was all it took to get each rusty, painted-over screw turning.

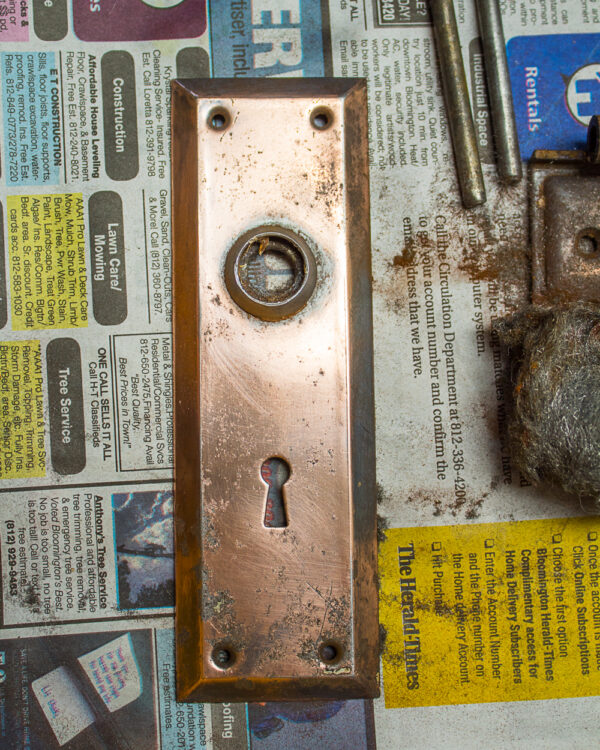
Step 2: Remove the paint.
There are a few methods for removing paint from old hardware, but the easiest, most eco-friendly way is simply to grab a beat-up old crock pot and boil the snot out of everything. I did this out on my back deck one sunny afternoon. Set the crock pot to low, add a squirt (or fifteen squirts, in my case…) of dish soap, and walk away. A few hours later, you can fish each piece out with tongs, set it on a piece of clean newspaper, and peel away the paint or gently scrape it off. If any paint still seems stuck, put the piece back in the crock pot for another couple of hours.
When you’re finished, your piece won’t look pretty, but it WILL look paint-free!
Step 3: Get distracted and therefore make more work for yourself.
You’re supposed to thoroughly dry each piece after scraping all the paint off. But… I don’t know. One kid might have needed help factoring a polynomial, or the other kid might have wanted me to drive her to pick up holds at the library, or maybe a friend texted me, or heck, maybe I saw a squirrel. Who knows? Whatever happened to interrupt me after paint scraping but before thorough drying, it resulted in me eventually wandering back by the deck and noticing that all of my nice door hardware that I had spent all that time cleaning off had rust ALL over it.
Pro tip: Your cleaned pieces will rust VERY quickly if not dried thoroughly!
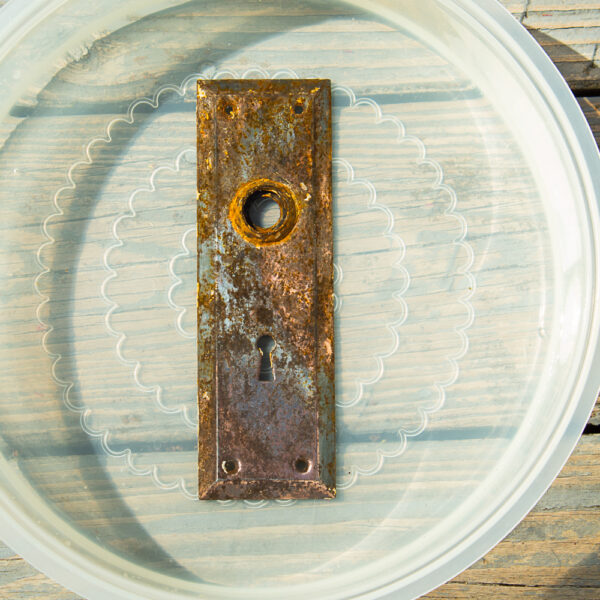
Step 4: Remove rust from the door hardware.
If your piece doesn’t have any paint on it, but it’s dirty and rusty, you can start here. Or if you’re like me, and you have the attention span of a gerbil, continue here! Fortunately, removing a thin layer of rust is SUPER simple. I put my metal pieces in a shallow dish, covered them with vinegar, and let them sit for a couple more hours on my deck.
After a couple of hours, I took the pieces inside and used a soft cloth and cool running water to rub away the residue and rinse off the vinegar.
THEN I DRIED EACH PIECE THOROUGHLY.
Step 5: Polish the hardware.
Your end result isn’t going to be a gorgeous, like-new piece of door hardware. I mean, fifty years ago someone first painted over that piece for a reason, right? So I was a little disappointed, sure, but not too terribly surprised that my clean, rust-free, paint-free door hardware shows a lot of wear. The pieces are also brass-plated, not solid brass, and the brass plating has worn away in several spots.
You actually CAN re-plate antique pieces, but I’m not going to. Instead, I polished each piece with #0000 steel wool. You’ll find this in your local hardware store with the sandpaper, not with the cleaning supplies, because this is fine steel wool for polishing, not scrubbing.
Step 6 (optional): Repair and restore.
after I had cleaned and polished the pieces, I was actually able to see a manufacturer’s stamp on the hinges that were previously completely covered with paint and crud. That particular stamp was only used between 1920 and 1934, so I’m pretty stoked!
Unfortunately, I can’t find any specific information on my mortise locks, although I do hope to restore those to functionality. Here’s a site that sells parts for several varieties of antique locks, and another site that sells skeleton keys that, while they aren’t guaranteed to work on any particular lock, aren’t so spendy that they’re not worth gambling on.
Step 7 (optional): Seal the hardware.
I did not seal my door hardware, because I’m willing to live with it a while first. My area doesn’t get terribly humid, and I’m curious to see how the hardware will fare without being sealed. If its condition starts to deteriorate, I have no problem with the extra steps of popping it back off the door, cleaning the rust off (again), and sealing it.
However, if you want to ensure that the pieces that you worked so hard on stay as nice and shiny as they look right this second, you can coat them with any sealant that works on metal. None of your options are particularly eco-friendly, but if it keeps an antique piece out of the waste stream and allows you to get by without buying new hardware, it’s a net good.
The final result isn’t door hardware that looks brand-new, but it IS door hardware that looks clean, feels authentic, and is much, much, MUCH preferable to what it looked like before!
Now I just have to scrape those same five layers of paint off of the door, too…


Well written and photographed. Exactly what I needed.