If you want to make the best friendship bracelets as efficiently as possible, you want to use this DIY braiding wheel!
I’ve heard this nifty little braiding tool called both a Kumihimo Disk and a Trollen Wheel, but I most often refer to it around the kids I work with as a Friendship Bracelet Maker.
That’s because whatever you call it, this braiding wheel makes the BEST friendship bracelets!
This friendship bracelet maker is eco-friendly and accessible, since it’s made quickly and simply from corrugated cardboard. With just this tool, you can make surprisingly intricate and beautiful woven bracelets. Here’s how!
You will need:
- scrap piece of corrugated cardboard. Shipping boxes are perfect for this! If you don’t have any on hand, check out your local recycling center.
- Kumihimo wheel designer template. This site is free! Ten centimeters and eight strings ought to be big enough for most purposes. To save on printer ink, trace the wheel template directly from your computer screen onto white paper.
- embroidery floss. The kids I work with and I have made designs ranging from 1 to 8 different colors. Any embroidery floss works well for this, so it’s a good chance to use up that embroidery floss of unknown provenance. Save your DMC floss for your cross-stitch projects!
- measuring and cutting tools. You can get by with a ruler, a good pair of scissors for cutting cardboard, and a pair of thread scissors for cutting embroidery floss.
Step 1: Create the braiding wheel.

Choose a template from the Kumihimo Wheel Designer site or be brave and draw your own template! Your template should have two notches per strand of floss and a central hole, but otherwise you could have fun with creating your own simple shapes.
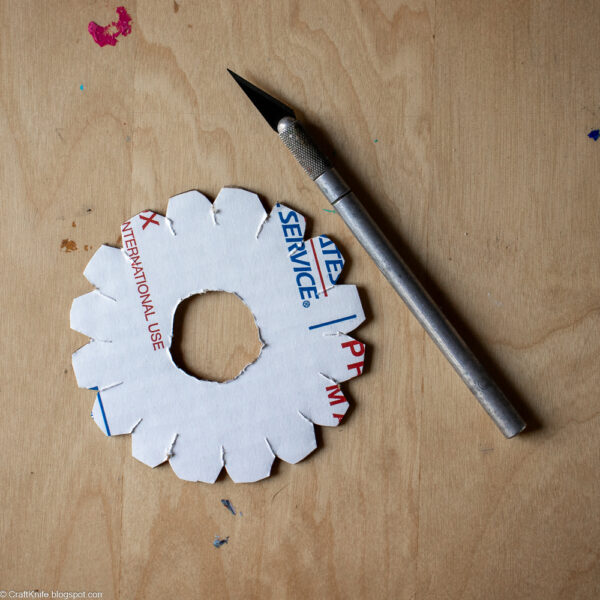
Trace the wheel onto scrap corrugated cardboard and cut it out. Or, if you want to be fancy, use a scroll saw to make your wheel from wood! Sand the snot out of it, though, so you don’t snag your floss.
Step 2: Prep your embroidery floss and set it up on the wheel.
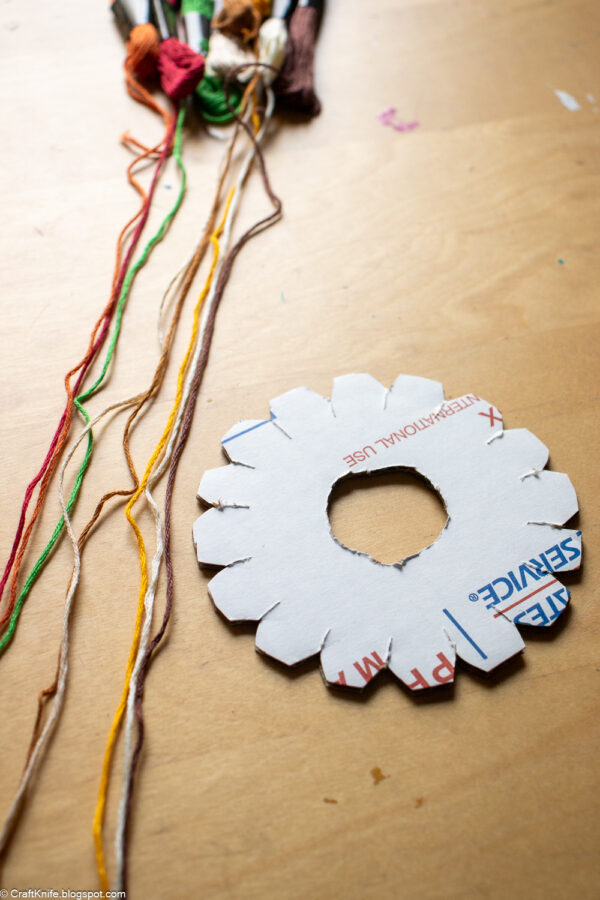
You need eight strands of floss in any color combination to make these friendship bracelets. The length of the strands should be somewhere between 20″-24″, depending on wrist circumference. When in doubt I like to go longer, because I can always tie the bracelet off and cut off the excess.
Tie all the strands together at one end using an overhand knot.
Center the knot, with the tail facing down, within the central hole of the kumihimo wheel.
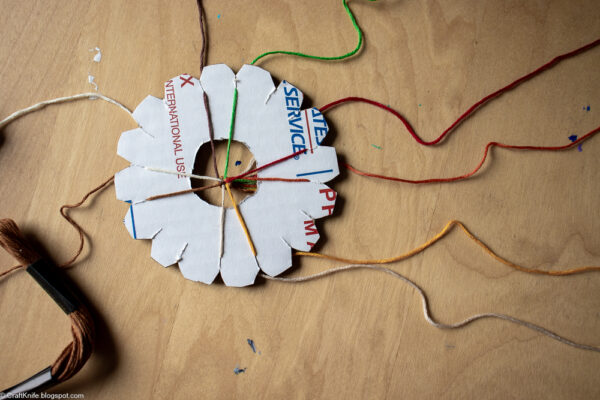
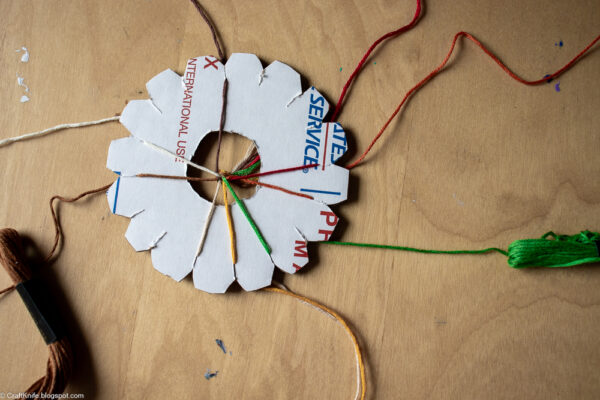
How you organize your floss strands depends on what design you want to create. For the simple braid that I’ll be showing you here, you’ll arrange your floss as in the photo above, with two strands each at the north, south, east, and west poles of the wheel. Normally, the opposite pairs would be the same color for a simple design, but I’ve got eight different colors so you can more easily see what goes where.
Step 3: Weave your friendship bracelet!
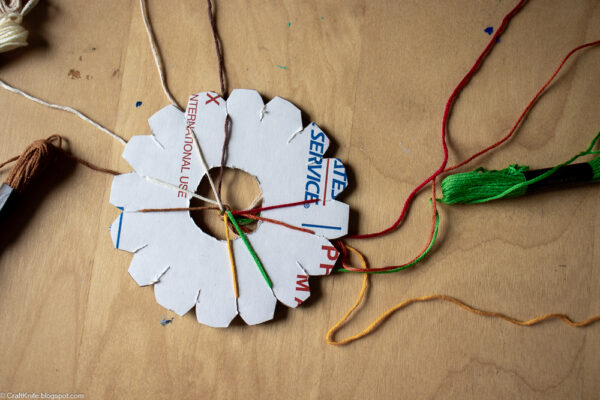
Here’s the weaving process that you’ll follow: Starting with the two lengths of floss at the top of the wheel, it’s 1) top right floss down, 2) bottom left floss up, 3) rotate (either way, but I go counter-clockwise here), 4) repeat. So the green floss goes down, and it stays to the right of the bottom floss pair:
The cream floss goes up, and it stays to the left of the brown floss. Notice that this puts all the floss on the wheel back into tidy pairs:
Rotate so the next pair of floss strands is on top, and repeat: 1) top right floss down to the right of the bottom pair of floss strands, 2) bottom left floss up to the left of the top remaining floss strand, 3) rotate, 4) repeat.
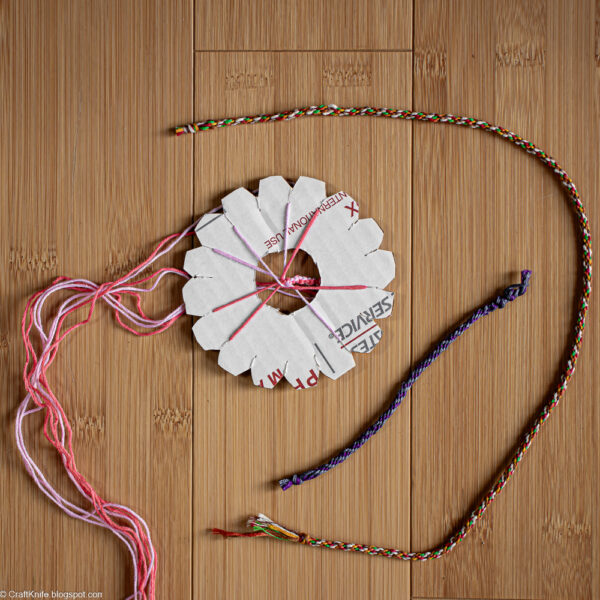
Continue until you’ve got your desired length of braid or run out of floss, then remove the floss from the wheel, use another overhand knot to tie the braid off, and trim the ends.
My favorite braids are this one and the square braid, because they’re both the simplest, but you can find a ton of more intricate and complicated braiding methods in books or online. Here are a few of my favorite braiding wheel books:
- Japanese Braiding: The Art of Kumihimo, by Jackqui Carey. The illustrations in this book use a very large wooden wheel and entire spools of thread, but the braid patterns themselves translate seamlessly to a small wheel and embroidery floss. My favorite square braid pattern is in here, as well as plenty of ideas for riffing on that basic braid.
- Friendship Bracelets, by Lucy Hopping. Braiding wheels are only a small part of this children’s craft book, but if you’re working with children, you’ll appreciate that the included braiding wheel templates are color-coded to help kids keep on track.
- How to Make 50 Fabulous Kumihimo Braids, by Beth Kemp. The braids in this book get complicated VERY quickly, so if you want to try them it would be worth DIYing the square plate that the book uses instead of this wheel.
- Beautiful Braiding Made Easy, by Helen Deighan. This is the book that I used to first learn the braiding wheel, and it has the braid pattern I demonstrated above. Sometime I want to try her pattern for a hollow braid with a wire insert, so I can make braided monograms!
If you’re not into friendship bracelets, don’t worry: you can use a braiding wheel (enlarged, if necessary) to make all sorts of handy items. Personally, I like to use these braids as hanging loops that I stitch onto sewn ornaments, but with an enlarged wheel and wider cording, you could also make bag handles, decorative cords for pillows or curtains, belts, switch pulls, and even pet leashes.