Want to sew a perfect buttonhole? The trick is to sew it by hand!
My sewing machine does sew buttonholes, and with a buttonhole foot they’re even perfectly sized with zero effort, but my sewing machine is also a tinge on the unpredictable side, and you know what I hate more than sewing a buttonhole by hand?
Picking out the thread from a half-done machine-sewn buttonhole because my thread broke or the needle broke or the bobbin decided that it no longer existed or the thread tension decided it no longer was even, etc. If the buttonhole I need is on the small side or on fiddly fabric, it’s honestly just as easy to sew it myself by hand.
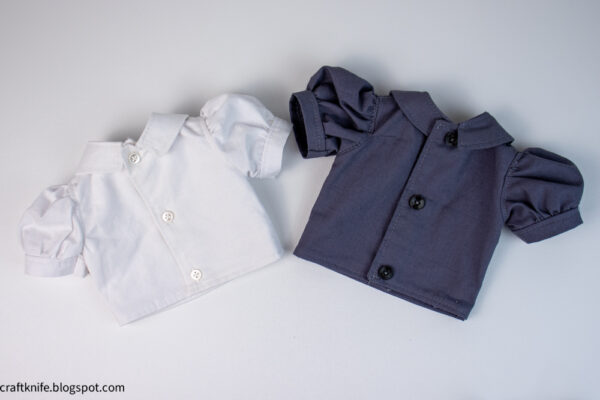
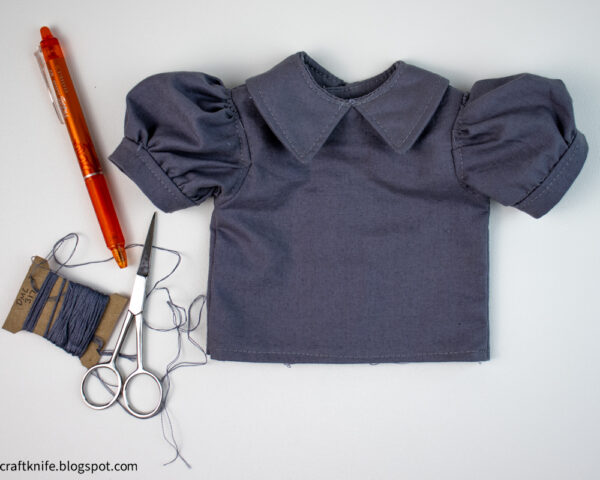
So that’s exactly what I did for these little doll blouses! I’m sewing my niece’s American Girl doll a whole wardrobe for her birthday, and that wardrobe includes lots of tiny buttonholes that need to be sewn onto sometimes fiddly fabric. I would WAY rather sew them all by hand while binging Season 3 of 9-1-1 (A tsunami?!? In LOS ANGELES!!!?!?!) than fight with my machine.
If you, too, like a little light hand-sewing while watching TV re-runs, here’s how to hand-sew a buttonhole of your very own.
Materials
To hand-sew a buttonhole, here’s what you need:
- button. You’ll measure the height of your buttonhole using the actual button you’re pairing with it.
- thread. Matching thread will hide messy stitches (ahem), but if you hand-sew beautifully, why not show it off with contrasting thread?
- marking tools. I’m using a heat-erasable pen, which is honestly not the best choice but it’s what I had on hand. A water-erasable pen is a much safer choice.
- scissors. A small, sharp pair is best for this project. Your thread scissors should work great.
Step 1: Measure and mark the buttonhole dimensions.
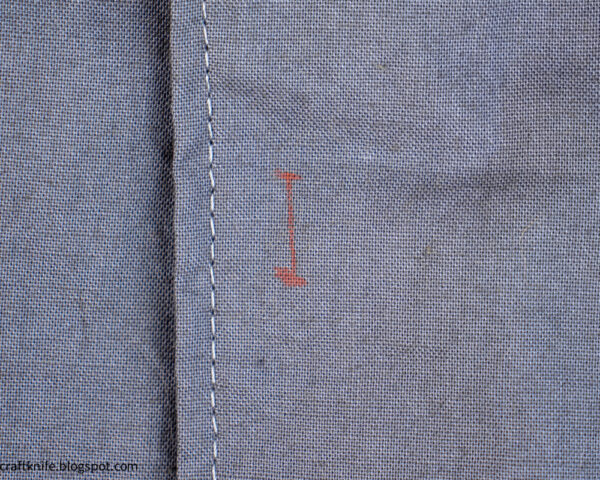
Generally, a buttonhole should be the diameter of the button + 1/8″. You might even have to go a little longer if the button is exceptionally thick. I also measured generously here, since the buttons for this blouse are tiny and will need to be buttoned and unbuttoned by a child.
Since you’re hand-sewing, use the marks (a little more tidily than I did!) to mark the center line of the buttonhole and the two tacking stitches, one at each end. The tacking stitch line should be twice the length you’ll want your buttonhole stitches to be.
I didn’t mark these tacking stitches as long as I wanted them, but if you mark those stitches exactly where you want them and draw the line the exact length that you want, then when it’s time to pick up your needle and thread you can simply stitch over those marks.
Step 2: Lock your stitching.
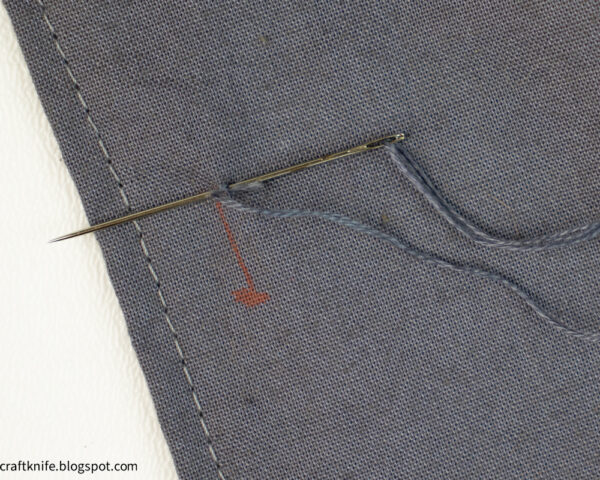
Sew three tacking stitches (tangent, but I often volunteer teaching children to sew, and I have the hardest time explaining this stitch in a way that kids will understand! I’ve tried “three stitches right on top of each other,” “do the same stitch three times,” and “stitch in the same spot twice more,” and none of that makes any sense to any person under the age of ten. Lmk if you have a better way to explain it!) on the line you marked at one end of the buttonhole. It will be hidden under the proper tacking stitches that you’ll sew next.
Give your thread a tug, and it should be firm and ready to sew!
Step 3: Sew tacking stitches at one end of the buttonhole.
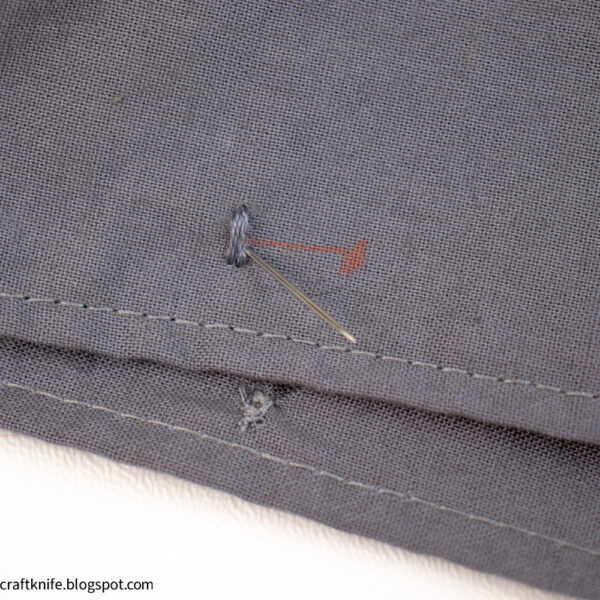
Now that your thread is locked, sew three stitches on top of the tacking line you drew at one end of the buttonhole. If you drew your line as messily as I did, remember that you want these tacking stitches centered on the buttonhole, and twice as long as your buttonhole stitches.
Step 4: Sew buttonhole stitches down one side of the buttonhole.
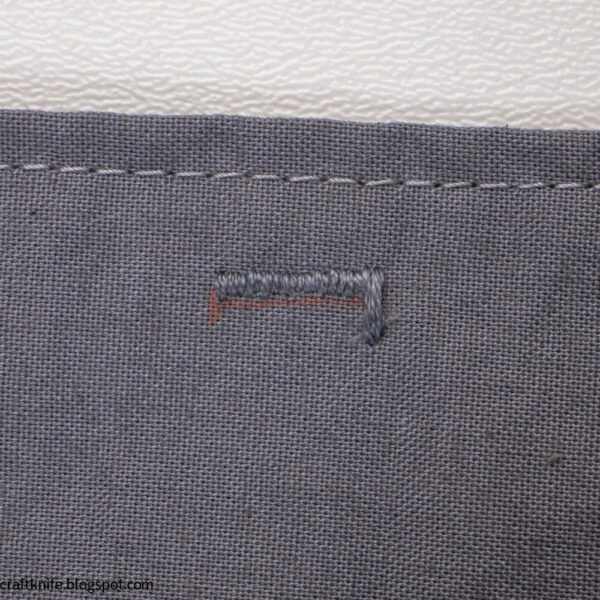
There are a few different techniques for hand-sewing a buttonhole, but I prefer this method of satin-stitching down both sides.
Starting from the completed end, use the satin stitch to create a series of parallel stitches that touch each other and extend all the way to the other end of the buttonhole. I like to use the center mark as the line to avoid, since that’s what I’ll be clipping at the very end.
Step 5: Sew the second set of tacking stitches.
When you’ve stitched your way to the other end of the buttonhole, make the second set of tacking stitches for that side.
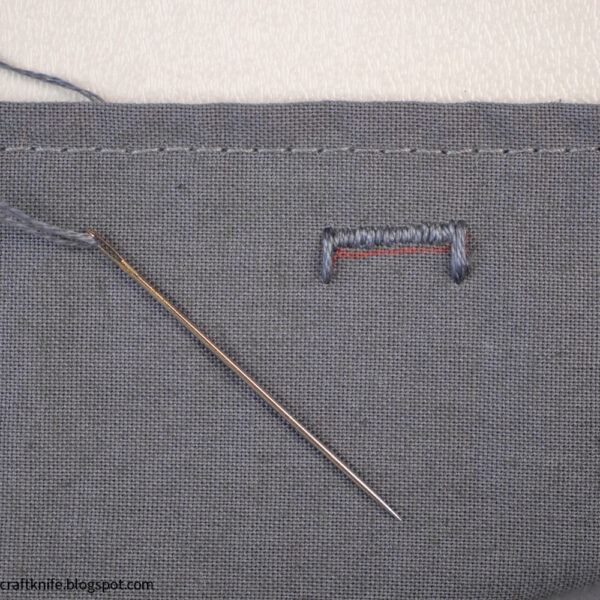
Step 6: Sew the second set of buttonhole stitches.
Finish the buttonhole stitching by sewing the second set of satin stitches all the way back down the buttonhole.
My stitches are particularly messy here, but keep in mind that this buttonhole is TINY. Those stitches are hard to see! Also, I’m pretty sure Buck and Christopher are about to die in this tsunami!
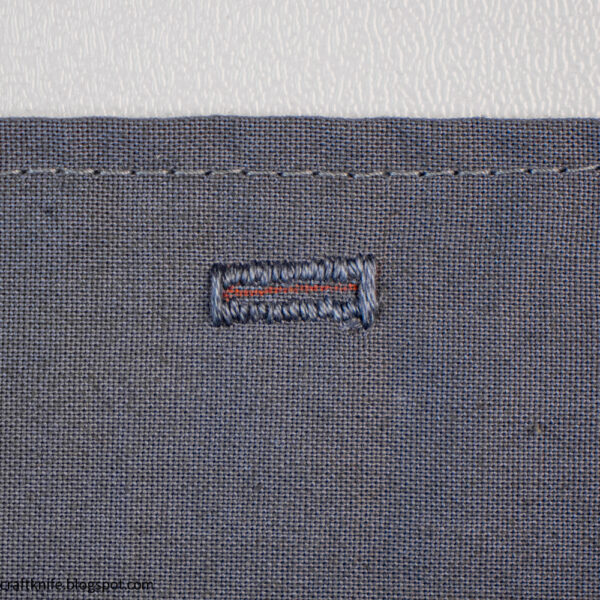
Step 7: Clip the buttonhole open.
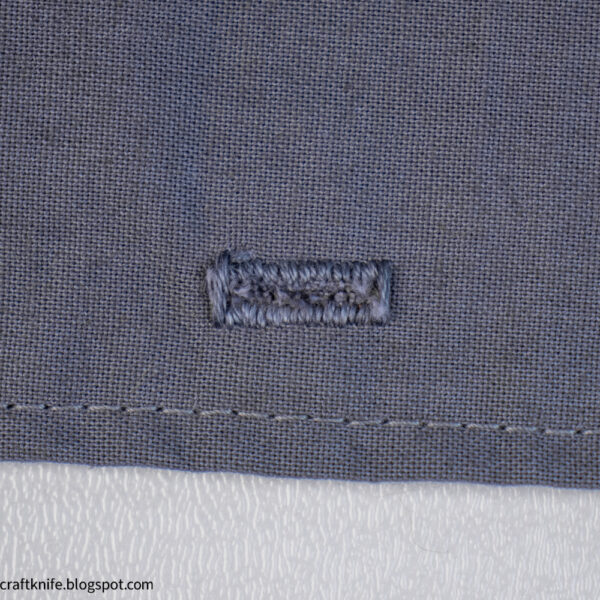
Clip along the center line of the buttonhole VERY carefully. You want to open up the fabric, NOT cut into all those stitches you just made!

When the buttonhole is opened up, your button is ready to be buttoned!
P.S. If you made it this far, you might also like to know how to sew on a button!