
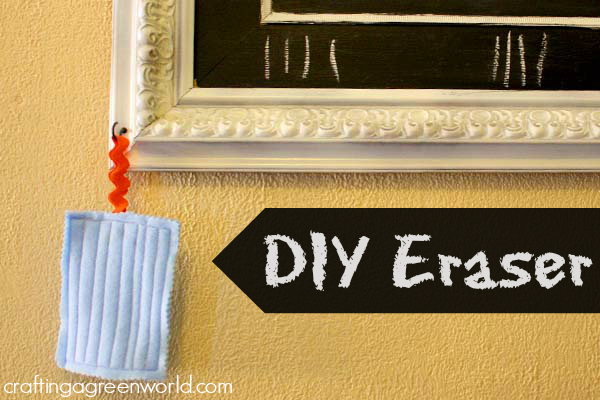
How to Make an Eraser
It’s easy as pie to make an eraser with just some recycled felt and super basic sewing skills.
Materials
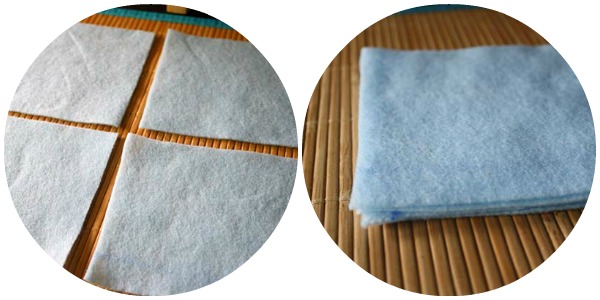
- one 9×12″ sheet of recycled felt
- scissors
- sewing machine, thread
- pinking shears (optional)
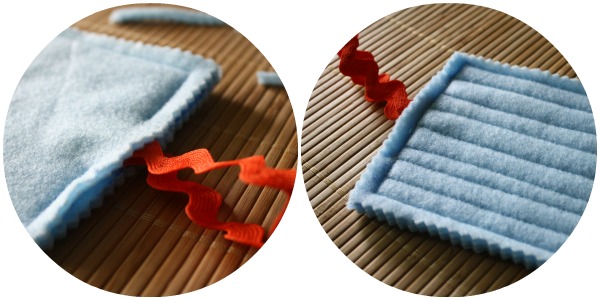
- 3″ piece of scrap ribbon, ric rac, or even yarn
- 1.5″ metal cup hook
Directions
1. Cut your felt into 4 equal-sized pieces, then stack those pieces up!
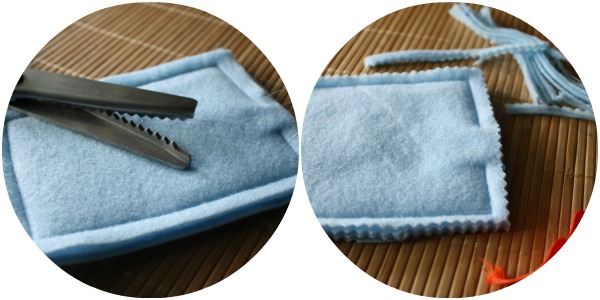
2. Using a 1/2″ seam, sew around 3 sides of your stacked felt and almost all the way around the 4th side. You’ll want to leave about a 1″ opening, so you can insert your ric rac.
3. Grab your scissors or pinking shears and trim around the outside of your eraser, so the edges are nice and even.
4. Fold your piece of ribbon or ric rac in half and insert the unfinished ends into the hole you left. Then, top stitch that hole closed to secure your loop in place, then use your machine to quilt the top of your eraser.
5. Take your metal hook and screw it into your frame, and you’re ready to hang your eraser.


Pingback: Make an Eraser for Your Homemade Chalkboard
Thanks Becky. I live in UK, have 4 grandchildren who all like me drawing pics on my whiteboards (and they do their own). I need more whiteboard erasers, will try your idea for making chalkboard erasers… or rather, my wife has agreed to try it out – she does all the sewing! One of my grandkids lives in Oregon, so most of my drawing for him is on Skype.