If you sew, and especially if you love to upcycle, the upcycled denim skirt is a rite of passage. Here’s how to make one!
You will need:
well-fitting pair of blue jeans. Maybe they have holes in the knees that you don’t want to patch. Maybe they’re too short, and you don’t want to sew on a cuff or a ruffle. Whatever the reason for converting them into a skirt, they should fit well in the waist.
thread and sewing needle for denim. I like using the extra-strong thread made especially for denim, and you’ll need an extra-sharp needle for your sewing machine.
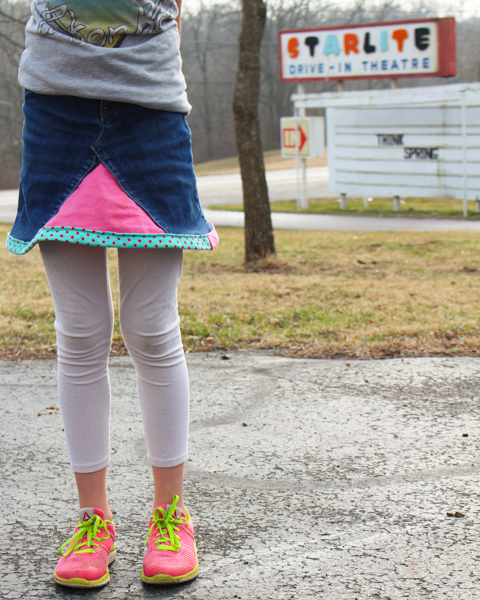
decorative fabric scrap (optional). You can piece together the front and back panels of your skirt using the legs from your jeans, but it’s also possible, as I did in the photo above, to use a contrasting fabric. Flannel is a good choice to better match the weight of the denim, but anything will work.
double-fold bias tape (optional). In the image above, you’ll also see that I bound the bottom hem with scrap bias tape. It’s optional, as you can also simply hem the bottom.
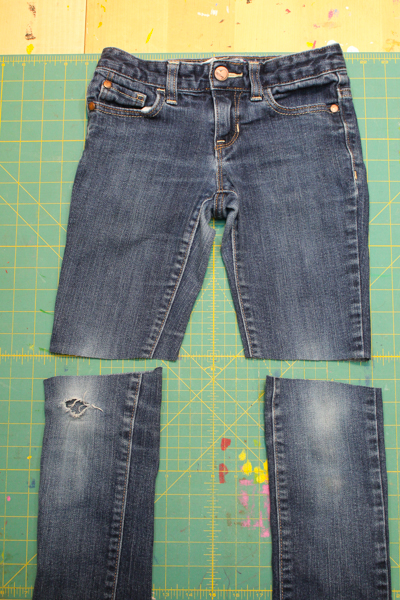
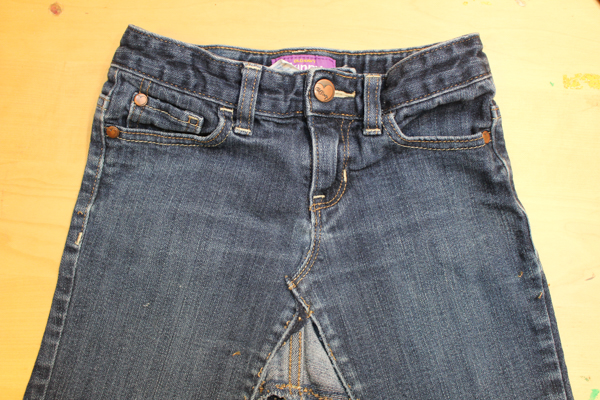
1. Measure and cut off the legs of your jeans. Measure from your waist to your desired hemline, then add a couple of inches for hem allowance and shaping. Place your jeans flat onto a cutting mat (iron them first if you need to), with the front and back waistband aligned and the crotch seam centered. See the image above for what that should look like.
Cut the legs of the jeans straight across at your measurement, and set them aside for later.
2. Pick apart the inseam. You can use a seam ripper for this step, but I actually prefer a sharp pair of thread scissors. Either way, don’t be surprised if it makes your hands sore–this step can be a lot of work!
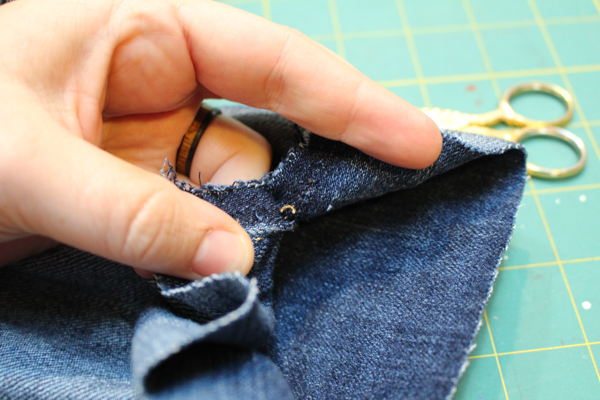
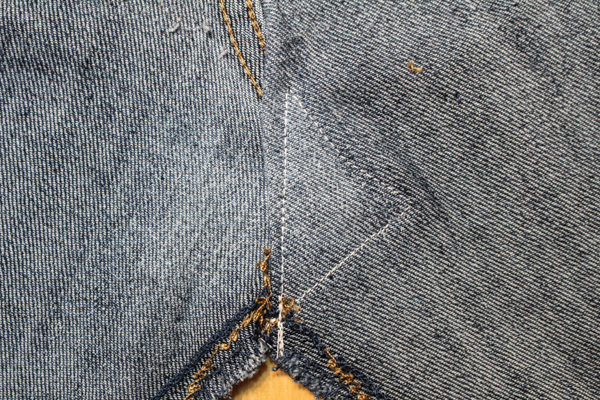
3. Sew up the crotch overlap. Iron the jeans again, flattening them and adjusting them so that the outside leg seams are straight. This should shape the jeans into a natural A-line, but there should also be a triangle-shaped flap of fabric at the crotch that you’ll have to overlap.
You can pick apart the seam there to overlap it more smoothly, but with these thin, child-sized jeans, I just folded the flap over, pinned, then sewed it down. Here’s what it looks like from the inside, with contrasting thread so you can see it:
Repeat for the back side of the jeans.
4. Add a panel of fabric to the front and back. Again shape and flatten the jeans as you did in step 3, then place a panel of fabric behind the legs, to cover the large, triangular-shaped hole in the front of the jeans. Pin it in place–
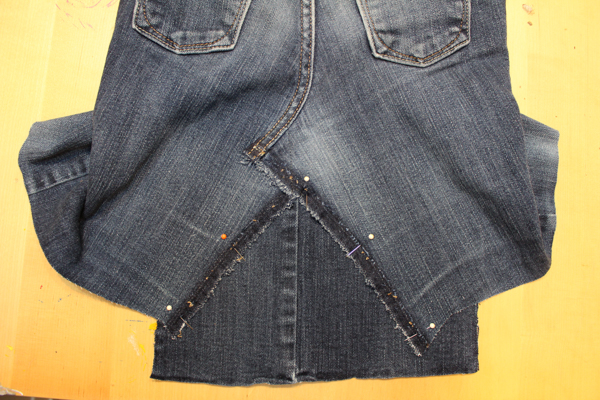
–then sew around the raw edges of the jeans legs. Turn the jeans inside out and cut away the excess fabric on the outside of that stitching line. The visible raw edges of the jeans legs will fray slightly with washing, but won’t fray past your stitching line. It’ll look pretty!
Repeat for the other side of the jeans.
5. Shape the skirt. Once again flatten, shape, and align your denim skirt on top of a cutting mat. Use a piece of chalk to shape the bottom edge of the skirt into a more pleasing curve, then trim it to that shape.
6. Hem or bind the bottom edge of the skirt. There are a few ways to do this. If your skirt is all denim, you can again stitch around the bottom hem, leaving it to fray up to but not past that stitching line.
If you prefer a neat edge, you can fold the entire bottom edge up to the back twice, then sew it to make a traditional hem.
I got my daughter’s approval to use up a couple of leftover pieces of bias tape to bind around the bottom of the skirt. She likes the extra pop of color, and I think that a bias tape hem is easier to do than folding denim over twice and trying to sew it.
Once you’ve got this method down, you’ll find that there are a lot of fun ways to alter, embellish, and otherwise play with this simple design.