

Does your family always ask, “Where are my keys?” Mine does.
So I wanted to make a little tray for my husband so that he can use it to throw in his keys, wallet, phone, and his change, as soon as he walks in the door. And since I still have some burlap scrap leftover from my myriad of burlap projects this year, I thought a burlap fabric tray was a great way to use up the medium sized pieces. But if you don’t have burlap, you can use any thick fabric, like canvas, to make these trays. They are so simple to make; I wonder why I didn’t make them sooner. I could have stave off five years from my life, helping my husband look for his keys.
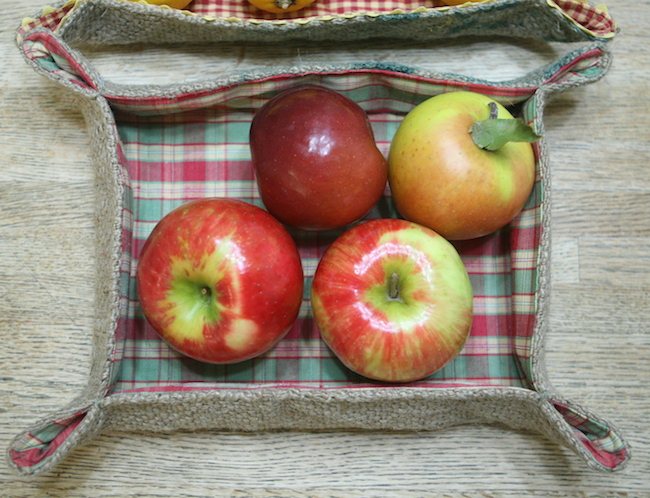
Don’t these apples look pretty in this basket? …better than his car keys, I think
You’ll Need:
- Outside fabric of your choice
- Inside lining fabric of your choice
- Padding for between the two layers to make it stiff. You can use strong fusible interface lining but another layer of thick fabric will be fine, like the old quilted fabric scrap (green) I’m using
- Needle and thread
- Sewing Machine
- Ribbon or rikrak (optional)
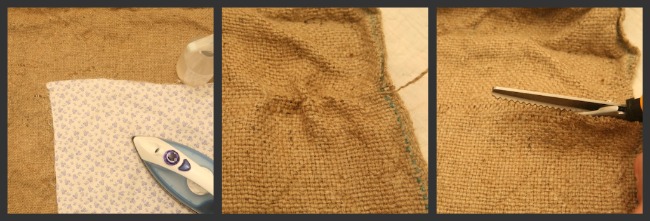
Before I begin to tell you how to make the tray, I want to tell you how to cut burlap perfectly.
First, spray starch the burlap and iron with a thin fabric on top. This way, starch won’t scorch the iron. Then, pull one or two strands of burlap weaves out from the sides. They should pull out easily, if sides are not sewn. If they are sewn, you’ll need to take the stitches off so that the strand can come out. Then, take your pinking shear and cut along the line where the missing strands were. Cutting burlap this way will ALWAYS give you a perfectly straight edge. See the perfectly cut edge in the photo below?
Now on to how to make the burlap fabric tray.
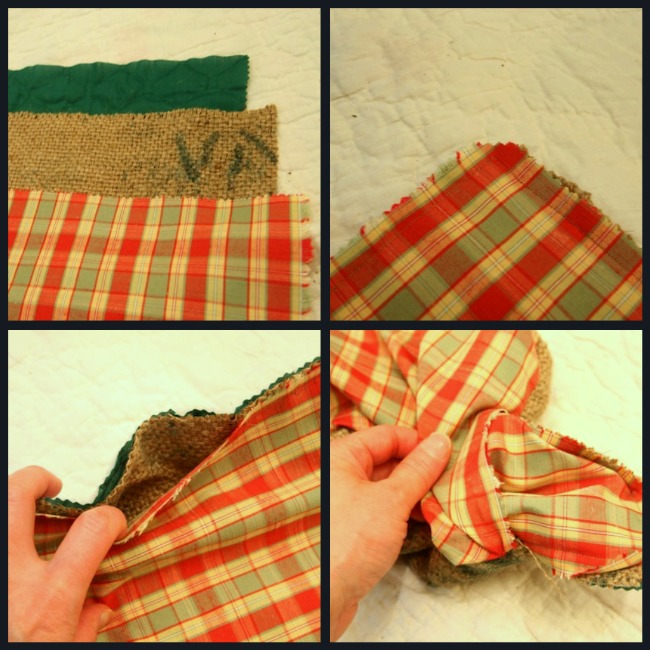
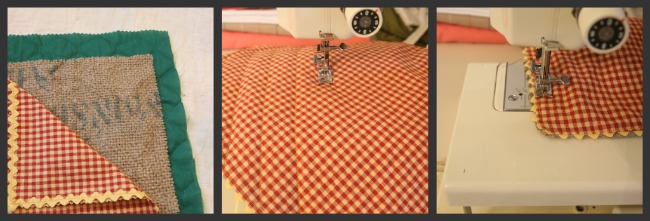
Cut all three pieces of fabric in the size you want. Line up the three layers of fabric in this order, from bottom – the inside padding (green), outside fabric (burlap) with right side up, and inside lining (checkered) right side down. So right sides of inside lining and outside fabric are touching each other. Then sew around the edges with 1/4 inch seam allowance, leaving about 2-3 inch opening to flip the finishes rectangle inside out. Then, cut the corners. Flip the rectangle inside out using the space in between the outside and inside fabric.
Hand baste or pin the opening. Then, quilt the whole rectangle the way you want, either free motion or long stripes, or diamond shape. Doing this will give the bottom of the tray some stiffness. Then, pinch the corners and hand stitch them together and you are done!
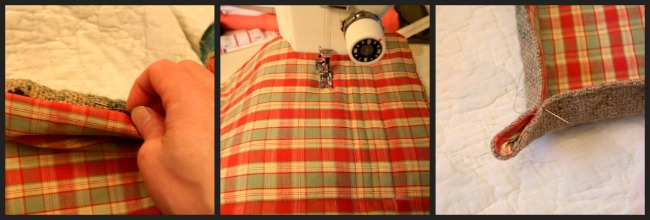
I finished the edges with rikrak for this one. If you are going to use ribbons or rikrak on the edges, sew them on the right side of the inner lining fabric (checkered) first, lay it on top of the outer fabric (burlap), right side down. Then quilt the whole piece. With both styles it’s always nicer to stitch along the edges to flatten out the edges.
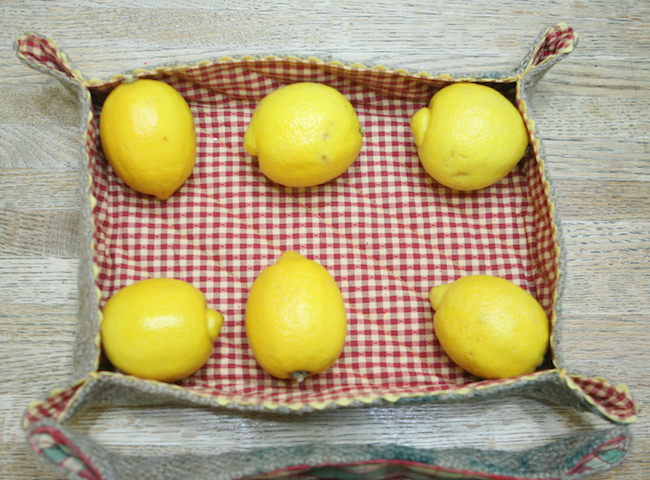
Now my husband will know exactly where his car keys are…that is, if I give him these pretty to use. Or I may fill them up with goodies and give them out as Christmas gifts! I think fruits look pretty in them, don’t you?


Great tips…love it!
Pingback: Day 7: 24 Days of Green Christmas – Burlap Ornament
Pingback: Buckets of Burlap [DIY] | One Good Thing by Jillee