
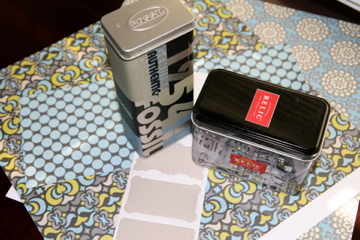
 I have a mini stockpile of tins in my craft room begging for attention. In an effort to ditch all the plastic bins for greener options, I have decided to alter the tins with decorative paper so I can use them as storage for all my crafty bits. You can use anything from Altoid tins to larger cookie or popcorn tins for this project. Around the holidays there tends to be a lot of products packaged in tin containers. I am going to use two tins from a pair of sunglasses and a watch.
When it comes to altered tins, there aren’t any rules. You can paint them, draw on them, glue stuff to them… what ever you desire. Today I wanted to share an easy tutorial for altering tins with paper to make simple decorative storage containers.
 Supplies:
- Tin container
- Decorative Paper (I used scrapbook paper from the Amy Butler Lotus Collection)
- Glue (I like Yes! Paste or try EcoGlue)
- Bone Folder
- Tape Measure
- Paper Cutter or scissors
- Labels (optional)
Step by Step:
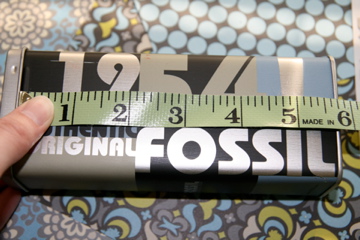
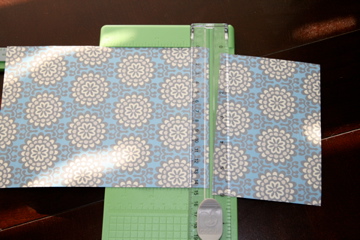
 Measure the body height of your tin. For the sunglass case I am covering with a hinged lid, I measured from the bottom edge of the closed lid to the metal lip at the bottom of the case. This leaves some exposed area at the top where the lid closes, so I chose paper that closely matched the original colors on the tin. For the watch tin with a removable lid and no metal lip at the bottom, I measured from the top edge all the way to the bottom.
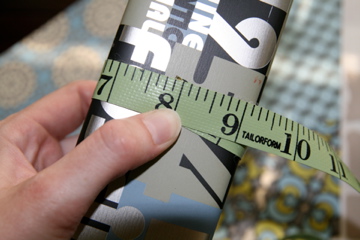
 Measure the circumference of your tin. If the measurement is larger than width of your paper follow the instructions in parentheses on the next two steps.
 Cut your decorative paper height to the exact height of the tin and width to the circumference of the tin plus 1/4 inch. (If the circumference is greater than the width of your paper, then cut two pieces of paper; the first should be the height x 1/2 the circumference and the second should be the height x 1/2 the circumference plus 1/2 inch)
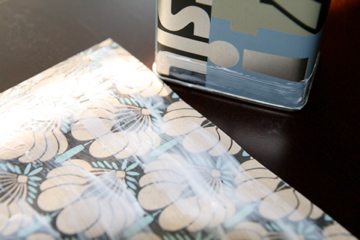
 Apply glue to the backside of your decorative paper. Apply glue around the top and bottom edges of the tin.
- Carefully wrap the paper around your tin. The paper will overlap about 1/4 inch at the seam. Make sure the seam ends up on the back or side of your tin. (Apply the first piece of paper to the back of the tin wrapping half way around each side. Apply the second piece to the front of the tin wrapping around the sides and overlapping the back paper by 1/4 inch on each side. This will leave you with a seam on each side of your tin.)
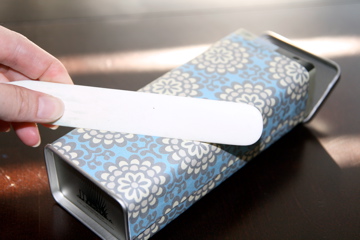
 Use the edge of a bone folder to smooth the paper onto the tin, making sure there are no air bubbles or wrinkles.
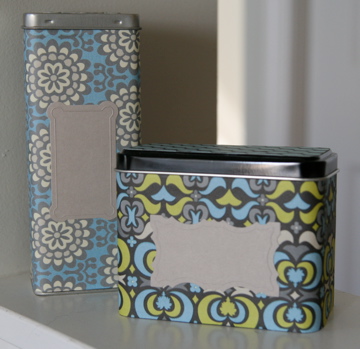
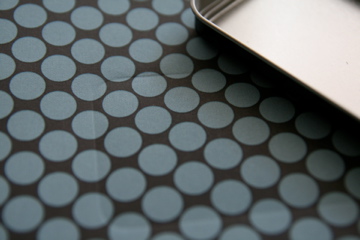
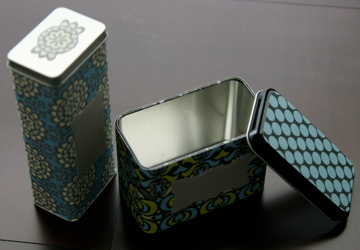
 Cover the lids. On the sunglass case I liked the metal look of the lid, but I wanted to cover the logo. I cut a flower shape from the same decorative paper I used for the body and glued it over the logo (see the photo below). For the watch case, I needed to cover the entire lid. I used a contrasting decorative paper for the lid. To get the exact shape of the lid I put the paper over the lid and used a bone folder to burnish the outline onto the paper (you can just see the shape of the burnished lid in the picture above). I carefully cut out the shape with scissors and glued it to the lid. I chose papers that went well with the edges of the lid that remained exposed.
 Embellish your tins however your like. I added a chipboard label to the front of each tin, so once I decide what to keep in them I can label the contents.
[Images by Jackie Hernandez]


Just yesterday I was scrabbling around in my loft and I found some old cake tins. I hate throwing stuff away and I knew I could do something with them to make them useful storage tins. I just wasn’t sure what(I’m not making cakes in an effort to trim down my chubby rear end)
Anyway, I think this idea will work for my cake tins too.
Thanks for the inspiration!
I was rummaging around in my loft yesterday and I found some old cake tins. I knew they could be transformed into something useful and decorative, but I didn’t know what (I’m not making cakes in an effort to trim down my bottom!)
I think your idea could be applied to my cake tins. Thanks for the inspiration.
Sorry I managed to comment twice as I thought I’d forgotten to hit the submit button. Idiot!
Those are awesome and look so beautiful. I have so many stinking tins I should do this with. Thanks for the great post!
I love this idea! Will it work on round tins as well? I have a lot of round tins, especially the ones like butter cookies come in during the holidays.
These are so beautiful. I love your paper!
I’ve seen something similar to this before but they used a really hot hair dryer to remove the paint on the tin before, then painted it with a thinned ink paint before applying the paper/decoupage . This would be so much easier since the majority of the tin is covered. I’m definitely trying it this way! Would it need to be covered with some type of sealer? I found some wonderful tall rectangular tins with incense in them at the dollar store that are screaming for this project. 🙂 Thanks a MILLION for the tutorial!!! Just think of the possibilities!!! Those little mint tins for sewing needles, or altoid type tins for mini sewing kits for college students. Limitless possibilites.
Love this idea! I’ve been saving tins too, with plans to fill with homemade truffles as presents.
Pingback: links for 2009-03-24
Pingback: Crafters Medley: 20 Neat-O Projects To Make (July 2009) : TipNut.com
Love this idea! I linked to it on my weekly roundup, the post is under my name. Thanks!!
Pingback: Crafty Reuse: Eight Projects for Tins and Cans : Crafting a Green World
I made some for a giveaway on my blog that I just had – and they were one of the most requested items! (scroll down to see them – they’re the last one pictured) What a fun, easy tip that never in a million years would have occurred to me. :>) Thanks!!
A hint: Prime the tins for better pain adhesion. Prime the cleaned and dried tin with a product called Gesso. Its available at Walmart and art and craft stores….its around 5.00 for a 4 oz. jar.
Pingback: RedThreadDIY » Metal: What Can I Do With It?